

Are you frustrated with the poor performance of your microwave? Is it emitting strange odors or simply not heating up your food correctly? If so, then you’re probably looking for an easy and efficient way to vent your appliance.
Fortunately, you can learn how to vent a microwave safely yourself by following these simple steps! With just a few tools and some basic knowledge of home maintenance, you’ll be able to get back to perfectly cooked meals in no time. Read on for more information about how to vent microwave.
Can You Vent the Microwave?
Microwaves are a staple in most modern kitchens, making cooking quick and easy. But have you ever wondered if it’s safe to vent them? Well, the answer is yes, you can vent your microwave! Venting allows the hot air and steam accumulating during the cooking process to escape, preventing your kitchen from becoming a hot and stuffy mess.
However, it’s important to make sure that you have the correct type of vent and that it’s installed properly to avoid any potential safety hazards. So go ahead and vent away, your kitchen will thank you!
Why Should You Vent the Microwave?
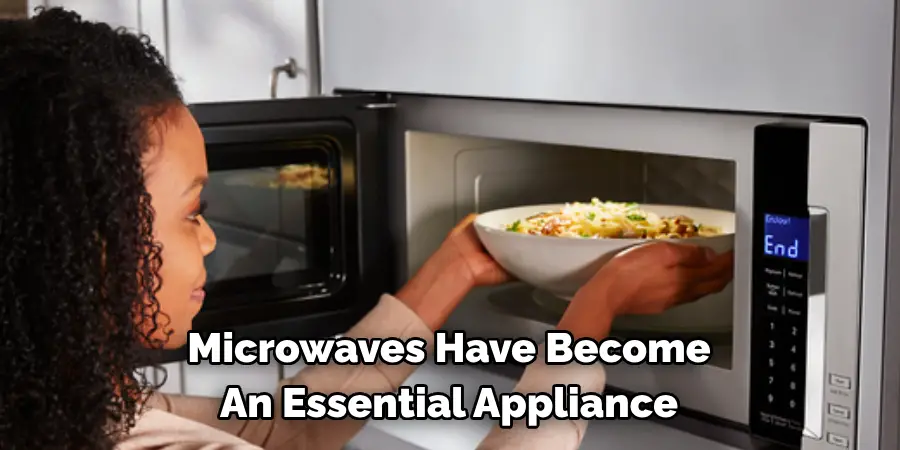
Microwaves have become an essential appliance in every kitchen. It is a convenient and quick way to heat and cook food. However, one question often arises is whether or not you should vent the microwave. The answer is yes!
A vented microwave helps to remove excess steam, smoke, and food odors that can accumulate during cooking. It also helps to prevent the buildup of moisture that can lead to mold growth and damage the microwave. By venting the microwave, you ensure that it functions properly and keeps your kitchen smelling fresh and clean. So, vent your microwave the next time you cook up a storm in your kitchen!
How to Choose the Right Exhaust Fan to Vent Microwave
Choosing the right exhaust fan to vent your microwave is crucial as it can significantly influence the effectiveness of your venting system. Here are a few steps to guide you through this process:
- Determine the Size: First, you need to measure the space where the fan will be installed to determine the size of the fan needed. Your microwave’s size will also play a role in this.
- Assess the Airflow Requirements: The exhaust fan’s capacity is measured in CFM (cubic feet per minute). Most microwaves require an exhaust fan with a capacity of at least 100 CFM. However, larger microwaves or those used more frequently may require a more powerful fan.
- Check the Noise Level: Fans are rated by their noise level, measured in sones. If noise is a concern for you, choose a fan with a lower sone rating.
- Consider Energy Efficiency: If energy consumption is a concern, look for fans that are Energy Star-rated. These models consume less power and are more environmentally friendly.
- Look for Additional Features: Some fans come with additional features like built-in lights, filter change indicators, or humidity sensors. Consider which of these features might be beneficial for your specific needs.
By carefully considering these factors, you can select an exhaust fan that will effectively vent your microwave and improve the air quality in your kitchen.
How to Vent Microwave: A Step-by-Step Guide
Step 1: Choose the Right Size Microwave
Before you can vent your microwave, you must ensure it’s the right size for your space. Measure the height, width, and depth of the area where you plan to install the microwave and ensure it matches its dimensions. You should also consider the size of your cookware and the size of the plates you typically use to ensure they’ll fit in the microwave.
Step 2: Determine if You Have a Vent
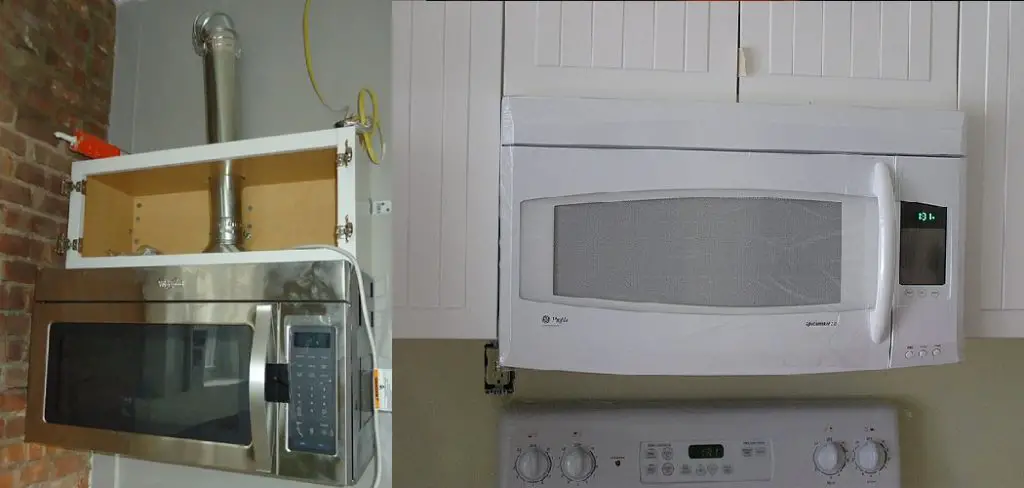
Not all over-the-range microwaves come with a vent. If you’re replacing an existing microwave, it’s important to determine whether you already have a vent installed. To do this, look for a duct or a metal box above the microwave that connects to your home’s ventilation system. If you don’t have a vent, you’ll need to install one before installing the microwave.
Step 3: Find the Correct Ductwork
The ductwork is the tubing that connects the vent to your home’s ventilation system. It’s essential in removing smoke and odors from your kitchen. To find the correct ductwork for your microwave, measure the distance between the vent and the ventilation system opening in your ceiling. Make sure to choose ductwork that’s the same diameter as the vent. Ductwork can be found at most home improvement stores, and it’s important to choose a high-quality duct that’s well-insulated to prevent air leaks.

Step 4: Install the Microwave
Now it’s time to install the microwave. If you’re not comfortable doing it yourself, hire a professional. Follow your microwave’s manufacturer’s instructions and connect the duct to the microwave vent before securing the microwave to the wall. Proper installation is crucial for effective venting.
Step 5: Connect the Ductwork to the Vent
Once you’ve installed the microwave, it’s time to attach the ductwork. Start by connecting one end of the duct to the vent on the top of the microwave and secure it with a metal clamp or screws. Next, connect the other end of the duct to your home’s ventilation system using another metal clamp or screw.
Step 6: Test the Vent
Before you use the microwave, it’s important to ensure the vent works properly. Turn on your stovetop fan and ensure it’s drawing air through the ductwork and out of your kitchen. You can also run a piece of paper through the vent opening to ensure no blockages.
Step 7: Enjoy Your Microwave
Congratulations, you’ve successfully vented your microwave! You can now enjoy all the benefits of having a convenient appliance to help make cooking and reheating food easier. Just remember to clean the vent regularly to ensure it’s working properly.
That’s it! You’ve now learned how to vent microwave. You can install a vent quickly and efficiently with the right instructions and tools. Enjoy your new appliance!
Venting an Externally Vented Microwave
1. Find the Outside Wall
If you have decided to vent your microwave using the ducted method, the first step is to find an outside wall where you can install an exhaust vent. Pick a spot that is near your microwave and has no obstructions, such as windows or doors.
2. Mark the Location
Once you have found the ideal location for your exterior vent, use a pencil to mark the center of the hole. You will need to drill a 3-inch diameter hole for the vent.
3. Drill the Hole
Using a power drill and a 3-inch hole saw, carefully drill through the exterior wall where you marked it. It is essential to follow all safety precautions when using power tools.
4. Attach Ductwork
Next, attach the rigid metal ductwork to the hole in your exterior wall using screws and a screwdriver. Be sure to use weatherproof caulking around the edges of the vent to prevent air leaks.
5. Connect the Ductwork
With the ductwork attached to your exterior wall, you can now connect it to the back of your microwave using a metal clamp or screws. Be sure to secure the ductwork tightly to prevent any air leaks.
6. Test the Vent
Before using your microwave, make sure to test the vent by turning on your stovetop fan and ensuring that it is drawing air through the ductwork and out of your home.
7. Enjoy Your Vented Microwave
Congratulations, you now have a properly vented microwave! You can now enjoy all the benefits of having an externally vented appliance in your kitchen. Regularly clean and maintain the vent to ensure it continues to work effectively.
So go ahead and cook up a storm without worrying about lingering odors or smoke in your kitchen! With proper ventilation, your microwave will continue to be a convenient and essential appliance in your home.
5 Considerations Things When You Need to Vent Microwave
1. Location
When deciding where to vent your microwave, you should first consider the location of the appliance. The best location for a microwave vent is usually near an exterior wall, as this will allow the steam and fumes to be vented outside your home. If you do not have an exterior wall that is convenient, you can also vent the microwave into an adjacent room, such as a laundry room or garage.
2. Venting Method
There are two primary methods for venting a microwave: ducted and recirculating. Ducted venting involves attaching a flexible duct to the back of the microwave and running it to an exterior wall or other location where it can be vented outside. Recirculating venting involves installing a charcoal filter in the back of the microwave that will absorb the steam and odors before they are released into the room.
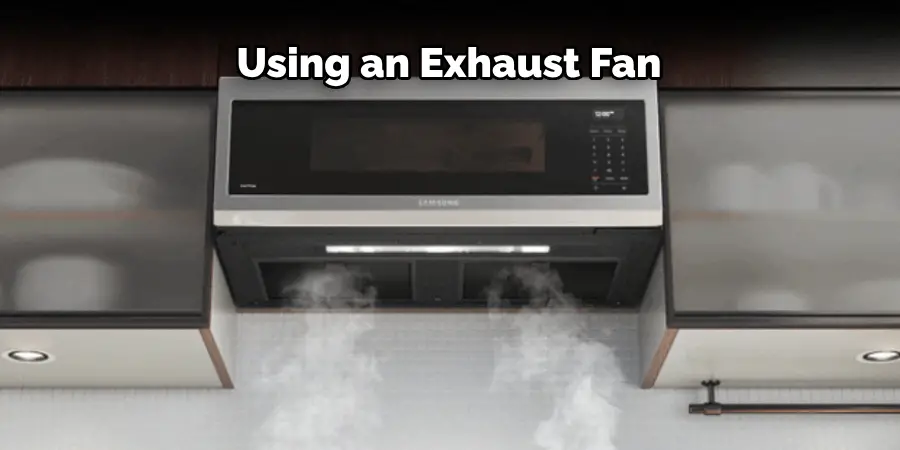
3. Exhaust Fan
Your microwave will need to be vented using an exhaust fan. The fan size will depend on the size of your microwave; most microwaves will require a fan with a capacity of at least 100 CFM (cubic feet per minute). You can purchase an exhaust fan at most home improvement stores or online retailers.
4. Ductwork
Install some ductwork if you are venting your microwave using the ducted method. This can be done by hiring a professional, but it is also possible to do it yourself if you are handy with tools. The type of ductwork you need will depend on the location of the exhaust fan; if the fan is located near an exterior wall, you can use flexible aluminum ductwork. You must use rigid metal ductwork if the fan is located in another room.
5. Electrical Requirements
Finally, you should make sure that your electrical system can handle the additional load that will be placed on it by the exhaust fan. Most microwaves require a dedicated circuit with a 20-amp breaker; if you do not have one, you should have an electrician install one before proceeding.
Benefits of Vent Microwave
Are you tired of having to clean your microwave after every use? Or struggling to reach the back of the microwave to stir your food? A vent microwave might be your solution! Not only does a vented microwave save counter space, but it also has the added benefit of a ventilation system that eliminates smoke, steam, and cooking odors. This means you can have a smoke-free kitchen while cooking your favorite meals. Additionally, the vent system removes the need for an additional hood, saving you money and adding to the overall aesthetic of your kitchen. So why not upgrade to a vented microwave and enjoy its many benefits?
4 Common Mistakes People Make When Trying to Vent Microwave
1. Not Allowing the Steam to Build Up
One common mistake people make when venting a microwave is not allowing the steam to build up. If you open the door too soon, the steam will escape, and the food will not be cooked evenly. It is important to wait until the food is cooked before opening the door.
2. Not Using the Proper Settings
Another common mistake people make when venting a microwave is not using the proper settings. Use the correct power level and cook time for your food. If unsure, consult the owner’s manual or a cooking guide.
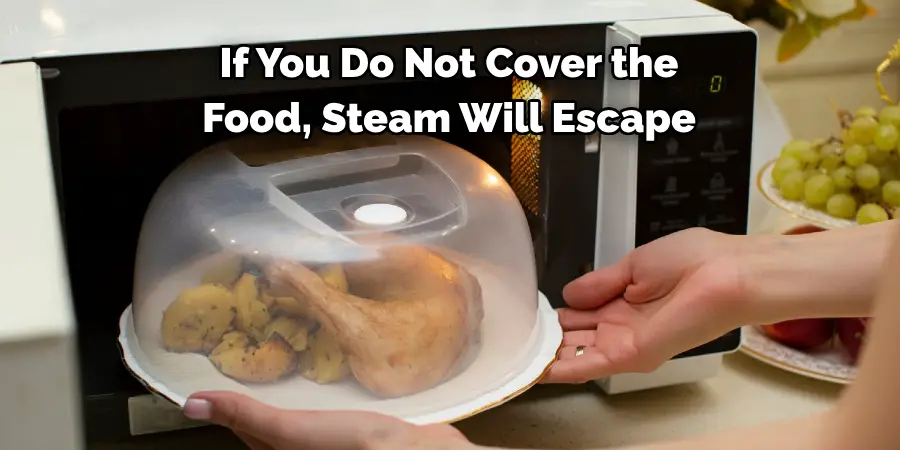
3. Not Covering the Food Properly
Another common mistake people make when venting a microwave is not covering the food properly. If you do not cover the food, steam will escape, and the food will not cook evenly. Make sure to use a lid or plastic wrap that fits snugly over the top of the dish.
4. Not Monitoring the Food
A common mistake people make when venting a microwave is not monitoring the food. It is important to check on the food periodically to ensure it is cooking evenly and that no steam is escaping from the dish. If you see any problems, adjust the settings or coverings as necessary.
Best Practices for Cleaning a Microwave Vent
Cleaning the vent of your microwave is a necessary part of regular maintenance and upkeep. Here are some best practices for cleaning a microwave vent:
1. Start by Unplugging the Microwave and Removing Any Food or Debris from Inside:
Unplug your microwave and remove any food or debris from inside the cavity. It is important to make sure that nothing is obstructing the vent before you start cleaning.
2. Clean the Inside of the Microwave:
Use a damp cloth or sponge to gently clean the interior of the microwave, paying special attention to crevices and hard-to-reach areas.
3. Vacuum Out the Vent:
Use a vacuum cleaner with an attachment hose to suck up any dirt and debris from the vent opening. Make sure to move the hose in a circular motion to remove all particles.
4. Wipe Down the Exterior:
Once you’ve finished vacuuming, use a damp cloth or sponge to wipe down the exterior of the microwave, paying special attention to areas where dirt and grime may have accumulated.
5. Use an Appropriate Cleaner:
Finally, use a mild cleaner such as dish soap and warm water to remove any residue from the interior or exterior of the microwave. Be sure to rinse thoroughly once you’ve finished cleaning.
6. Replace the Filter:
If your microwave is equipped with a charcoal filter, you should replace it periodically to ensure proper ventilation and reduce odors. Refer to the manufacturer’s instructions for specific information on how often the filter needs to be changed.
7. Replace Any Broken Parts:
Finally, check that all of the vent parts are in good condition and replace any broken or damaged pieces. This will help to ensure that your microwave is ventilating properly.
By following these best practices for cleaning a microwave vent, you can keep your kitchen smelling fresh and extend the lifespan of your appliance. It’s also a good idea to check the manufacturer’s instructions for more detailed information on how to clean your specific model. With regular maintenance, you can keep your microwave vent running at its best!
Alternative Methods of Venting a Microwave
1. Using a Ductless Microwave
If installing ductwork is not an option, you can still vent your microwave using a ductless method. This involves the use of activated carbon filters that trap odors and smoke before recirculating them back into the kitchen. While this method is not as effective as ducted venting, it is still better than having no venting system at all.
2. Using a Downdraft Vent
Another alternative method is to use a downdraft vent, which is installed behind or underneath the microwave. This type of vent pulls air downwards and out through ductwork in the floor or wall. While this may be a more aesthetically pleasing option, it can be less effective than traditional venting methods.
3. Using a Countertop Ventilation System
For those who don’t have the space or budget for a built-in microwave, a countertop ventilation system can be used. These compact systems sit on top of your countertop and use fans to pull steam and odors through filters before releasing them back into the kitchen. While not as powerful as built-in options, they are a good alternative for smaller kitchens.
4. Using a Hybrid System
Some microwaves now come equipped with hybrid venting systems that offer both ducted and ductless options. This allows for more flexibility in installation and can be a good compromise for those who are unable to install traditional ductwork but still want the benefits of a vented microwave.
Tips for Preventing Common Microwave Venting Problems
1. Regularly Clean the Vent and Filters
To prevent any issues with your microwave vent, it is important to clean it regularly. This includes wiping down the exterior, vacuuming the vent, and replacing or cleaning filters as needed.
2. Use Proper Cookware
Using proper cookware can also help prevent issues with a microwave vent. Make sure to use containers and covers that are microwave-safe and fit properly to prevent steam from escaping.
3. Don’t Overcrowd the Microwave
Overcrowding the microwave with too much food can lead to uneven cooking and potential venting problems. Follow recommended cook times and use multiple stages if necessary to ensure all food is cooked evenly.
4. Avoid Using Metal in the Microwave
Metal should never be used in the microwave as it can cause sparks and damage to the appliance. This includes metal containers, utensils, and aluminum foil.
5. Inspect and Repair Vents Regularly
If you notice any issues with your microwave vent, such as excessive steam or noise, make sure to inspect and repair it promptly. This will help prevent any further damage and ensure proper ventilation.
With these tips and tricks, you can keep your microwave vent running smoothly and efficiently for years to come.
Environmental Impact of Improper Microwave Ventilation and the Benefits of Regular Maintenance
Improper ventilation in microwaves can have significant environmental impacts, including energy waste and increased emissions. When the vents are not working efficiently, it forces the microwave to work harder, consuming more energy. This excessive energy use not only increases your electricity bill but also contributes to the increased demand for power plants, leading to higher greenhouse gas emissions. Furthermore, if the vent cannot remove heat and moisture effectively, it may lead to mold and bacteria buildup, compromising indoor air quality.
Regular maintenance of your microwave vent is critical in mitigating these environmental effects. By keeping the vent clean and free from obstructions, you can ensure it operates at maximum efficiency, thus reducing energy consumption. Regularly replacing or cleaning filters also prevents the accumulation of harmful substances, promoting a healthier indoor environment.
Moreover, timely repair and replacement of broken or worn-out parts of the vent can further enhance its operation, preventing energy wastage and reducing the risk of potential health hazards. Adhering to these maintenance practices doesn’t just extend the lifespan of your microwave but contributes to a more sustainable and healthier living environment.
Enhance the Efficiency of Your Microwave Vent with These Additional Accessories
1. Microwave Heat Resistant Mat
A heat-resistant mat can be placed underneath your microwave to help absorb any excess heat and prevent damage to your kitchen counter.
2. Vent Extender
If you have a ducted vent, using a vent extender can help direct the airflow more efficiently and reduce noise in smaller kitchens.
3. Duct Sealant
When installing a ducted vent, using duct sealant can help prevent any air leaks and ensure proper ventilation.
4. Microwave Splatter Guard
To keep your microwave clean and prevent food from splattering onto the vent, use a microwave splatter guard while cooking.
5. Microwave Deodorizer
To combat any lingering odors in your microwave vent, use a specialized microwave deodorizer to neutralize them and keep your kitchen smelling fresh.
By incorporating these accessories into your microwave setup, you can enhance the efficiency of your venting system and improve its overall performance. So, if you’re looking for ways to upgrade your microwave ventilation, consider trying out these additional accessories.
Frequently Asked Questions
1. Can I vent my microwave into the attic?
Venting a microwave into the attic is not recommended due to potential moisture damage. The moisture-laden air from cooking can condense in the attic, leading to mold or structural damage over time.
2. How often should I clean my microwave vent?
It’s recommended to clean the microwave vent every 6-12 months, or more frequently if the microwave is used heavily. Regular cleaning can ensure optimal performance of the venting system and prolong the lifespan of your microwave.
3. Can I use my microwave without a vent?
Yes, you can use a microwave without a vent. However, this setup doesn’t extract the steam, heat, and odors from cooking, meaning these will linger in your kitchen. If your microwave doesn’t have a venting system, consider using a range hood for ventilation.
4. Can a microwave vent be installed later?
While it is possible to install a microwave vent later, it is much easier and less expensive to install it at the same time as the microwave. Installing a vent later may require professional assistance and alterations to your kitchen structure.
5. Are there microwaves that auto-vent when cooking?
Yes, some high-end microwave models have a feature that automatically vents when cooking. This feature helps in ensuring a consistent temperature inside the microwave. Always check the product specifications or consult with the manufacturer to determine if a specific model has this feature.
Conclusion
Proper venting is essential to ensure your microwave’s longevity and improve your kitchen’s air quality. Following these simple steps, you can vent your microwave like a pro and enjoy fresh, clean air in your home. Remember to measure, choose the correct ductwork, install the microwave properly, and test the ventilation system. With these steps in mind, you’ll be able to confidently vent your microwave and keep your kitchen air as clean as possible. Thanks for reading our post about how to vent microwave.