

Do you have a leaky faucet in your home? If so, don’t fret! Tackling and tightening a sink faucet doesn’t have to be daunting. In fact, with just a few basic tools and easy-to-follow instructions, you’ll soon have that leak fixed up and will be able to enjoy flowing water again in no time. This blog post is here to give you all the information you need on how to tighten a sink faucet at home conveniently and quickly!
What Is a Sink Faucet and How It Works
A sink faucet, a tap, or a water spigot is a device used to control water flow in a sink or basin. It is a fundamental component of any plumbing system and is typically found in kitchens, bathrooms, and other areas where water is needed.
Usually, a sink faucet comprises two parts: the body and the handle. The body houses the valve stem and related components that allow water to flow in and out of the tap as required. On the other hand, the handle is connected to the valve stem via a screw or nut. This connection allows you to adjust how much water flows through the faucet by turning the handle.
Common Reasons for a Loose Faucet
A loose faucet can be frustrating and lead to issues if not addressed promptly. Here are some common reasons why a sink faucet may become loose:
1. Normal Wear and Tear
Over time, the constant use of a faucet can cause the connections to loosen. The repeated motion of turning the faucet on and off and the water pressure can gradually loosen the components.
2. Improper Installation
If the faucet was not installed correctly in the first place, it may become loose sooner rather than later. Poor installation techniques or insufficient tightening during the initial setup can result in a loose faucet.
3. Loose Mounting Nut
The mounting nut secures the faucet to the sink or countertop. If the mounting nut is not tightened adequately or becomes loose over time, it can cause the faucet to wobble or move around.
4. Loose Handle or Handle Connection
The handle of a faucet is frequently used and can become loose due to regular usage. The handle’s connection point to the valve stem or cartridge may also loosen, causing the handle to feel wobbly or difficult to turn.
5. Worn-out or Damaged Components
Over time, the various components of a faucet, such as washers, O-rings, seals, and cartridges, can deteriorate. This can lead to a loose faucet or cause leaks, requiring replacing or repairing these worn-out parts.
6. High Water Pressure
Excessively high water pressure can strain the faucet’s connections and cause them to loosen over time. If your home has high water pressure, installing a pressure regulator is essential to prevent potential damage to your faucets and plumbing system.
7. Temperature Changes
Frequent exposure to hot and cold water can cause expansion and contraction of the faucet’s metal components. This thermal cycling can contribute to the loosening of connections and require occasional tightening.
By understanding these common reasons for a loose faucet, you can identify the underlying issue and take appropriate steps to tighten the faucet and prevent further problems.
7 Step-By-Step Guides on How to Tighten a Sink Faucet
Step 1: Gather Tools
To tighten a sink faucet, you’ll need an adjustable wrench or slip-joint pliers, a flashlight (optional), and a towel to protect the faucet finish.
Step 2: Turn Off the Water Supply
Shut off the water supply valves located under the sink. This can help prevent any water spills or damage to the faucet.
Step 3: Inspect Connections
Using a flashlight, inspect the connections for signs of wear and tear or damage. If you spot any corrosion, replace the components as needed.
Step 4: Tighten Compression Fittings
If your faucet has compression fittings, use an adjustable wrench or slip-joint pliers to tighten the nuts. Do not over-tighten them.
Step 5: Tighten the Set Screws
If your sink faucet has a set screw, use a flathead screwdriver to turn the screw clockwise until you feel resistance. Do not over-tighten the screw.
Step 6: Tighten the Handle Screws
Use a Phillips head screwdriver to tighten the screws that attach the handles to the valve stems or cartridges. Make sure not to over-tighten them, as this can cause damage.
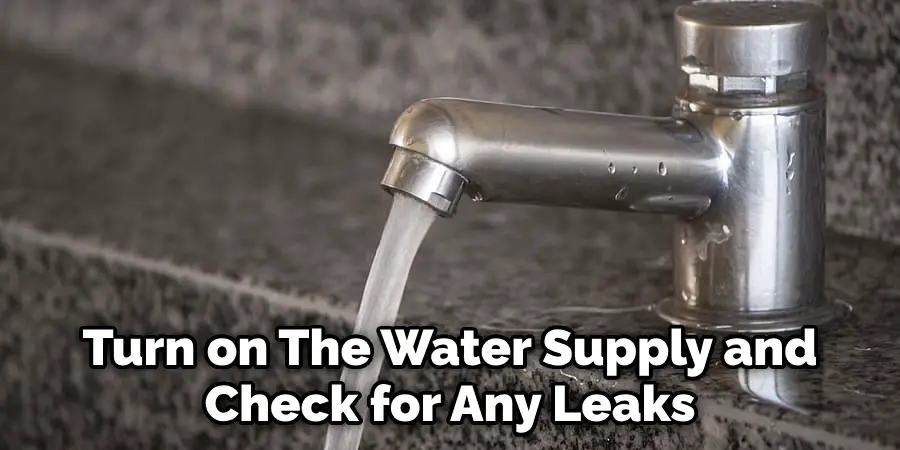
Step 7: Check for Leaks
Once you have tightened all the components, turn on the water supply and check for any leaks. If there are no leaks, your faucet is now secure and ready to use!
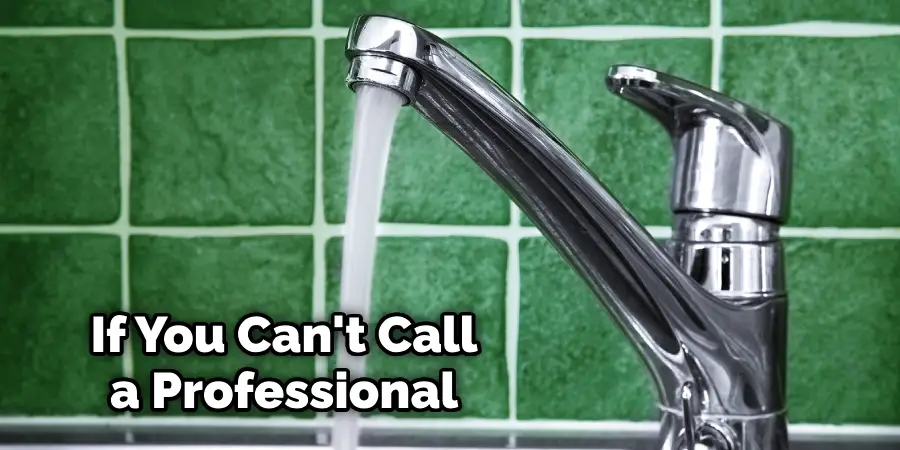
By following these steps, you can easily tighten a sink faucet at home. If you’re uncomfortable performing the above steps yourself or need help with a complex installation, don’t hesitate to call a professional plumber.
5 Common Mistakes People Might Make While Tightening a Sink Faucet
1. Over-Tightening
One of the most common mistakes people make when tightening a sink faucet is over-tightening the components. Over-tightening can damage the connections, causing leaks and other issues.
2. Not Using the Right Tools
It’s important to use an adjustable wrench or slip-joint pliers to tighten the compression fittings and a Phillips head screwdriver for handle screws. Using the wrong tool may damage the components or result in an insufficient tightening of the faucet.
3. Not Inspecting the Connections
Before attempting to tighten a sink faucet, always inspect the connections and components for signs of wear and tear or damage. If any component needs to be replaced, do so before attempting the tightening process.
4. Ignoring the Set Screws
Many people forget about the set screw located in the base of the faucet and neglect to tighten it adequately. This can lead to a wobbly handle that is difficult to turn.
5. Not Using a Towel
Using a towel or cloth when working on the faucet is essential as it can help protect the finish and prevent damage from accidental slips of your tools.
By avoiding these common mistakes, you can save time and money and ensure that your sink faucet is tightened properly and securely. With the right tools and knowledge, you can easily tighten a sink faucet at home conveniently and quickly!
How to Maintain & Inspect a Sink Faucet Regularly
1. Inspect Connections
It’s important to inspect the connections and components of your faucet regularly for any signs of wear and tear or damage. Check that all nuts, screws, washers, O-rings, and cartridges are secure and in good condition. If necessary, replace any worn-out parts as soon as possible.
2. Inspect for Leaks
Frequent inspections can help you quickly detect leaks and prevent further damage to your sink or countertop. Check under the faucet, behind the handles, at the base of the faucet, and around any joints to ensure there are no signs of water leakage.
3. Tighten Any Loose Parts
If any components are loose or wobbly, use the appropriate tools to tighten them. Do not over-tighten, as this can damage the connections and cause leaks.
4. Clean Regularly
To keep your faucet in good condition, clean it often with warm water and a mild detergent. This can help prevent the buildup of dirt, grime, and mineral deposits that could cause damage or wear out the components.
5. Check for Corrosion
Corrosion can weaken the faucet’s connections and cause them to loosen over time. If you spot any corrosion, replacing the corroded parts as soon as possible is important.
Regularly inspecting and maintaining your sink faucet can keep it in good working condition and prevent any potential problems. If you’re unsure of how to inspect or maintain your faucet, don’t hesitate to call a professional plumber for assistance.
Frequently Asked Questions
Q: Can I Use Any Type of Faucet Handle for My Sink?
A: No, you should always use the same type of handle that came with your sink. Using a different type can result in water leakage or other problems.
Q: What Should I Do if My Faucet Leaks?
A: If there is any water leakage, turn off the water supply valves under the sink and inspect the connections for any wear and tear or damage. Replace corroded parts as needed, then tighten all the components with the right tools.
Q: How Often Should I Check My Faucet for Leaks?
A: It’s a good idea to check your faucet regularly for any signs of water leakage, especially after any repairs or replacements. Doing so can help you detect and address any potential problems quickly.
Conclusion
Tightening a sink faucet is easy with the right tools and knowledge. By following these steps and avoiding common mistakes, you can ensure that your faucet is secure and properly tightened. Inspecting and maintaining your faucet regularly is important to prevent any potential water leakage or other problems. If you’re uncomfortable performing these tasks, don’t hesitate to call a professional plumber for help.
Following these guidelines, you can easily tighten a sink faucet at home, inspect it regularly, and maintain it for optimal performance. With the right tools and knowledge, your sink faucet will be ready to go in no time! Thanks for reading this article about how to tighten a sink faucet.