
As the weather starts to turn cold, it’s essential to prepare your home and shut off the water supply to outdoor faucets to prevent winter damage. Many homeowners have faced costly repairs or replacement of burst pipes due to forgetting this critical step.
However, turning off the exterior water is actually a straightforward process that anyone can do. In this post, I’ll walk through the basic steps to help you shut off your outdoor water with ease.
Whether you’re a seasoned DIY-er or just getting started with home maintenance, following the easy instructions and tips outlined here will allow you to tackle this task with confidence and protect your home from winter weather woes. Let’s learn more about how to shut off water to outside faucet.
Can You Shut Off the Water to The Outside Faucet?
As colder months approach, it’s important to know how to shut off the water to your outside faucet properly. Many people are unsure whether or not this is a necessary task, but it can save you from a major headache come springtime. Water left in an outside faucet, also known as a hose bib, can freeze and cause the faucet to burst during the winter.
Not only does this lead to a costly repair, but it can also result in water damage to your home. So, can you shut off the water to the outside faucet? The answer is yes! It’s a simple task that can be done in just a few steps, and it’s well worth the effort to prevent any potential problems.
Why Should You Shut Off the Water to The Outside Faucet?
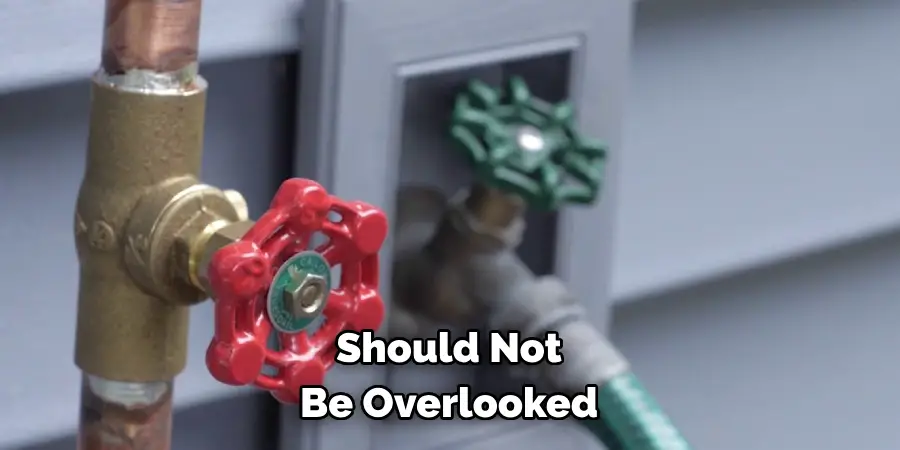
Shutting off the water to the outside faucet is an important task that should not be overlooked. As temperatures drop and winter approaches, it’s crucial to prevent frozen pipes and potential damage to your home’s plumbing system. When left on, it can freeze and expand, causing water pressure to build up and ultimately burst your pipes.
By turning off the water supply to the outside faucet, you’ll protect your home and avoid costly repairs. It only takes a few minutes to shut off the water, so why not take the time to do it and give yourself peace of mind this winter season?
Identifying the Shutoff Valve
1. Locate the Main Water Shutoff Valve
The first step in shutting off the water to your outside faucet is to locate the main water shutoff valve. This can typically be found near your home’s main water supply, which is usually located in a basement or crawlspace.
2. Find The Outdoor Faucet Shutoff Valve
Next, you’ll need to find the outdoor faucet shutoff valve. This can be found near the outside faucet or in the basement or crawlspace, depending on your home’s plumbing system.
3. Shut Off The Outdoor Faucet Shutoff Valve
Once you’ve located the outdoor faucet shutoff valve, please turn it off by rotating it clockwise. This will stop the water supply to the outside faucet, preventing any water from entering it.
Understanding Valve Types and Operation
There are multiple types of valves used in a home’s plumbing system, each with its unique operation and potential challenges. Here, we will cover three primary types – Gate Valve, Ball Valve, and Compression Valve to help you understand their functioning and troubleshoot issues.
Gate Valve
Gate valves are a common type, often used for main water shutoffs. To operate a gate valve, turn the handle clockwise until it stops, or as the saying goes, “righty-tighty.” This process lowers the gate to block the flow of water.
It’s not uncommon to encounter difficulties with stiff valves or worn handles due to infrequent use or rust formation over time. If the handle doesn’t turn smoothly, do not force it, as it could break or cause damage. To overcome these challenges, you may need to use a wrench for extra leverage. Another solution could be to apply a valve lubricant to ease the operation.
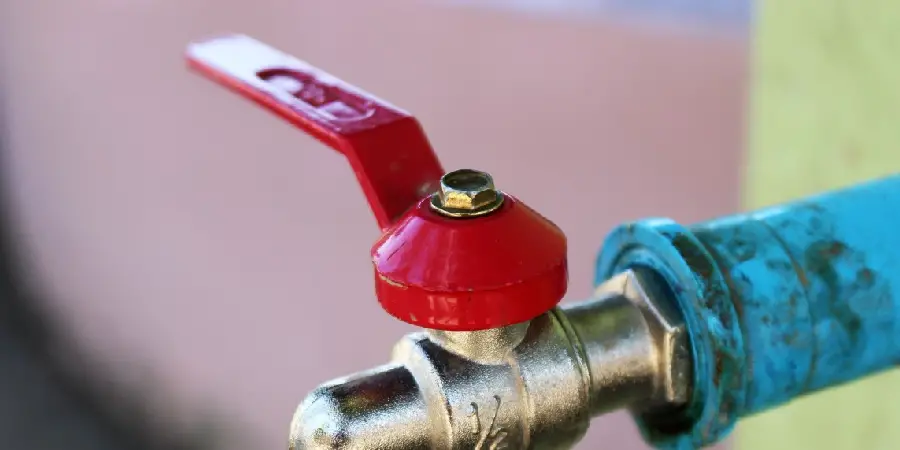
Ball Valve
Ball valves are another type frequently found in modern homes due to their longevity and reliability. They are identifiable by their long lever handle. To close a ball valve, turn the lever so it is perpendicular to the pipe. To open it again, turn the lever back parallel to the pipe.
The operation of a ball valve is generally quicker and easier compared to gate valves, as they require only a 90-degree turn to open or close fully. However, over time, the handle may become stiff or the ball may develop mineral deposits. In such cases, a lubricant or vinegar can help to loosen the buildup.
Compression Valve
Compression valves, commonly used for water supply lines to faucets and toilets, have a round handle that you turn to control the water flow. These valves are typically very reliable, but it’s important to know how to operate them correctly.
To close the valve, turn the handle clockwise or “righty-tighty,” and to open it, turn it counterclockwise or “lefty-loosey.” If this valve is difficult to turn, it might mean that the packing nut needs to be tightened or the handle needs to be replaced. An adjustable wrench can usually solve this problem.
In conclusion, understanding how to operate the different types of valves in your home can help prevent damage and costly repairs. Always remember, if you’re unsure or if a valve is stuck, it’s best to call a professional plumber to avoid further issues.
7 Steps to Follow on How to Shut Off Water to Outside Faucet
Step 1: Locate Your Water Shut-off Valve
When shutting off water to outside faucets, the first step is to locate the valve controlling water flow to the outdoor pipes. Most modern homes have a main water shut-off valve close to the water heater or crawl spaces. If you are unsure where to locate the valve for your home, check for the water meter. Once you find the meter, trace the pipe that leads to the faucet. The main valve will be located somewhere along the pipe in a box or near the home’s foundation.
Step 2: Turn Off the Water Supply
After identifying the valve, turn it clockwise to switch off the water supply. Once the handle has been turned, the water flow to all outdoor spigots should stop. Turn on the faucet closest to the valve to ensure the water is completely off. If the water runs, it indicates that the valve needs tightening.
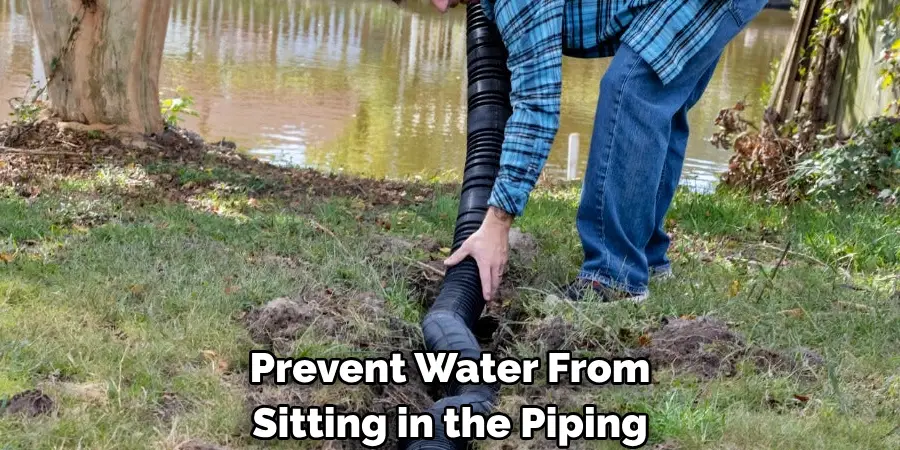
Step 3: Drain The Faucet
After turning off the valve, please proceed to the outside faucet and turn it on to drain any remaining water. Ensure the faucet’s spout points downwards to prevent water from sitting in the piping, which could lead to freezing in the winter. After the water has run out, turn off the faucet.
Step 4: Remove the Handle
To remove a faucet handle, use an adjustable wrench to loosen and unscrew the nut at its base. If the nut appears stuck or corroded, spray a lubricant on it before attempting to remove it. Once the handle has been removed, remove any remaining parts inside the hole, such as washers or O-rings.
Step 5: Unscrew the Spigot
Using an adjustable wrench, loosen and unscrew the nut that holds the spigot in place. Once it is loose enough, pull out the spigot from its housing and inspect for any damage or corrosion. If there are any signs of wear and tear, replace them with a new one before proceeding.
Step 6: Check the O-ring
The O-ring plays an essential role in preventing water leaks from outside faucets. Visual inspection of the O-ring for any damage or wear and tear is necessary before installing it back into the housing. If there are signs of deterioration, replace it with a new one that matches your faucet’s specifications.
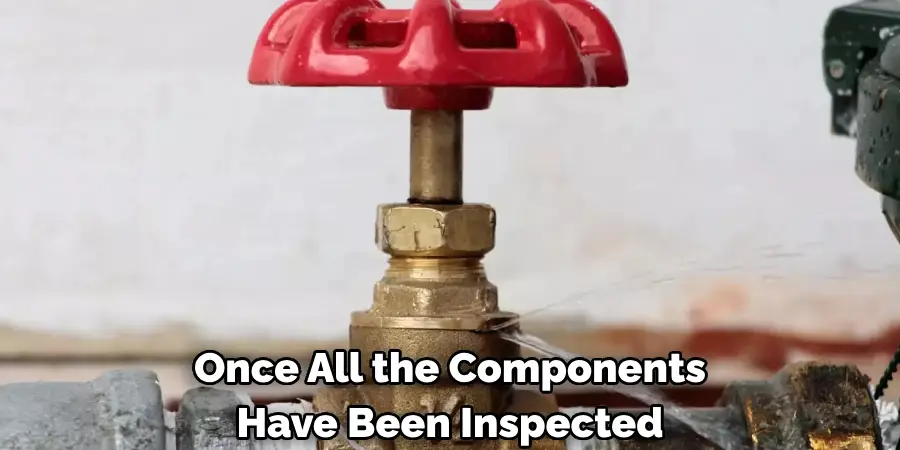
Step 7: Put Everything Back Together
Once all the components have been inspected and any necessary replacements made, it’s time to put everything back together. Start by placing the O-ring in its housing and screwing the spigot back into place with an adjustable wrench. Reattach the handle and any remaining parts, such as washers or screws that may have been removed earlier. Finally, turn the water supply back on and check for leaks before closing the valve box.
Following these seven simple steps, you can easily shut off water to outside faucets whenever necessary. This will protect your home from potential damage caused by burst pipes or leaking faucets during cold winter months. For added protection, consider insulating your outdoor faucets to prevent freezing. With a little bit of maintenance and care, you can keep your home safe from water damage in the colder months.
5 Considerations Things When You Need to Shut Off Water to Outside Faucet
1. The Process
The first thing you need to do is locate your water shutoff valve. This is usually located in your basement or crawlspace. Once you have found the valve, turn it to the “off” position. This will stop the flow of water to your outside faucet.
2. Drain the Faucet
Once the water has been shut off, you must drain the faucet. To do this, open the outside faucet and allow all of the water to drain out. You may want to place a bucket under the faucet to catch any remaining water.
3. Remove the Hose
Once the faucet has been drained, remove the hose from the fixture. To do this, unscrew the hose from the fixture. If you have a detachable hose, you may also want to remove it from the faucet.
4. Turn Off the Water Supply
The next step is to turn off the water supply to your home. This is usually done by shutting off the main water valve near your water meter or main water line. Once you have shut off the main water valve, all the water to your home will be shut off.
5. Drain Your Pipes
The final step is to drain your pipes. To do this, open all your faucets and allow all the water to drain out of your pipes. Once all of the water has been drained, you can close all of your faucets and proceed with whatever repairs or maintenance you plan.
Following these steps, you can easily and safely shut off the water to your outside faucet. Contact a professional plumber if you have any questions or need further assistance. They can help you with any issues or repairs, from shutting off the water to your outside faucet.
Benefits of Shut Off Water to Outside Faucet
Did you know that shutting off the water to your outside faucet can save you money and prevent significant damage to your home? It’s true! By turning off the water supply to your outdoor faucet, you can prevent freezing and bursting pipes during winter. This can save you hundreds if not thousands, of dollars in repairs and water damage.
Additionally, shutting off the water to your outside faucet can help conserve water and prevent leaks. Simple steps like these can have a big impact on your home and wallet in the long run. So why not take a few moments to shut off your outside faucet before the temperatures drop? It could be one of the easiest and most practical things you do for your home this season.

Some Common Mistakes People Make When Trying to Shut Off Water to Outside Faucet
As the leaves change color and temperatures drop, it’s important to remember to shut off the water to your outside faucet. This seemingly simple task can become a nightmare if not done correctly. One common mistake is forgetting to disconnect any hoses or attachments connected to the faucet. Doing so can cause damage to both the faucet and hose. Another mistake is using improper tools or techniques to turn off the water valve, resulting in a broken or leaking valve. Taking the time to shut off the water to your outside faucet properly can save you time and money in the long run. So, follow the correct steps and avoid those common mistakes.
Regular Maintenance Tips for Your Outside Faucet
Regular maintenance is key to keeping your outside faucet working properly. This can help prevent frozen and burst pipes, as well as costly repairs. Here are some useful tips to help keep your outside faucets in tip-top shape:
1. Insulate the Faucet:
Insulating your outside faucet is a great way to prevent freezing. Wrapping it in foam insulation can help reduce the risk of damage during cold winter months.
2. Inspect for Leaks:
Inspect your outside faucet for any signs of leaking or wear and tear. If you notice any issues, replace the necessary parts before it becomes a bigger problem.
3. Clean Regularly:
Cleaning your outside faucet regularly can help prevent corrosion and buildup that could lead to clogging or leaking.
4. Check the Shut-Off Valve:
Make sure your shut-off valve is in good working condition and can be easily accessed when needed.
5. Have a Professional Plumber Inspect:
Have a professional plumber inspect your outside faucet for any underlying issues. They can identify and repair potential problems before they become worse.
Following these simple steps, you can make sure your outside faucet stays in top condition and ready to use when needed. Regular maintenance helps prevent further damage or costly repairs down the road.
How to Choose and Install New Outside Faucets for Your Home
If your current outside faucet is damaged or needs to be replaced, you’ll need to purchase a new one. Choosing a quality model is essential for keeping your home safe and preventing damage caused by water leaks. Here are some tips on how to choose and install a new outside faucet:
1. Choose Quality Materials:
Make sure to purchase a faucet made from durable materials like brass or stainless steel. These materials are more resistant to freezing and corrosion, ensuring better protection for your home.
2. Choose the Right Size:
Before purchasing a new outside faucet, make sure you measure the existing opening and get the appropriate size replacement. A bad fit can lead to leakage, which can cause costly damage.
3. Hire a Professional Plumber:
When installing a new outside faucet, it’s essential to hire a professional plumber for the job. They have the knowledge and experience necessary to ensure your new faucet is safely installed and working correctly.
Following these tips will help you choose and install a new outside faucet with ease. Taking the time to do it right now will save you from costly repairs down the road. So, be sure to get the job done correctly and keep your home safe all year round!
Tips for Winterizing Your Outdoor Faucet
1. Shut off the Water Supply:
As mentioned earlier, the first step in winterizing your outdoor faucet is to shut off the water supply. This will prevent water from freezing and causing damage.
2. Disconnect Hoses:
Make sure to disconnect any hoses or attachments from your outside faucet before temperatures drop below freezing. This will prevent damage to both the hose and faucet.
3. Drain the Water:
After disconnecting the hoses, make sure to drain any remaining water from the outdoor faucet. This can be done by turning on the faucet until it runs dry.
4. Use Insulation:
Insulate your outdoor faucet with foam insulation or a specialized cover designed for this purpose. This will provide an extra layer of protection against freezing.
5. Consider a Frost-Free Faucet:
If you live in an area with harsh winters, consider installing a frost-free outdoor faucet. These models are designed to prevent water from freezing and damaging your pipes.
Common Signs of a Faulty Outdoor Faucet
1. Leaks:
If you notice any leaks coming from your outdoor faucet, it’s a clear sign that something is wrong and needs to be addressed.
2. Difficulty Turning On or Off:
Another common sign of a faulty outdoor faucet is difficulty turning the handle on or off. This could indicate an issue with the valve or other internal components.
3. Visible Damage:
If you see any visible damage to your outdoor faucet, such as cracks or rust, it’s important to have it inspected and repaired before further damage occurs.
4. Frozen Pipe:
In colder climates, a frozen outdoor faucet can be a common sign of a faulty valve or lack of proper insulation. Make sure to address these issues before temperatures drop.
Taking care of your outdoor faucet is essential to the overall maintenance of your home.
How to Repair a Leaking Outdoor Faucet
1. Shut Off the Water Supply:
The first step in repairing a leaking outdoor faucet is to shut off the water supply. If you’re unsure how to do this, it’s best to call a professional plumber for assistance.
2. Identify the Source of the Leak:
Next, identify where the leak is coming from. This could be from a damaged valve, worn-out washer, or other internal components.
3. Replace the Damaged Parts:
Once you’ve identified the source of the leak, you can replace any damaged parts. This could include a new valve or washer, depending on the issue.
4. Reassemble and Test:
After replacing any necessary parts, reassemble your outdoor faucet and turn the water supply back on. Test to make sure the leak has been fixed.
5. Hire a Professional Plumber:
In some cases, repairing a leaking outdoor faucet may require the expertise of a professional plumber. This is especially true if you’re not familiar with plumbing repairs or if the issue seems more significant than just a simple leak.
Following these steps will help you repair a leaking outdoor faucet and keep it in top condition.
Importance of Professional Help for Faucet Issues
Hiring a professional plumber for faucet repairs ensures that the job is done right, saving you time and reducing the risk of further damage. Professionals have the necessary training, experience, and tools to diagnose and resolve faucet issues accurately. They can also offer advice on maintenance and potential upgrades that can increase the lifespan and functionality of your faucets.
Moreover, professional services often come with warranties, providing you with peace of mind and protection in case the problem reoccurs. While it might be tempting to attempt DIY repairs, plumbing systems can be complex, and incorrect fixes might lead to more significant issues down the line. Trusting a professional helps ensure your home’s plumbing operates smoothly and efficiently.
Conclusion
Shutting off water to outside faucets is an essential home maintenance task for homeowners. Following the simple steps listed above will protect your faucets from freezing during the winter and prolong their life. Remember always to disconnect the outside hoses, drain the faucet, and protect the faucet against freezing with a cover. By doing so, you will be ensuring your outdoor faucet is ready to use come springtime. Thanks for reading our post about how to shut off water to outside faucet.