
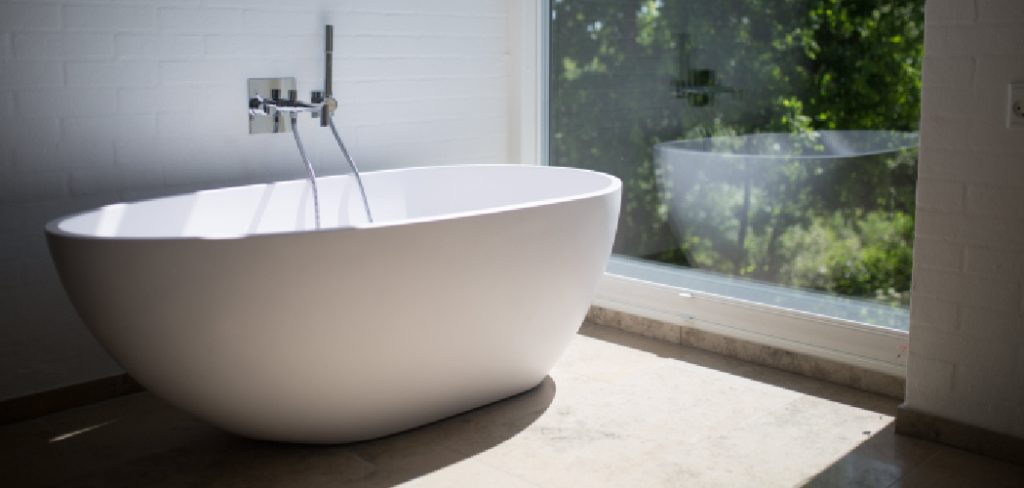
Replacing a drain pipe under your bathtub may seem challenging, but it’s a task you can tackle confidently with the right guidance and proper toolkit. Drain pipes often require replacement due to various issues that arise over time. Constant wear and tear or the corrosive effect of water can result in leaks.
Additionally, clogs can become so stubborn that the only solution is to replace the drain pipe. Similarly, cracks caused by pipe aging or physical damage can lead to ongoing leaks that no patch can permanently fix. No matter what prompts you to learn how to replace a drain pipe under the bathtub, having a clear understanding of the process will ensure a successful and wallet-friendly plumbing repair.
Can You Replace a Drain Pipe Under the Bathtub?
Yes, replacing a drain pipe under your bathtub is possible. Although it may initially seem daunting, with careful planning, the right tools, and a step-by-step guide, you can confidently tackle this plumbing repair yourself. It is important to understand that drain pipes are not designed to last forever. Over time, they can become susceptible to wear and tear, clogs, and corrosion from water, which can lead to leaks or blockages.
Other times, physical damage or aging can cause cracks in the pipe that are beyond repair. Instead of opting for a temporary fix with a patch, you may find it more beneficial in the long run to replace the drain pipe altogether. This DIY repair can save you on costly plumber fees and equip you with valuable knowledge and skills for future home maintenance.
Understanding Your Drain System
Drain Types:
Before embarking on replacing a drain pipe under your bathtub, it’s essential to understand the different types of drains and their components. The three main bathtub drains are waste, overflow, and combo drains. A waste drain drains water from the tub through the pipes and into your home’s plumbing system. An overflow drain prevents water from spilling over the tub’s edge by catching excess water and draining it back into the pipes. A combo drain combines both functions into one unit. It’s important to note that different types of drains may require slightly different approaches when replacing a drain pipe.
Material Options:
When choosing a material for your new drain pipe, you have various options, including PEX, PVC, and galvanized steel. Consider the pros and cons of each material carefully before making a decision. PEX (cross-linked polyethylene) is flexible, easy to install, and resistant to chemical corrosion. However, it can be more expensive than other materials. PVC (polyvinyl chloride) is rigid and inexpensive but may not withstand extreme temperatures well. Galvanized steel offers durability but is prone to rust and corrosion over time. Your chosen material will ultimately depend on your budget, accessibility, and personal preference.
Accessibility Assessment:
Before beginning any plumbing repair, it’s important to assess the accessibility of the area under your bathtub where the drain pipe is located. Factors such as tight spaces, fixtures like faucets or showerheads, and flooring materials can affect the ease of access. If necessary, consider moving or removing fixtures to provide more room for maneuvering. Additionally, be aware of any potential hazards, such as electrical wiring, that may be present in the area.
Planning and Preparation
Gather Information:
First, collect as much information as possible about your existing drainage system. Key information includes the type of bathtub drain you have (waste, overflow, or combo), the material of the current drain pipe (PEX, PVC, or galvanized steel), and its diameter. This information will guide your choice of replacement parts.
- Drain Type: Identify whether you have a waste, overflow, or combo drain.
- Pipe Material: Determine the material of your existing drain pipe – PEX, PVC, or galvanized steel.
- Pipe Diameter: Measure the diameter of your existing drain pipe, as this will dictate the size of the replacement pipe you need to purchase.
Remember, the more precise your information, the smoother your project will proceed.
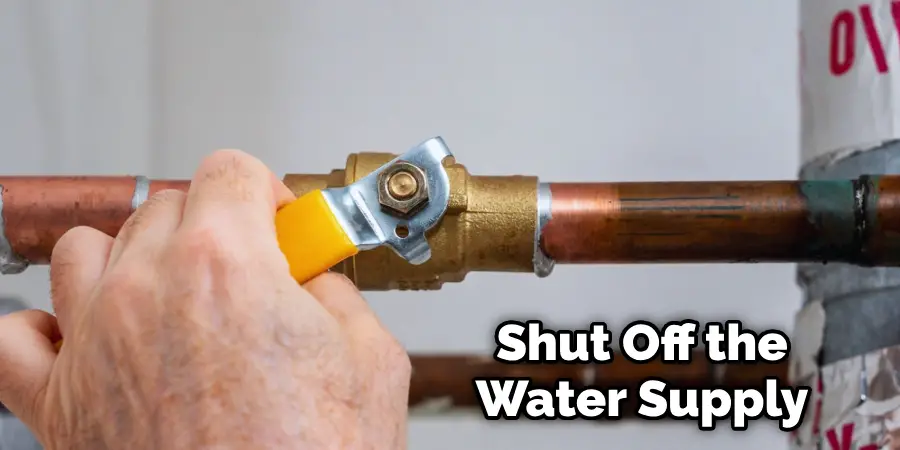
Shutting Down the System:
Before beginning any plumbing repair, turning off the water supply and draining any remaining water from the bathtub is crucial. Locate the main water shut-off valve for your home and turn it off. If you are unsure where this is located, check with your utility company or consult a professional plumber for assistance. Next, remove any standing water in the tub by using a bucket or rag to scoop it out.
Protective Measures:
Always take necessary precautions when working on any plumbing project. Wear gloves and goggles to protect your hands and eyes from hazards such as sharp edges or chemical cleaners. Lay down a drop cloth to catch any spills or debris during the repair process.
How to Replace a Drain Pipe Under the Bathtub – A Step-by-Step Guide
Step 1: Disassembly Example:
To access the drain pipe under your bathtub, you may need to remove an access panel or maneuver around fixtures such as faucets and showerheads. If there are no access panels, carefully cut a hole in the drywall behind the tub using a utility knife. Be sure to make this hole large enough for you to easily reach in and work on the drain pipe. If necessary, temporarily remove fixtures such as faucets and showerheads to provide more room for disassembly.
First, loosen the locknut on the waste drain with a wrench to remove the old drain. Then, disconnect the overflow tube from its connection at the back of the tub and detach it from the wall. Finally, disconnect the trap arm from its connection at the drain pipe. If any of these connections are stuck or corroded, use a penetrating oil such as WD-40 to help loosen them.
Step 2: Installing the New Drain:
Once you have removed the old drain pipe, it’s time to install the new one. Before making any permanent connections, begin by dry-fitting all components to ensure proper alignment and compatibility.
Next, apply the plumber’s tape to all threaded connections to create a tight seal and prevent leaks. Then, use a wrench to secure the new drain pipe and fittings in place. Be sure to tighten the connections securely, but avoid over-tightening, as this can cause damage.
After all connections are secure, reattach the trap arm and overflow tube to their respective locations. Finally, reassemble any fixtures that were temporarily removed.
Step 3: Testing and Refinements:
Before finishing up your project, it’s important to test for leaks and make any necessary refinements. Gradually turn on the water supply and check all connection points for leaks. If you notice any leaks, try tightening connections or replacing gaskets as needed.

Once you are satisfied with no leaks, replace any access panels and clean up the work area. Dispose of old parts responsibly according to local regulations.
Step 4: Final Touches:
Congratulations, you have successfully replaced the drain pipe under your bathtub! Before using the tub again, turn on the water supply and run hot water through the drain for a few minutes to ensure proper drainage. Take this opportunity to also clean and freshen up your bathtub with a gentle cleaner or natural solution.
Step 5: Maintenance Tips:
To ensure your newly replaced drain pipe continues to function properly, be sure to keep it maintained. Regularly check for any leaks and address them promptly. Also, periodically clean out the drain using a mixture of baking soda, vinegar, and hot water to prevent buildup and clogs.
These steps and tips will help you successfully replace a drain pipe under your bathtub. Always take necessary precautions and consult a professional plumber if you encounter any difficulties or are unsure of any steps. With proper maintenance, your new drain pipe will provide efficient drainage for years to come.
Additional Tips and Considerations
- If you are unsure about any steps or techniques, consult a professional plumber for guidance.
- When purchasing replacement parts, match the type and diameter of your existing drain pipe to ensure proper fit.
- Use eco-friendly and natural cleaning solutions instead of harsh chemicals when maintaining your drain pipe. These can also help prevent damage to pipes and the environment.
- Don’t forget to regularly check for any potential damage or wear and tear on your drain pipe, and address any issues promptly to prevent larger problems.
- If you have a bathtub with jets, be sure to also check the condition of the jet system and clean it regularly to maintain proper function.
- In addition to gloves and goggles, consider wearing a mask to protect yourself from any dust or debris that may be present during the repair process.
- If you have a particularly old or complex plumbing system, it may be best to consult a professional plumber for assistance with replacing your drain pipe. Remember, safety should always be the top priority when working on any plumbing project. So take your time, follow these steps, and complete the repair with confidence and caution. With proper care, your bathtub’s drain pipe will continue to function smoothly for years to come.
Conclusion
In conclusion, replacing a drain pipe under a bathtub is a doable task, provided you’re prepared to take the right steps. From disassembling the existing setup, installing the new drain pipe, and testing for leaks to the final touches and regular maintenance, each step is crucial to successful completion. Remember, safety and precautionary measures are key, and using the right tools and materials will make the process smoother.
We hope you found this guide helpful, and we encourage you to share your experiences or post any questions in the comments section. Your insights and queries not only help you but also assist others who might be embarking on a similar plumbing project. Thanks for reading our post about how to replace a drain pipe under the bathtub.