
To varnish a table without brush marks, sand the surface, use a high-quality brush, apply thin and even coats, and follow the direction of the grain. Are you looking for an effective way to varnish a table without brush marks?
Brush marks can ruin the beauty and smoothness of your table’s surface. However, by following a few simple steps, you can achieve a flawless finish. First, ensure the table surface is smooth by thoroughly sanding it. Next, select a high-quality brush designed for varnishing, as this will reduce the likelihood of brush marks.
Apply the varnish using thin and even coats, gently brushing in the direction of the wood grain. By following these steps, you can varnish your table with a professional finish, free from unsightly brush marks.
Choosing The Right Varnish
Discover the secret to achieving a flawless varnish finish on your table with no brush marks. Follow our expert tips and techniques to achieve a professional look with ease.
Understanding Different Types Of Varnish
Before you start varnishing your table, it’s essential to understand the different types of varnish available in the market. Choosing the right varnish will not only enhance the beauty of your table but also help you achieve a smooth and brush mark-free finish.
Here are some popular types of varnish to consider:
- Polyurethane Varnish: This type of varnish is highly durable and dries into a hard, protective coating. It is available in both oil-based and water-based options.
- Spar Varnish: Spar varnish is specifically designed for outdoor applications. It provides excellent protection against sunlight, water, and temperature changes.
- Lacquer: Lacquer varnish is known for its quick-drying properties and high gloss finish. It is perfect for achieving a smooth and shiny surface.
Selecting The Appropriate Varnish For Your Project
Now that you have a better understanding of different varnish types, let’s dive into the process of selecting the appropriate varnish for your table project.
Consider the following factors while making your decision:
- Indoor or Outdoor Use: Determine whether your table will be placed indoors or outdoors. If it’s an outdoor table, choose a varnish that offers high resistance to UV rays and moisture.
- Desired Finish: Think about the type of finish you want to achieve. Different varnishes offer different levels of shine, from matte to glossy.
- Application Method: Consider the ease of application. Some varnishes are better suited for brush application, while others can be sprayed on. Choose a varnish that matches your preferred application method.
- Drying Time: Check the drying time specified by the manufacturer. This will help you plan your project timeline and ensure that you allow enough time for each coat to dry properly.
By considering these factors, you can choose the right varnish that will give your table a flawless finish without any brush marks. Remember to read the manufacturer’s instructions and follow the recommended application techniques for the best results.
Preparing The Surface
To varnish a table without brush marks, it is crucial to properly prepare the surface. By sanding the table, removing any imperfections, and applying a sanding sealer, you can achieve a smooth finish that is free from brush marks.
Sanding And Smoothing The Surface
Before varnishing your table, it’s important to prepare the surface properly. Sanding and smoothing the surface will help remove any imperfections, allowing the varnish to adhere evenly. Here’s what you need to do:
- Sand the table using a medium-grit sandpaper. Sanding in the direction of the wood grain will help achieve a smoother finish.
- Once done, switch to a finer-grit sandpaper to further smooth the surface.
- Remember to wipe away any dust or debris produced by sanding, ensuring a clean canvas for varnishing.
Cleaning And Removing Any Residue
After sanding, it’s crucial to clean the table thoroughly to remove any residue that might affect the final finish. Take the following steps to ensure a pristine surface:
- Begin by dusting off the table with a soft, lint-free cloth to remove any loose particles.
- Next, dampen a clean cloth with a mild, non-abrasive cleaner or a mixture of warm water and liquid dish soap.
- Gently wipe down the table, focusing on areas that may have built-up grime or sticky residue. Avoid using excessive moisture that could damage the wood.
- Once the table is clean, use a dry cloth to remove any excess moisture and allow the surface to air-dry completely.
By following these steps, you’ll be well on your way to varnishing your table without the pesky brush marks that can mar your hard work. The key lies in properly preparing the surface, which includes sanding and smoothing the wood, as well as thoroughly cleaning any residue. With a pristine surface ready, you’ll achieve a flawless varnish application that will make your table the centerpiece of any room.
Applying The Varnish
Applying varnish without brush marks is a crucial step in achieving a flawless finish for your table. Follow these expert tips to ensure a smooth and professional-looking result.
Optimal Environment For Application
Before applying varnish to your table, it’s important to create an optimal environment that will ensure the best possible results. Start by clearing the area and ensuring there is no dust, debris, or lint that could potentially mar the finish. Dust particles can easily become trapped in the varnish, leaving behind unsightly brush marks.
Ensure the room is well-ventilated to promote proper drying of the varnish. Adequate air circulation will help the varnish cure evenly and prevent any bubbling or unevenness in the final finish.
Proper Techniques For Brush-free Application
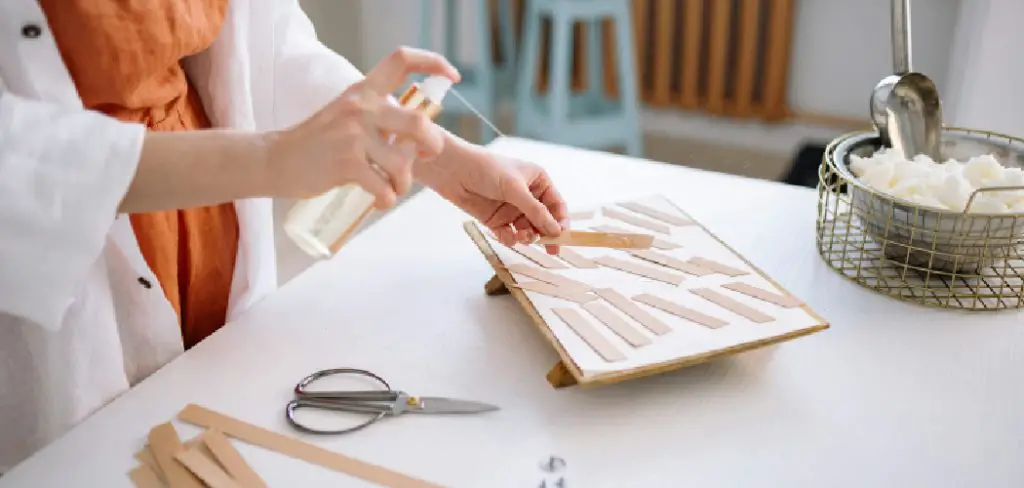
If you’re aiming for a brush-free application method, consider using a foam brush or a paint pad instead. These tools are great alternatives as they don’t leave behind any brush marks.
Foam brushes: Foam brushes are ideal for smaller projects where you need precise control. They are inexpensive and can be easily discarded after use. Dip the foam brush lightly into the varnish and apply it in smooth, even strokes, moving in the direction of the wood grain for a professional-looking finish.
Paint pads: Paint pads consist of a flat applicator attached to a handle, similar to a sponge. They are suitable for larger surfaces and offer a quick and efficient way to apply varnish without brush marks. Apply the varnish to the paint pad, ensuring even coverage, and then swipe it across the table surface using long, even strokes.
Achieving Smooth And Even Coats
To achieve a smooth and even varnish finish on your table, there are a few techniques you can employ:
- Thin coats: It’s better to apply several thin coats of varnish rather than one thick coat. Thick coats can lead to drips, brush marks, and uneven drying. Allow each coat to dry thoroughly before applying the next, following the manufacturer’s recommended drying time.
- Long, even strokes: Whether using a foam brush or a paint pad, apply the varnish using long, even strokes. This will help distribute the varnish evenly without leaving behind any visible brush marks.
- Sanding between coats: To achieve an extra smooth surface, lightly sand the table between each coat of varnish. This will help eliminate any imperfections or dust particles that may have settled on the surface. Use fine-grit sandpaper and be gentle to avoid scratching the wood.
By creating the optimal environment, utilizing brush-free application techniques, and following the proper guidelines for applying varnish, you can achieve a stunning, brush mark-free finish on your table. Remember to take your time, work in well-ventilated areas, and apply thin, even coats for the best results.
Curing And Finishing
Achieve a flawless table varnish by following these simple steps to avoid brush marks and achieve a smooth finish. With attention to detail and a few tips and tricks, you’ll have a beautifully varnished table in no time.
Allowing Sufficient Drying Time
Curing and finishing are crucial steps in varnishing a table without brush marks. However, many people overlook the importance of allowing sufficient drying time. Rushing this process can lead to uneven application and unsightly brush marks. In this section, we will explore the significance of allowing the varnish to dry properly and how it contributes to achieving a flawless finish.
After you have applied the varnish on the table surface, ensure that you provide enough time for the first coat to fully dry. In general, it is recommended to wait at least 24 hours, but this may vary depending on the type of varnish you are using. Check the manufacturer’s instructions for the specific drying time.
During this waiting period, it is essential to keep the table in a well-ventilated area, away from dust, dirt, and direct sunlight. This will help prevent any unwanted particles from settling on the surface, which could affect the smoothness of the finish. Patience is key at this stage, as rushing the process can compromise the overall quality of the varnished table.
Once the first coat is completely dry, you can proceed to apply subsequent coats. Repeat the process of allowing sufficient drying time between each coat. Applying multiple thin coats instead of one thick coat will help prevent brush marks and create a more professional-looking finish.
Post-treatment And Buffing
Post-treatment is an essential step that ensures the smoothness and durability of the varnished table. After all the coats have dried, gently sand the surface using fine-grit sandpaper. This will eliminate any imperfections or rough spots, allowing for a more even and polished appearance.
Buffing the varnished surface further enhances its smoothness and shine. You can use a soft cloth or a buffing pad attached to a power tool for this process. Apply gentle pressure in circular motions, covering the entire table surface. This technique helps bring out the natural luster of the varnish and minimizes any remaining brush marks.
Remember to clean the table thoroughly after buffing to remove any debris or residue. This will leave behind a flawless, mirror-like finish, free from brush marks and imperfections.
Protecting And Maintaining The Varnished Surface
Once you have achieved a smooth varnished surface, it is crucial to protect and maintain it properly to prolong its lifespan and ensure its beauty for years to come. Here are some tips:
- Use coasters or placemats to prevent direct contact with hot or wet items.
- Avoid dragging sharp or heavy objects across the table surface to prevent scratching or gouging.
- Regularly clean the table using a mild, non-abrasive cleaner to remove dust, dirt, and stains.
- Consider applying a fresh coat of varnish every few years to maintain the protective layer and restore the table’s shine.
By following these protective measures and adopting a regular maintenance routine, you can enjoy a varnished table that remains free from brush marks and retains its stunning appearance for a long time.
Frequently Asked Questions Of How To Varnish A Table Without Brush Marks
How Can I Varnish A Table Without Brush Marks?
To varnish a table without brush marks, start by using a fine-grit sandpaper to smooth the surface. Apply thin coats of varnish with a high-quality brush, following the wood grain. Keep the brush strokes light and even, avoiding overbrushing. Sand between coats to remove any imperfections.
This will help achieve a smooth finish without brush marks.
What Is The Best Way To Avoid Brush Marks When Varnishing A Table?
To avoid brush marks when varnishing a table, choose a high-quality brush with fine bristles. Apply thin coats of varnish in the direction of the wood grain, using smooth and even strokes. Avoid applying too much pressure on the brush and be mindful of the varnish’s drying time.
Sanding between coats can also help remove brush marks and ensure a smooth finish.
Can I Use A Roller Instead Of A Brush To Varnish A Table?
While using a high-quality brush is recommended for varnishing a table, you can use a foam roller as an alternative. However, it’s important to note that using a roller may result in a slightly less smooth finish compared to using a brush.
Roll in the direction of the wood grain and apply thin coats to minimize any potential roller marks.
Should I Dilute The Varnish To Avoid Brush Marks?
It is not recommended to dilute the varnish as it can affect the finish and durability of the final result. Using a high-quality brush and applying thin coats will help prevent brush marks. If you find that the varnish is drying too quickly and causing brush marks, you can use a slow-drying varnish or work in smaller sections to ensure a smooth application.
Conclusion
To achieve a flawless varnish finish on your table, it is essential to follow the right techniques and use the proper tools. By adopting the methods showcased in this blog post, you can minimize brush marks and achieve a smooth and professional-looking outcome.
Remember, it’s all about patience, proper preparation, and taking your time during the application process. With a little practice and attention to detail, you can varnish your table like a pro, without any unsightly brush marks.