
Are you looking for an easy and affordable way to give your home a dramatic new look? If so, consider covering an entire wall with curtains! This creative design concept can instantly transform any room into a chic space while providing flexibility for changing styles over the years.
Covering a wall with curtains is a simple and effective way to add texture, depth, and color to your walls without the commitment and expense of paint or wallpaper. It’s also a great option for renters who cannot make permanent changes to their space.
In this guide, we will walk you through the steps of how to cover entire wall with curtains. Keep reading to learn how it’s done!

What Will You Need
Before we get started, let’s go over the materials and tools you will need to complete this project:
- Curtains of your choice
- Curtain rod
- Measuring tape
- Pencil
- Leveler
- Drill and drill bits (if necessary)
- Hooks or brackets for curtain rod
Once you have all your materials gathered, it’s time to start on the fun part – transforming your wall with curtains!
8 Easy Steps on How to Cover Entire Wall With Curtains
Step 1: Measure Your Wall
The first step is to measure the length and width of the wall you want to cover. Make sure you measure from ceiling to floor and from one side of the wall to the other. This will give you an accurate measurement of the area you will need to cover.

Step 2: Select Your Curtains
Based on the measurements taken, select your curtains. Be sure to choose curtains that are long and wide enough to cover the entire wall. Consider the fabric, color, and pattern of the curtains, as these will significantly impact the overall look of your room. Remember, the curtains should complement your space’s existing decor and color scheme.
Step 3: Install the Curtain Rod
Now that your curtains are selected, it’s time to install the curtain rod. Determine how high you want the curtains to hang; a common approach is to hang them close to the ceiling to give the room a taller appearance. Use your pencil to mark the spots where the brackets or hooks will be mounted. Ensure they are level to prevent the curtains from hanging unevenly. Once marked, drill holes into the wall at these points and secure the brackets or hooks. Then, simply place your curtain rod on the brackets or hooks. Remember, the curtain rod should extend a bit beyond the wall width to allow the curtains to rest on the wall when drawn open.
Step 4: Hang the Curtains
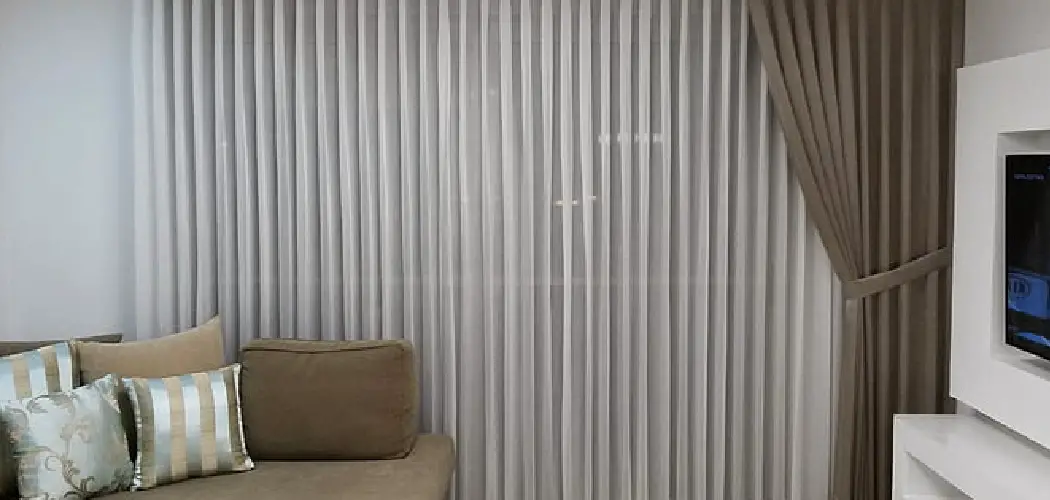
At this point, you’re ready to hang your curtains. Start by threading your curtain onto the rod. Ensure that the side of the curtain you want facing the room is inward while you’re doing this. Once your curtain is threaded, lift the rod and place it onto the brackets. Ensure the curtains are evenly spread over the rod before securing it. You should have a wall completely covered with your chosen curtain at this stage. Check if the curtain hangs all the way to the floor and covers the wall side-to-side. If everything is in place, step back and admire your work!

Step 5: Make Adjustments and Finishing Touches
Now that your curtain wall is up, it’s time to make some final adjustments. Check the length and drape of the curtains. If they’re too long, you may consider hemming them for the perfect fit. For a more finished look, you can add tie-backs or holdbacks to secure the curtains when they’re open. These can be simple ribbons or more decorative hardware. Remember, the goal is to create a look that suits your style and the overall aesthetic of the room. Lastly, step back and evaluate the overall effect. Adjust the curtains as needed until you’re satisfied with the look. And there you have it: a new, dramatic element in your décor that adds style, sophistication, and flexibility.
Step 6: Maintenance and Care
Like any other part of your decor, your curtain wall requires regular maintenance to keep it looking its best. To remove dust and prevent accumulation, lightly vacuum the curtains while they hang. For a deeper clean, carefully remove the curtains and follow the instructions on the curtain’s label. Some may be machine washable, while others might need professional dry cleaning. Consider the cleaning needs of the curtains before you purchase them. When hanging them back, make sure they are completely dry to prevent any mildew. Following these care instructions will help ensure your curtain wall remains a stunning feature in your home for years to come.

Step 7: Enjoy Your New Space
With the curtain wall up and all adjustments made, it’s time to enjoy your new space! The impact of the curtain wall on your room’s vibe and aesthetics will be remarkable. Whether you’re aiming for a dramatic, calming, or chic effect, the transformation will undoubtedly breathe new life into your space. Remember, one of the great advantages of this design approach is flexibility. If you feel like changing the room’s mood or color scheme, simply switch out the curtains for a fresh new look. Enjoy the creative freedom that a curtain wall affords!
Step 8: Experiment with Lighting
Now that your curtain wall is in place, experiment with different lighting options. The right lighting can enhance the atmosphere of your space and highlight the texture and color of your curtains. Consider combining direct and indirect lighting to create different moods at different times. For instance, natural light can create a bright and airy atmosphere during the day. In the evening, indirect lighting like fairy lights or table lamps can give your room a cozy and inviting ambiance. Remember, the goal is to accentuate the beauty of your curtain wall and create a space that feels comfortable and appealing to you.
By following these eight easy steps, you can transform any wall in your home into a stunning focal point. So go ahead and get creative with curtains – the possibilities are endless!
5 Additional Tips and Tricks
- Start with accurate measurements: Before you begin covering your entire wall with curtains, it’s critical to take accurate measurements of the wall. Knowing the exact height and width will help you choose the right size of curtains and avoid any disappointment or inconvenience later.
- Choose your curtains wisely: When choosing curtains for an entire wall, it’s important to pick a color and pattern that will complement your existing decor. Choosing the right fabric is crucial – if you want your curtains to block out light, opt for heavier fabrics like velvet or thick cotton.
- Mount your curtain rods properly: To ensure that your curtains cover the entire wall and look neat, it’s essential to mount your curtain rods properly. Use a level to make sure they are straight and use sturdy brackets to support the weight of the curtains.
- Invest in enough fabric: If you have a larger wall to cover, make sure you have enough fabric for the job. It’s always better to have a little extra than not enough, as you can always use the excess fabric for other projects.
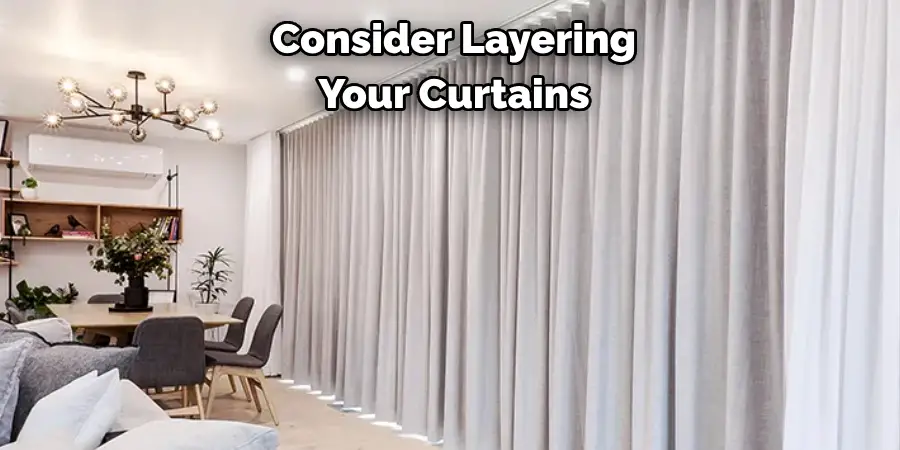
- Consider layering your curtains: For added functionality and style, consider layering your curtains. This is especially useful if you need both light-blocking and sheer curtains – you can layer them on the same rod for a seamless look.
By following these additional tips and tricks, you’ll be well on your way to successfully covering your entire wall with curtains.
5 Things You Should Avoid
- Avoid Rushing the Process: It can be tempting to rush through the process of hanging curtains, especially if you’re eager to see the finished product. However, hurried installations often lead to mistakes such as misaligned rods or uneven curtains. Take your time to ensure everything is done correctly.
- Avoid Skimping on Quality: While budgeting is important, it’s not worth skimping on the quality of your curtains or hardware. Low-quality curtains can fade or degrade quickly, while poor-quality hardware could fail under the weight of the curtains.
- Avoid Ignoring the Washing Instructions: Different curtain materials require different care instructions. Ignoring these guidelines could lead to damaged or prematurely worn-out curtains. Always check the washing instructions before laundering your curtains.
- Avoid Using Inappropriate Tools: Using the wrong tools for installation can damage your walls or the curtain rods. For instance, a regular drill might not be suitable for concrete or brick walls. Always use the appropriate tools for the job.
- Avoid Neglecting Regular Maintenance: Regular cleaning and maintenance are crucial to keep your curtains looking their best. Dust and dirt can accumulate over time, leading to a dull appearance and potentially damaging the fabric. Regularly vacuum or steam clean your curtains according to their care instructions.
Avoiding these common pitfalls will ensure that your wall-covering curtains look great and last longer.
Conclusion
It’s easy to find the perfect curtains for your home. By following our tips and considering both style and practicality, you can find curtains that fit your needs and any budget. You’ll also be able to turn any wall into a cozy and inviting space with the right curtains. If you’d like more advice on choosing the best curtains for your unique space, feel free to contact us; we would be happy to help.
Take the steps today towards creating a more stylish, comfortable home environment; plan what kind of curtains are necessary for covering up an entire wall, and select what type of fabric is most suitable for the job. And purchase the best ones that suit both important requirements.
Hopefully, the article on how to cover entire wall with curtains has been helpful, and you are now ready to tackle your next interior design project. With these tips and tricks, your curtains will serve as functional pieces and add a personality to your home. So go ahead and give those plain walls some love with beautiful curtains!
You can check it out to Modernize Cedar Walls