

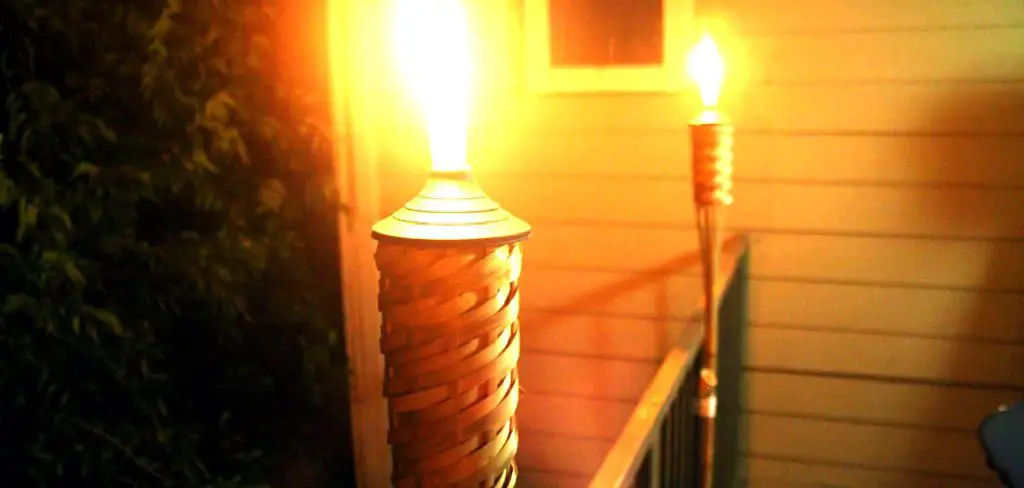
To make a tiki torch snuffer, cut a piece of copper pipe to desired length and attach a cap on one end. Tiki torches are a popular addition to outdoor spaces, creating a warm and inviting atmosphere for gatherings.
However, after the festivities are over, it’s important to properly extinguish the flame for safety reasons. A tiki torch snuffer is a simple tool that can be used to extinguish the flame and cover the torch opening to prevent any stray embers from sparking into a fire.
While there are many commercially available snuffers, making your own can be a fun and economical diy project. All you need is some copper pipe, a cap, and a little bit of elbow grease. In this article, we’ll walk you through the steps of making your own tiki torch snuffer.
Materials Needed
Making your own tiki torch snuffer is an excellent way of adding a personal touch to your outdoor area. Besides being an aesthetic addition, it also helps to put out the flames and keeps the torches in good shape for more extended periods.
However, it’s essential to follow safety guidelines when creating one, such as using fire-resistant materials. Here’s a list of the essential materials you’ll need to make a tiki torch snuffer:
Materials Needed:
- Metal bucket: 1 (10-inch diameter)
- Steel mesh: 1 (10-inch square)
- Steel wire: 1 (10 inches long)
- Pliers
- Heat-resistant spray paint
- Gloves
- Safety glasses
Before embarking on the project, ensure that you have all the necessary items available. Keep in mind that using safe materials is crucial to ensure that your diy project is successful and does not compromise your safety.
Metal Bucket:
The primary material required for the project is a metal bucket. It should have a 10-inch diameter to ensure it’s large enough to cover the tiki torch. You’ll use it to trap the flames, thereby extinguishing them instantly.
Steel Mesh:
You’ll require a square-shaped steel mesh that fits the diameter of the bucket. The mesh prevents hot embers from escaping the tiki torch and helps in putting off the flame.
Steel Wire:
Along with steel mesh, a 10-inch wire is essential for this project. You need the wire to attach the mesh to the bucket securely. Steel wire is recommended because it has high strength, and it’s fire-resistant.
Pliers:
To bend and snip the wire, solid pliers are needed. While working with wire, accidents can happen. Therefore, it’s essential to wear gloves and safety glasses throughout the project.
Heat-Resistant Spray Paint:
To ensure the bucket looks aesthetically pleasing, coat it with heat-resistant spray paint. The paint also helps in protecting the bucket from extreme heat.
Once you’re done gathering all the materials, it’s time to follow the steps to create your diy tiki torch snuffer, which we’ll cover in the next section. Follow the instructions carefully, and you’ll have a snuffer in no time.
Steps To Make Diy Tiki Torch Snuffer
Tiki torches are a great way to create a cozy atmosphere and illumination during outdoor gatherings or events. However, it’s essential to ensure that you are using them safely. One of the most important things you can do to ensure safe use of tiki torches is to make a diy tiki torch snuffer.
In this section of the blog post, we’ll provide a step-by-step guide on how to make a diy tiki torch snuffer safely and efficiently.
Materials Needed
- Metal can with a lid
- Large nail
- Hammer
- String
- Lighter
- Work gloves
Before jumping into the steps, gather all the necessary materials, and ensure your work area is safe to avoid any potential hazards.
Step 1: Prepare The Can
First, clean the surface of the can. Remove any labels, and ensure it’s dry and in good condition. Next, flip the can over and use the hammer and nail to punch a hole at the center of the lid. The hole should be big enough for the flame to fit inside.
Step 2: Cut A String
Cut a piece of string approximately 15 inches long.
Step 3: Attach The String To The Can
Thread the string through the hole so that one end is inside the can and the other is outside.
Step 4: Light The String
Hold the can upside down with the string inside it and light the string with the lighter. Allow the string to burn for a few seconds, then extinguish the flame by placing the lid over the can. This burning process will remove any harmful chemicals from the can.
Step 5: Cut The String
Once the can has cooled down, use the scissors to cut the string inside the can.
Step 6: Ready To Use
Your diy tiki torch snuffer is now ready to use. Place it near the tiki torch and ensure it’s within arm’s reach. In case of an emergency, slide the lid over the top of the torch to extinguish the flame.
It’s essential to use work gloves while making this diy tiki torch snuffer to avoid any injuries. Also, ensure the can you are using is completely dry and free from any flammable substances, as this could be dangerous. Always exercise caution when using tiki torches, and remember that safety comes first.
That’s it! Making a diy tiki torch snuffer is easy and can help you enjoy your outdoor space safely and responsibly.
Benefits Of Making A Tiki Torch Snuffer
Tiki torches are a great outdoor decor option to add a tropical touch to your backyard parties during summers. Not only it illuminates the open-air gatherings but also creates a warm and inviting ambiance. However, many people often overlook the importance of having a tiki torch snuffer.
If you are a tiki torch enthusiast or just starting with them, here are the benefits of making a tiki torch snuffer.
Discuss The Advantages Of Using A Tiki Torch Snuffer.
A tiki torch snuffer may appear insignificant, but it has several benefits in terms of safety, cost, and convenience compared to merely blowing out the flames.
Saving Money
Without a snuffer, you are likely to spend more money replacing your torch wicks. Blowing out the flames from the top could result in the wick being blown out alongside the fire. Eventually, this decreases the lifespan of the wick, and you’ll need a new one fairly soon.
Using a snuffer ensures the flame is out, reducing the usage of the oil, and thus increasing the longevity of the wick.
Convenience
Using a tiki torch snuffer is more convenient and efficient than other ways of putting out the fire. For example, using an extinguisher might be more effective, but it will leave your torch in a mess, making it harder to clean and maintain.
On the other hand, using the snuffer is less messy and doesn’t require a person to leave their cozy spot to find water or sand to pour over the flame.
Safety
Of all the advantages of using a tiki torch snuffer, safety is the most vital. Blowing out the flame could cause sparks to fly off and burn others or cause a fire if it comes into contact with any flammable material.
A snuffer works efficiently because it smothers the flame and puts the fire out fast, minimizing the risk of causing any damage.
Having a tiki torch snuffer is a wise investment that enhances safety, saves money, and adds convenience. It might seem small in the grand scheme of things, but it could make your outdoor experience comfortable and secure, knowing that you have the right tools to extinguish it when needed.
Frequently Asked Questions Of How To Make A Tiki Torch Snuffer
What Materials Do I Need To Make A Tiki Torch Snuffer?
To make a tiki torch snuffer, you’ll need a fireproof material such as metal or ceramic. You’ll also need a long handle, fire-resistant adhesive, and tools to cut and shape the material.
Why Use A Tiki Torch Snuffer?
A tiki torch snuffer helps prevent accidents by extinguishing the flame without the need to blow it out. It’s also an easy way to avoid getting burned or accidentally knocking the torch over when trying to put it out.
How Do I Make A Tiki Torch Snuffer?
To make a tiki torch snuffer, cut out a cone shape from your fireproof material then attach it to a long handle. You can use fire-resistant adhesive to secure it in place and decorate it as you like. Just make sure it fits snugly over the flame to put it out effectively.
Can I Buy A Tiki Torch Snuffer Instead Of Making One?
Yes, you can buy tiki torch snuffers in most home and garden stores as well as online. They come in various shapes, sizes, and materials to suit your needs and preferences. However, making your own can be a fun and creative diy project.
Conclusion
Now that you know how to make a tiki torch snuffer, you can enjoy your backyard gatherings without worrying about accidental fires. This diy project is easy, cheap, and takes very little time and effort. By using household materials, you can create a functional tool that will add a level of safety to your outdoor space.
Additionally, you can customize your snuffer to match your decor or give it a unique flair. Remember to prioritize safety when using your tiki torch snuffer and to keep it easily accessible in case of emergencies. By following the steps outlined in this guide, you can create a practical and stylish addition to your outdoor setup.
With a little creativity and some basic crafting skills, you can turn everyday items into a useful tool that will improve your quality of life during the summer months.