

Are you tired of never having enough time in the day actually to get dinner on the table? Are you often looking for ways to simplify meal prep and make cooking so much easier? Then why not let technology do some of the hard work for you with the instant pot delay start function?
This amazing feature allows you to choose when your food will be ready so that no matter what your schedule looks like, hot meals will be waiting!
In this blog post, we’ll tell you all about how to use delay start on instant pot – from massive time savings and convenience to a wealth of recipe ideas. Start taking control over meal times today!
What Are The Benefits Of Using Delay Start On Your Instant Pot?
Using Delay Start on your Instant Pot is an incredibly convenient way to cook meals without having to constantly monitor the process or worry about it burning. It allows you to set up a meal in advance and leave it to cook while you are away from home, eliminating the need for constant supervision. This can also help add some flexibility to your schedule, as you can start cooking a meal in the morning and have it ready for dinner time.
In addition, using Delay Start on your Instant Pot can help to conserve energy as well. By pre-programming the cooking time, you are able to turn off your Instant Pot when finished instead of leaving it to run continuously until mealtime. This prevents unnecessary electricity usage and helps reduce your utility bills in the long run.
Overall, using Delay Start on your Instant Pot is an easy and efficient way to make meals that are cooked perfectly every time without having to constantly monitor it. By taking advantage of this feature, you can enjoy delicious home-cooked meals while also saving both energy and time.
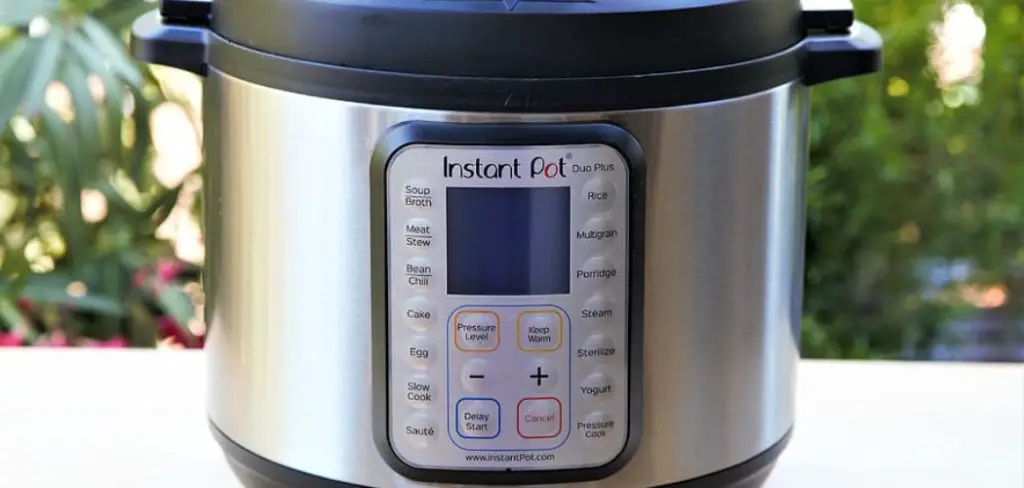
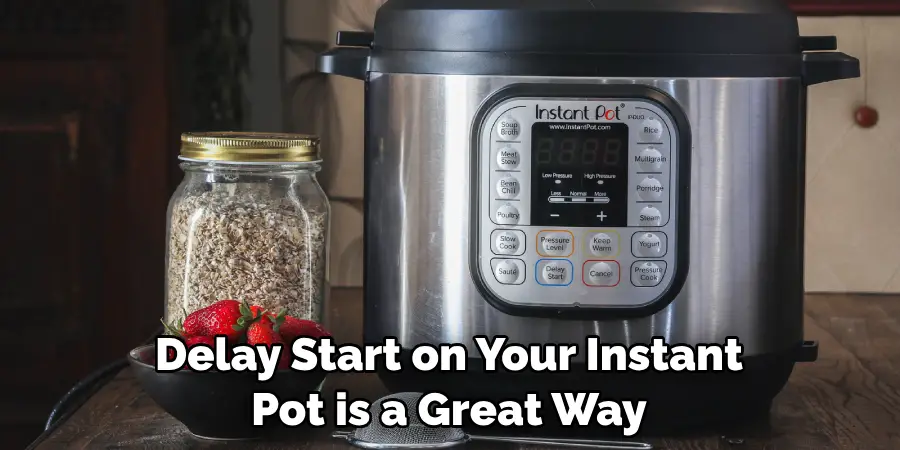
Getting to Know Your Instant Pot
Instant Pot Models with Delay Start Feature
There are several models of the Instant Pot that offer the Delay Start feature. The Instant Pot Duo, the brand’s best-selling model, boasts this feature along with seven cooking functions. The Duo Plus, an updated version of the Duo, also includes Delay Start and has a large blue LCD screen for easy convenience. The Instant Pot Ultra, a more recent model, also has the Delay Start feature, along with a custom programming option for a more personalized cooking experience.
Locating the Delay Start Button
The location of the Delay Start button can differ depending on your specific Instant Pot model. On the Instant Pot Duo, you’ll find the Delay Start button conveniently located on the bottom right of the control panel. For the Duo Plus, it’s located on the top right of the screen, marked as “Delay Start,” and for the Ultra, it’s integrated into the central dial control system, accessible via the ‘Pressure Cook’ menu. Always refer to your Instant Pot user manual if you’re unsure where to find this feature on your specific model.
Step-By-Step Processes for How to Use Delay Start on Instant Pot
Step 1: Inspect the Display Panel
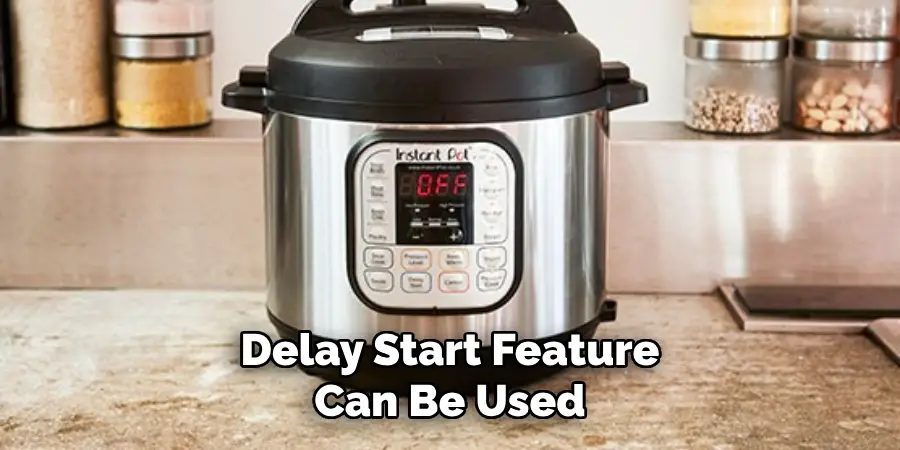
The Delay Start feature is typically located on the front display panel of your Instant Pot. Once you have located it, check to make sure that the “Delay Start” option is set to “Off,” as this will be your starting point.
Step 2: Set the Desired Time
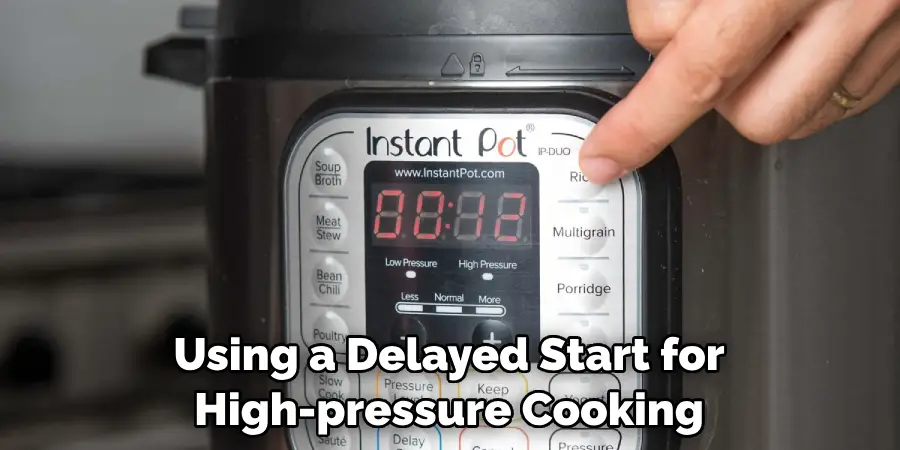
Using the + and – buttons, set the delay time you would like to start cooking. This can range from 30 minutes to 24 hours, depending on your preference. Now that you’ve chosen a delay time, it’s time to select your cooking setting. You can choose between “Manual” or the cooker settings such as “Soup,” “Rice,” etc.
Step 3: Set the Cooking Time and Pressure Level
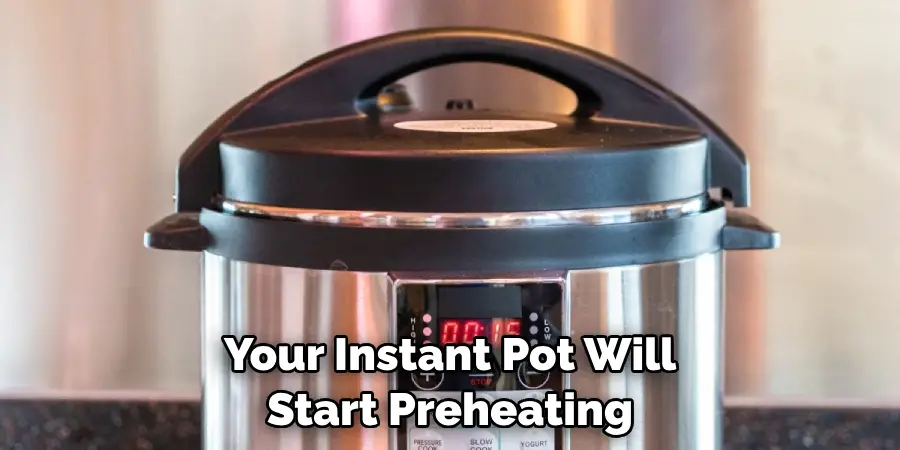
Once you have chosen your cooking setting, it is time to set the cooking time and pressure level for your food. For instance, if you were making rice, you would set the time to 15 minutes and the pressure level to be high. Now that you have chosen all your settings, it is time to select the “Start/Stop” button located on the display panel. This will initiate the process of preheating your Instant Pot so it can begin cooking at the designated delay time.
Step 4: Wait For Preheating to Finish
After you have hit the “Start/Stop” button, your Instant Pot will start preheating. This process usually takes about 10 minutes, and it is important that you wait for it to finish before moving on to the next step. Now that your Instant Pot is preheated, it is time to add all of your ingredients. Make sure to stir them together so they are evenly distributed in the pot before you close the lid.
Step 5: Secure the Lid and Close the Pressure Setting Valve
Once you have added all of your ingredients, it is time to secure the lid and close the pressure setting valve. Make sure that both of these are tightly closed before you move on to the next step.
Now that the lid is securely in place and the pressure setting valve is closed, it is time to select “Delayed Start” again on the display panel. This will confirm that you have chosen a delayed start, and your Instant Pot will begin cooking at the designated time.
Step 6: Wait For Your Food To Cook
Now, all you can do is wait! Your food will begin cooking at the designated delay time, and when it has finished, your Instant Pot will automatically switch to a “Keep Warm” setting. Using the delay start feature on your Instant Pot is quick and easy, and it can save you time in the kitchen.
Advanced Delay Start Techniques
Multi-Step Cooking: Combining Pressure Cook and Slow Cook with Delay
One of the many impressive features of Instant Pot is the ability to implement multi-step cooking. For instance, you can combine the use of Pressure Cook and Slow Cook settings with the Delay Start feature. Start with Delay Start for a pressure cook setting to tenderize meat or beans, then switch to slow cook to meld flavors together. Remember to adjust times appropriately for each cooking method.
Nested Delay Start: Setting Multiple Delays for Complex Recipes
Nested Delay Start can be utilized for more complex recipes that require different cooking times for different ingredients. You can set the Delay Start feature for one stage of the cooking process, and then once that stage is complete, set another Delay Start for the next stage. This way, your Instant Pot effectively manages the cooking process for you without the risk of overcooking any part of your meal.
Adjusting Cook Time During Delay: For Forgotten Ingredients or Changes
If you’ve set your Delay Start but then realized you’ve forgotten an ingredient or need to adjust your recipe, don’t worry. The Instant Pot allows you to adjust cook times even during the delay period. Press the “Cancel” button, wait for the pot to go into standby mode, and then proceed to make the necessary adjustments to your cooking time or settings.
Canceling or Re-Setting Delay Start: Troubleshooting and Adjustments
If you need to cancel or reset your Delay Start for any reason, the process is straightforward. Press the “Keep Warm/Cancel” button once to cancel the Delay Start. The display will revert to the previous cooking state. If you wish to reset the Delay Start, cancel it first, then go ahead with resetting it to your new preferred time.
These advanced techniques allow you to take full advantage of the versatility of your Instant Pot, ensuring you can prepare a wide range of dishes flawlessly. With a little practice, you’ll be able to navigate these features with ease, bringing both convenience and creativity to your cooking experience.
Delay Start Recipes for Every Meal
Breakfast
- Oatmeal: Set up your Instant Pot the night before with your favorite oatmeal recipe. Use the Delay Start feature to begin cooking 30 minutes before you wake up. You’ll wake up to a warm, nutritious breakfast.
- Overnight oats: Combine oats, chia seeds, and your choice of milk in the inner pot. Use the Delay Start feature to begin the process a few hours before sunrise, allowing the oats to soak and soften.
- Breakfast porridge: Add a blend of whole grains like barley, quinoa, and millet to the Instant Pot with water and salt. Set the Delay Start to begin cooking in the morning for a hearty, warm breakfast.
Lunch
- Soups and Stews: Prepare your ingredients the night before and set the Delay Start to begin cooking just before lunch. Enjoy a warm soup or stew for lunch.
- Chili: Brown your meat and vegetables before adding tomato sauce and spices. Set the Delay Start to have your chili ready by lunchtime.
- Lentil bowls: Rinse lentils and combine with rice, vegetables, and spices in the Instant Pot. Use the Delay Start function to have your flavorful, protein-rich lunch ready when you are.
Dinner
- Pulled Pork: Season your pork shoulder and place it in the pot with broth. Use the Delay Start feature so your meal is ready when you get home from work.
- Roast Chicken: Season a whole chicken and place it in the Instant Pot. Use the Delay Start to have a beautifully tender roast chicken ready by dinner time.
- Beef Brisket: Season your brisket and add it to the pot with your choice of liquid for a delicious, tender beef brisket, ready for dinner using the Delay Start feature.
- Pasta Dishes: For a quick, one-pot meal, add pasta, water, and your choice of sauce and protein. Use Delay Start to have it ready for dinner.
Desserts
- Cheesecake: Prepare your favorite cheesecake batter and pour into a springform pan. Set the Instant Pot to Steam using Delay Start, for a perfectly cooked cheesecake.
- Rice Pudding: Combine rice, sugar, and milk in the Instant Pot and set it to Pressure Cook using the Delay Start function. You’ll have a creamy, comforting dessert ready when you are.
- Yogurt: With the Instant Pot’s Yogurt function, you can make homemade yogurt. Use Delay Start to have fresh yogurt ready in the morning.
Bonus: Meal Prep Ideas
The Delay Start feature can also be used for efficient meal prep. Prepare a big batch of grains, legumes, or proteins using the Delay Start feature so they’re ready when you are, saving you time during the week. You can also use it to cook a whole chicken or roast, which can be used in various meals throughout the week. With a little planning, the Delay Start feature can become a game-changer in your meal prep routine.
Safety Considerations When Using Delay Start On Your Instant Pot
When using Delay Start on your Instant Pot, it is important to ensure that the pot is not left unattended during cooking. As with any appliance, there are certain safety considerations to keep in mind when operating an Instant Pot on a delayed start cycle.
Ensure that You Have Read Through and Followed All of The Instructions
First, always make sure that you have read through and followed all of the instructions in your Instant Pot manual before using it, including those related to safety. This will help ensure that you are using the appliance correctly and safely.
Check The Food Regularly
Second, it is important to check on the food regularly while in Delay Start mode. This will help make sure that the food does not overcook or burn while unattended.
Unplug The Instant Pot When It Is Not In Use
Finally, make sure to unplug the Instant Pot when it is not in use. This will help reduce the risk of fires or electric shocks that could occur if the Instant Pot is left plugged in and unattended for an extended period of time.
By following these safety considerations, you can ensure that your Instant Pot remains safe and functional for years to come. With these tips in mind, you can enjoy the benefits of Delay Start without any worry.
Additional Tips To Make The Most Out Of Delay Start
Tip 1: Use It For Meal Prep
The Delay Start feature can be used to make meal prep a breeze. Simply prepare the ingredients and set the Instant Pot on a delayed start time so that your meal will be ready when you need it. This is especially helpful if you have a busy schedule and want to have dinner ready at a certain time.
Tip 2: Have Breakfast
Delay Start can also be used to make sure you have breakfast ready in the morning. Prepare the ingredients the night before, set a delayed start time, and wake up to a hot meal ready to eat!
Tip 3: Consider Cooking Times
When using Delay Start, it is important to consider cooking times when setting your delayed start time. For instance, if you want to have your meal ready in 1 hour, make sure to set the delayed start time so that it finishes cooking 1 hour before you plan to eat. This will help ensure that your food is cooked properly without overcooking or burning.
By following these tips, you can make the most out of Delay Start on your Instant Pot and enjoy delicious, homemade meals with minimal effort. With these tips in mind, you can make sure your food is cooked to perfection every time!
Troubleshooting and Common Mistakes When Using Delay Start
Despite the convenience of the Delay Start feature, some users may encounter issues when attempting to use it. Here are some common problems and tips for troubleshooting them.
Problem 1: The Instant Pot Doesn’t Start at the Delayed Time
If you’ve set the delay time and your Instant Pot doesn’t start when expected, it could be due to a few reasons. First, ensure the “Delay Start” option was actually activated – it’s easy to forget in a rush. Also, check if the power source is connected and functioning properly. Always make sure your Instant Pot is plugged into a working outlet.
Problem 2: The Food Isn’t Cooked Properly
If your food isn’t cooked properly when using Delay Start, consider your cooking times. Remember, the timer for Delay Start does not include the time needed for the Instant Pot to come up to pressure. So, if a recipe requires 30 minutes to cook, you’ll want to set the delay time for at least 45 minutes to account for the pressure-building phase.
Problem 3: Delay Start Doesn’t Activate
If you’ve set the Delay Start and find it hasn’t activated, double-check your settings. It’s possible that you may have accidentally pressed ‘Cancel’ or ‘Keep Warm’ after setting up Delay Start, which would deactivate the delay. If all settings seem correct, it may be a technical issue, and you should consider reaching out to Instant Pot customer service.
Making Adjustments to Your Delay Start Settings
The Delay Start feature is designed to be flexible and adapt to your cooking needs. If you need to adjust your Delay Start time after setting it, press the ‘Cancel’ button and reprogram the time by following the same steps highlighted above. Remember, you can set your Delay Start up to 24 hours in advance, but you might need to adjust this depending on the dish you’re preparing. Always keep food safety in mind, especially when dealing with perishable ingredients.
By recognizing and addressing these common issues, you can make full use of the Delay Start feature on your Instant Pot and enjoy hassle-free cooking.
Tips for How to Use Delay Start on Instant Pot
- Read the instruction manual carefully before using the Delay Start on your Instant Pot to ensure you understand its functions and capabilities.
- Make sure that the lid is properly locked in place when setting a delayed start, as this will prevent any steam or liquid from escaping during the cooking process.
- If you are using the Delay Start feature for slow cooking, avoid over-cooking your food by setting a reminder to check the food’s progress.
- Do not leave the Instant Pot unsupervised while it is running in delayed start mode, as this could be dangerous and lead to an accident.
- Ensure that you have enough liquid in the pot to prevent food from burning.
- If you are using a delayed start for high-pressure cooking, make sure that the ingredients you are adding to your Instant Pot can withstand the pressure and heat of the process.
- When pressing down on the Delay Start button, please wait until it flashes twice before releasing, as this will help to ensure that the timer is set correctly and accurately.
These tips should help you use Delay Start on your Instant Pot safely and effectively. Always remember to follow the instructions provided in your Instant Pot manual when using this feature to ensure that your food comes out perfectly cooked every time.
What Are Some Common Uses for the Delay Start Function?
The Delay Start function is a great tool for busy households. It allows individuals to pre-program their Instant Pot so that meals can be cooked while they are away from home or asleep, without having to worry about turning it on or off at the right time. The Delay Start function is especially beneficial when making recipes that require long cooking times, such as stews, soups, curries, and grains. The Delay Start feature can also be used to help create meals in advance.
For example, if individuals know they will need lunch for the following day but won’t have time to cook it in the morning, they can program their Instant Pot the night before to start cooking when they wake up. This ensures that lunch will be ready when they need it without having to sacrifice time in the morning.
In addition, the Delay Start function can also be used to defrost ingredients overnight. If individuals are preparing a recipe and forget to take their ingredients out of the freezer the night before, they can use the Delay Start feature to program their Instant Pot to start cooking at the desired time.
Are There Any Cleaning Tips or Maintenance You Should Be Aware of When Using Delay Start on Your Instant Pot?
Yes, you should be aware of some cleaning tips and maintenance when using Delay Start on your Instant Pot. Here are a few:
- Make sure to remove any residue from the pot after each use. This will help keep it looking clean and new for longer.
- Clean the sealing ring regularly. This will help keep the seal of your Instant Pot airtight and prevent any food from getting stuck between the ring and the lid.
- Clean both interior and exterior surfaces with warm, soapy water after each use. This will help extend the lifespan of your Instant Pot.
- Don’t forget to clean out the milk reservoir of your Instant Pot. This is especially important if you use it for making dairy-based dishes, as residue can build up quickly and cause odor issues.
- Don’t forget to describe your Instant Pot on a regular basis. Using hard water in your area will help keep scale and film from building up inside the pot.
By taking care of your Instant Pot and following these cleaning tips, you can ensure that it will continue to work reliably for years to come.

How Long Can You Delay the Cooking Time for Your Food?
The Instant Pot Delay Start feature allows you to set the cooking time and delay it for up to 24 hours. This means that you can start the cooking process in advance, allowing your meal to be ready for you when you get home from work or school. To set a delayed start, press “Delay Start,” enter your desired cooking time, and press “Start.” Once the Instant Pot is in Delay Start mode, it will count down to the programmed cooking time and start the cooking process when that time arrives.
The Instant Pot will also give you a reminder 10 minutes prior to the pre-set cooking time. This feature can be used for all types of recipes, such as slow-cooking, pressure-cooking, and steaming food. Keep in mind that the Delay Start timer should be adjusted accordingly if you are using a high-pressure setting. If you are unsure how long to delay the cooking time, check the recipe for suggested times or use the manufacturer’s instructions.
Can You Manually Adjust the Cooking Time if Needed?
Yes, you can manually adjust the cooking time on your Instant Pot if needed. This will allow you to customize the length of time for a recipe or delay starting it. To do this, press and hold the “Manual/Pressure Cook” button until it reads “On.” Then, use the +/- buttons to set the cooking time.
Once done, press the “Start” button to start the Instant Pot cooking cycle. Keep in mind that if you adjust the cooking time manually, it will override any delay settings set up using Delay Start.
Therefore, be sure to make your adjustments before setting up a delayed cooking time with Delay Start. Delay Start on your Instant Pot is a great way to ensure your meals are cooked to perfection. By following the steps outlined above, you can easily customize the cooking time for each recipe and delay start it whenever needed.
Conclusion
One disadvantage of delayed start on an Instant Pot is that the cooking process can take a long time to begin. This means you have to plan ahead and set the timer accordingly to ensure your food will be cooked when you want it. Additionally, if power is lost while using delay start, all of the settings may be reset, which could cause your food to overcook.
In conclusion, the Delay Start feature on Instant Pot is a great way to ensure that your meals are ready when you want them. It is simple to use, and with the added convenience of being able to set it up before you leave home, you can enjoy freshly cooked meals without having to worry about it while away. With this easy-to-use feature, you can save time, money, and energy by having your meals cooked when you want them.
I hope this article has been beneficial for learning how to use delay start on instant pot. Make Sure the precautionary measures are followed chronologically.