Are you tired of your old leaky kitchen faucet but overwhelmed by the idea of removing it yourself? You’re not alone—replacing a kitchen faucet can seem intimidating.
But we’re here to tell you that with the proper instructions and tools, you absolutely can handle this task without calling a plumber. In today’s post, we’ll walk you through the simple step-by-step process for removing virtually any kitchen faucet secured with an ordinary U-shaped mounting bracket.

By the time you finish reading, you’ll feel empowered and confident in your new DIY skills. You’ll be one step closer to saying goodbye to that drippy old faucet and hello to a clean, functional replacement. Let’s get started to learn more about how to remove kitchen faucet with U-Shaped bracket.
Can You Remove the Kitchen Faucet with U-shaped bracket?
When it comes to updating your kitchen, removing the old faucet might be necessary. If your kitchen faucet has a U-shaped bracket, you might be wondering if it’s possible to remove it yourself.
The good news is that removing a kitchen faucet with a U-shaped bracket can be done with little effort and some basic tools. It’s important to ensure you have the right tools and take time during removal. With a bit of patience, you should be able to successfully remove your old faucet and replace it with a brand-new one in no time.
Why Should You Remove the Kitchen Faucet with U-Shaped Bracket?
Your kitchen faucet sees constant use; over time, the U-shaped bracket that secures it can begin to loosen. Though a loose faucet may seem like a minor inconvenience, it can actually create significant problems. Not only can the constant movement cause water to leak underneath the sink, but it can also lead to damage to the wall behind the sink.
A wobbly faucet can make cleaning your dishes difficult or filling large pots with water properly. Removing the kitchen faucet and tightening the U-shaped bracket is a simple process that can save you from future headaches, so don’t hesitate to take action if you notice any wobbling in your faucet.
Tools and Materials You’ll Need
Before we dive into the steps, you’ll need to gather some tools and materials that will help make the process easier. You may already have most of these items at home, but if not, they can easily be purchased at your local hardware store.
- Adjustable wrench
- Phillips head screwdriver
- Plumber’s tape
- Bucket or container for catching water
- Cleaning cloth or towel

Safety Precautions
Before you begin the process of removing your kitchen faucet, it’s crucial to prioritize safety. In-home renovation projects, a small oversight can lead to injury or damage. Here are some safety measures to consider:
- Turn off the Water Supply: Make sure you turn off the water supply from the source before you start working on your faucet. This will prevent any accidental water spillage, which can lead to slipping or electrical hazards.
- Wear Protective Gear: Always wear the appropriate protective gear, such as gloves, to protect your hands from potential cuts or scrapes.
- Be Mindful of Potential Hazards: Be aware of potential hazards, such as sharp edges on the faucet or loose parts that might fall off.
By taking these precautionary steps, you’ll ensure your safety while minimizing the risk of potential hazards during your faucet removal project. Always remember, safety first!
7 Steps to Follow on How to Remove Kitchen Faucet with U-Shaped Bracket
Step 1: Switch off the Water Supply
Before you start removing the faucet, it is important to turn off the water supply. Locate the valves under the sink and turn them off. You can also switch off the main valve connected to your house to be safe.
Step 2: Disconnect the Water Supply Lines
After you turn off the water supply, you can start disconnecting the water supply lines. Use a wrench to unscrew the nuts that attach the water supply lines to the faucet. Make sure you place a bucket or a towel under the lines to catch any water that may spill.
Step 3: Remove the U-Shaped Bracket
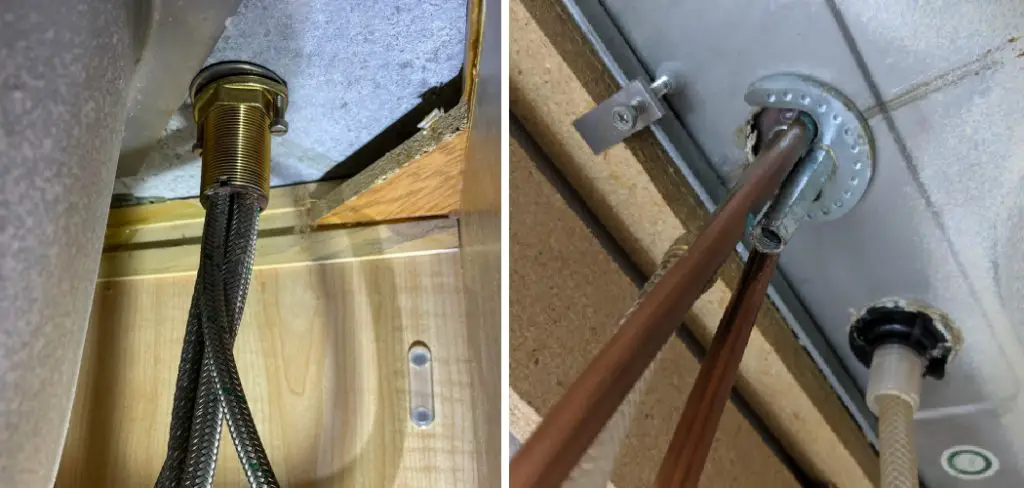
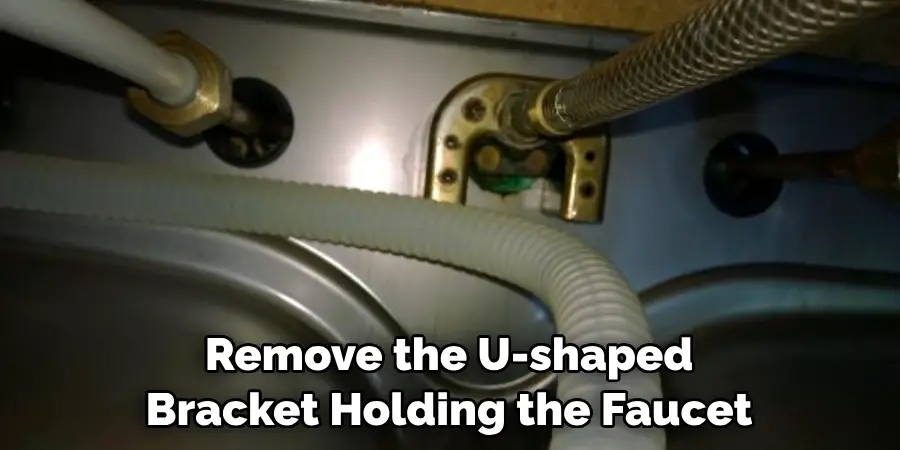
Once you have disconnected the water supply lines, you can now remove the U-shaped bracket that secures the faucet to the sink. Use a wrench to unscrew the nuts that hold the bracket and the faucet in place. Be careful not to damage the sink while doing this.
Step 4: Take Out the Faucet
After removing the bracket, you can now take out the faucet from the sink. Lift it out gently to avoid damaging the sink or any pipes connected to it. Make sure to inspect the faucet for any signs of damage or wear and tear.
Step 5: Clean the Area
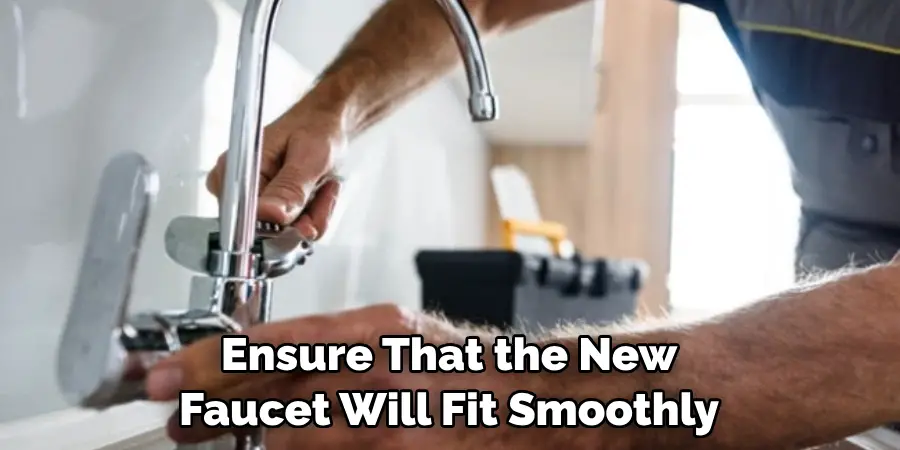
After removing the faucet, you should clean the area where it was installed. Use a soft cloth and a cleaning solution to wipe down the surface, removing any grime or debris. This will ensure that the new faucet will fit smoothly into the sink.

Step 6: Install the New Faucet
Now, it’s time to install the new faucet. Place the faucet in the hole and secure it with a U-shaped bracket. Once you have attached the bracket, use a wrench to tighten the nuts that hold it in place. Connect the water supply lines and make sure they are secure.
Step 7: Test the Faucet
The final step is to test the faucet. Turn on the water supply and check for any leaks. If there are no leaks, your new faucet is now ready to use! Enjoy your updated kitchen and marvel at your handy work!
That’s it! You’ve now learned how to remove the kitchen faucet with a U-shaped bracket. With these steps, you can now easily replace your old faucet with a new one. Enjoy the process, and don’t forget to read the instructions carefully before starting!
Tips for Avoiding Potential Damages During The Removal Process
Tip 1: Shut off the Water Supply
Before doing anything, make sure to shut off the water supply to your kitchen sink. This is an essential step that will help you avoid any unwanted damages and leaks.
Tip 2: Wear Protective Gear
It’s always a good idea to wear protective gloves and eyewear when dealing with plumbing work. This will help protect your hands and eyes from any potentially sharp edges or debris.
Tip 3: Use the Right Tools
Using the right tools for the job is crucial if you want to avoid potential damage to your plumbing system. Make sure you have a wrench, screwdriver, pliers, and any other necessary tools on hand before starting the removal process.
Tip 4: Carefully Support the Faucet
When removing your kitchen faucet, make sure to support its weight carefully. This will help you avoid any accidental drops or damage to your sink.
Tip 5: Consult a Professional Plumber
If you’re uncomfortable with the process of removing your kitchen faucet, don’t hesitate to consult a professional plumber. With their expertise and specialized tools, they can easily help you get the job done safely and efficiently.
By following these tips, you’ll be able to successfully remove your kitchen faucet with a U-shaped bracket without any issues or damages. So don’t wait any longer – start the process today!
5 Things You Need to Know Before Remove Kitchen Faucet with U-Shaped Bracket
1. Shut Off the Water Supply
Before you do anything, you must shut off your kitchen sink’s water supply. This will prevent any water from coming out of the faucet while you are working on it. You should also place a towel or bucket underneath the sink to catch any water that may drip out.
2. Remove the U-Shaped Bracket
Once the water is turned off, you can remove the U-shaped bracket holding the faucet. There are typically two screws that hold the bracket in place. Use a screwdriver to remove these screws, then carefully lift the bracket off the sink.

3. Disconnect the Water Lines
Next, you need to disconnect the water lines from the faucet. There will be two lines, one for hot water and one for cold water. Use a wrench to loosen the nuts that connect these lines to the faucet. Once they are loose, you can carefully pull the lines away from the faucet.
4. Remove the Faucet Handle
The next step is to remove the faucet handle. There will be a screw that holds the handle in place. Use a screwdriver to remove this screw, then carefully pull the handle off the faucet.
5. Remove the Faucet Body
Finally, you can remove the faucet body from the sink. There may be one or two screws holding it in place. Use a screwdriver to remove these screws, then carefully lift the faucet body off the sink.
How to Deal with Corrosion and Rust When Removing a Kitchen Faucet
Corrosion and rust can be common issues when removing a kitchen faucet with a U-shaped bracket. If you encounter these problems, here are some tips to help you deal with them:
For Corroded Nuts or Bolts:
Use a penetrating oil, such as WD-40, to loosen them up before trying to remove them.
For Rusted Screws or Bolts:
Use a wire brush to remove any visible rust before attempting to unscrew them. Apply penetrating oil if necessary.
For Corrosion on The Faucet Body:
Use a mixture of equal parts water and vinegar to scrub away the corrosion. Rinse with clean water afterwards.
For Severe Corrosion or Rust:
If you encounter excessive corrosion or rust, it may be best to consult a professional plumber. They will have the necessary tools and expertise to handle these issues safely and effectively.
Remember, it’s always better to address corrosion and rust early on before they cause further damage. Regular maintenance and cleaning can help prevent these issues in the future. So take care of your kitchen faucet and enjoy its functionality for years to come!
Benefits of Remove Kitchen Faucet with U Shaped Bracket
If you’re considering upgrading your kitchen sink, a removable U-shaped bracket faucet might be just what you need. This type of faucet offers numerous benefits that can improve your overall kitchen experience. The detachable head gives you more flexibility in cleaning dishes and filling large pots.
Additionally, the U-shaped design provides more space for washing and rinsing, making tackling tough dishes easier. Lastly, the removable feature simplifies replacing the faucet or taking it with you if you move. With so many advantages, it’s no wonder why the U-shaped bracket faucet is becoming a popular choice for homeowners looking to refresh their kitchen sinks.
Some Common Mistakes People Make When Trying to Remove Kitchen Faucet with U-Shaped Bracket
Removing a kitchen faucet can be a daunting task, especially when it comes to U-shaped brackets. Without proper knowledge and tools, it’s easy to make common mistakes that can make the process more difficult or even cause damage. One mistake people often make is not turning off the water supply to the faucet before starting the removal process.
Another mistake is using the wrong tools or improper technique, which can damage the brackets or even strip the screws. In addition, not properly supporting the weight of the faucet can lead to accidental dropping or damage to the sink. You can successfully remove your kitchen faucet with a U-shaped bracket by avoiding these common mistakes and following proper procedures.
Is It Safe to Use Pipe Wrenches when Trying to Remove My Kitchen Faucet with a U-shape bracket?
It’s important to use the right tools for the job when it comes to plumbing tasks. While a pipe wrench might seem like a good choice for removing a kitchen faucet with a U-shaped bracket, it’s not necessarily the safest option. Pipe wrenches are designed to grip and turn pipes, not delicate faucet components that could easily be damaged or scratched.

Additionally, applying too much force with a pipe wrench could accidentally damage your plumbing system or create leaks. It’s best to use a specialized plumbing tool or consult a professional plumber to avoid costly and time-consuming mistakes. Safety comes first, so always ensure you’re using the right tool for the job.
Can Plumbers Help Me in The Process of Removing My Kitchen Faucets with U-shape Brackets?
Kitchen faucets can be tricky to remove, especially if they have U-shaped brackets. But fear not because plumbers can definitely help you in the process. With their expertise and specialized tools, they can easily detach your old faucet and install a new one hassle-free.
Whether it’s a leaky faucet or a stylish upgrade you’re after, plumbers have got you covered. So why not leave the job to the professionals and have them handle the whole process from start to finish? Say goodbye to headaches and frustration, and hello to a shiny new kitchen faucet!
Special Maintenance Needed for U-shaped bracket Kitchen Faucets
Even though U-shaped bracket kitchen faucets are easy to remove and replace, they still need special care and maintenance. This is especially true if you live in an area with hard water or high mineral content. Regular cleaning and inspections can help keep your faucet functioning properly and looking great for years to come.
The U-shaped bracket should be checked periodically for any signs of rust or corrosion, and the faucet head should be wiped clean regularly with a damp cloth. For hard water deposits, you can use white vinegar to gently scrub them away without damaging the finish. Additionally, make sure to check for any loose screws or leaking seals, and replace any worn-out parts as needed. With these simple tips, you’ll be able to keep your U-shaped bracket kitchen faucet in tip-top shape!
Taking the time to maintain your kitchen faucet is well worth it – after all, taking care of your fixtures will help ensure that they last for years to come! Plus, keeping up with regular maintenance will save you time and money in the long run. So don’t wait any longer – start taking care of your U-shaped bracket kitchen faucet today!
Comparing Different Types of Kitchen Faucets
When it comes to the world of kitchen faucets, there are a plethora of choices available, each with its unique advantages and disadvantages. Let’s delve deep into comparing the pros and cons of different types of kitchen faucets, including U-shaped bracket faucets.
Standard Faucets:
The most common type, standard faucets, offer simplicity and reliability. They are easy to install and use. However, they tend to have limited functionality, providing just the basic features of water flow.
Pros:
- Reliable and straightforward to use.
- Easy to install and replace.
Cons:
- Limited functionality.
- Lower aesthetic appeal.
Pull-Down and Pull-Out Faucets:
Pull-down and pull-out faucets offer extended reach and flexibility, making it easier to fill large pots and clean each corner of the sink. However, their retractable hoses can wear out over time, necessitating replacements.
Pros:
- Greater reach and flexibility.
- Ideal for large sinks and pots.
Cons:
- Potential for wear and tear of retractable hoses.
- It can be more expensive to maintain.
U-Shaped Bracket Faucets:
Distinguished by their detachable heads and U-shaped design, these faucets provide more space and flexibility for washing and rinsing. However, special care and maintenance are required to prevent rust and corrosion.
Pros:
- Allows more flexibility in cleaning dishes.
- Provides more space for washing and rinsing.
Cons:
- Requires special maintenance to prevent rust and corrosion.
- It may be difficult to install and replace without professional help.
In conclusion, assessing your kitchen needs and preferences will guide you towards the best faucet type for your space.
The Environmental Impact of Choosing an Eco-Friendly U-Shaped Bracket Faucet
Opting for an eco-friendly U-shaped bracket faucet over traditional options can significantly contribute to environmental conservation. By incorporating features such as water-saving aerators and motion sensors, these faucets help reduce water consumption, leading to less strain on water resources.
Their design efficiency also minimizes energy usage in heating water, thereby reducing carbon emissions. Additionally, many eco-friendly faucets are made from sustainable or recycled materials, which further decreases their environmental footprint.
However, it is essential to ensure that these faucets are responsibly disposed of or recycled once they reach the end of their lifespan to prevent unnecessary waste. Overall, choosing an eco-friendly U-shaped bracket faucet is a small yet impactful step towards more sustainable living.
Conclusion
Removing a kitchen faucet can seem like a daunting task, especially if you have never done it before. However, with the right tools and a bit of patience, it is achievable.
By following the steps outlined in this blog post, you can easily remove a kitchen faucet with a U-shaped bracket. Remember to turn off the water supply, disconnect the water supply lines, remove the bracket, remove the faucet, and clean the area.
Good luck with your DIY project! Thanks for reading our post about how to remove kitchen faucet with U-shaped bracket.

