
Assembling a bunk bed can be a rewarding yet intricate task, demanding careful attention to detail and adherence to specific instructions. Whether you’re setting up a space-saving solution for siblings or optimizing a guest room for versatility, putting a bunk bed together requires a systematic approach. In this comprehensive guide, we will navigate the step-by-step process of how to put a bunk bed together.

From sorting out the components and understanding the provided instructions to utilizing the right tools for the job, this guide is designed to assist both beginners and DIY enthusiasts. Safety considerations, proper alignment of bed frames, and securing support structures will be covered to ensure a sturdy and reliable bunk bed construction. Whether you’re a parent setting up a shared bedroom or a homeowner maximizing space, mastering the art of putting a bunk bed together will guarantee a safe and functional sleeping arrangement.
Importance of Proper Bunk Bed Assembly
If you have purchased a bunk bed for your children or to save space in your home, it is essential to assemble it correctly before use. Improperly assembled bunk beds can be hazardous and lead to accidents such as falls, entrapment, and collapse.
In recent years, there has been an increase in the number of injuries caused by poorly assembled bunk beds. This is a concerning trend as bunk beds are commonly used by children, who are more vulnerable to accidents and injuries. According to the Consumer Product Safety Commission (CPSC), there were an estimated 32,000 bunk bed-related injuries treated in emergency rooms between 2008 and 2010.
One of the main reasons for these accidents is the use of incorrect or missing hardware during assembly. Bunk beds are designed to support the weight of two or more individuals, and any weak or missing hardware can lead to a collapse that can cause serious injuries.
Another factor contributing to accidents is improper placement of guardrails. Guardrails are essential for preventing falls from the top bunk, and they need to be installed correctly according to the manufacturer’s instructions.
10 Methods How to Put a Bunk Bed Together
1. Gather the Necessary Tools and Materials
The first step in putting together a bunk bed is to gather the necessary tools and materials. You will need an Allen wrench, a Phillips screwdriver, screws, bolts, washers, and other hardware that came with the bunk bed. You may also need a hammer and pliers to complete the job. Make sure you have all of these items before beginning the assembly process.

2. Read the Instructions Carefully
Before beginning to assemble your bunk bed, make sure to read through the instructions carefully. This will help ensure that you understand what steps are necessary for assembly and will reduce the risk of making mistakes during assembly. Pay special attention to any warnings or cautions included in the instructions as well.
3. Assemble the Bed Frame
The next step is to assemble the bed frame. Start by attaching the headboard and footboard to each side of the frame using screws or bolts provided with your bunk bed kit. Then attach each side rail to each side of the frame using more screws or bolts until all four sides are securely attached together.
4. Attach Mattress Support Slats
Once you have assembled the bed frame, it is time to attach mattress support slats so that your mattresses stay in place when sleeping on them. Depending on your model of bunk bed, you may need to use either screws or bolts for this step as well. Make sure that all slats are securely attached before moving on to the next step.
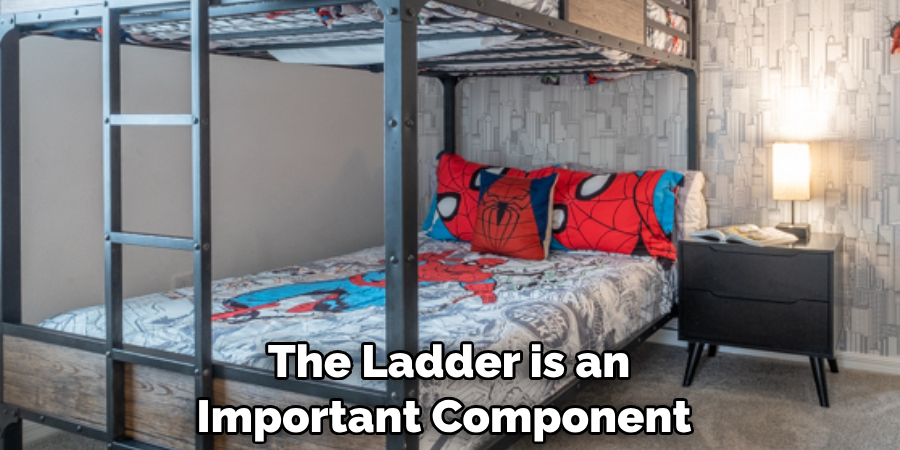
5. Attach Ladder
The ladder is an important component of a bunk bed as it provides access for someone getting into or out of their top bunk mattress safely without needing assistance from another person or object, like a chair or stool, which could be dangerous if used incorrectly. Depending on your model of a bunk bed, you may need either screws or bolts for this step as well, so make sure you have these ready before beginning assembly.
6. Secure Guardrails
Guardrails are essential components of a bunk bed as they provide additional safety for anyone sleeping on their top mattress by preventing them from rolling off while they sleep at night. Make sure that all guardrails are securely attached with either screws or bolts, depending on your model of a bunk bed, before moving on.
7. Connect Bunk Bed Together
Once all parts have been assembled separately, it is time to connect them together into one unit. Start by connecting each side rail to its corresponding end piece and then secure them with either screws or bolts, depending on your model. Finally, connect both ends together using more screws or bolts until everything is securely connected into one unit.
8. Install Mattress Supports
Mattress supports are essential components of a bunk bed as they provide extra support for mattresses so they don’t sag over time. Depending on your model, you may need either screws or bolts for this step, so make sure you have these ready before beginning installation. Once installed, check that all mattress supports are securely attached before moving onto the final steps.
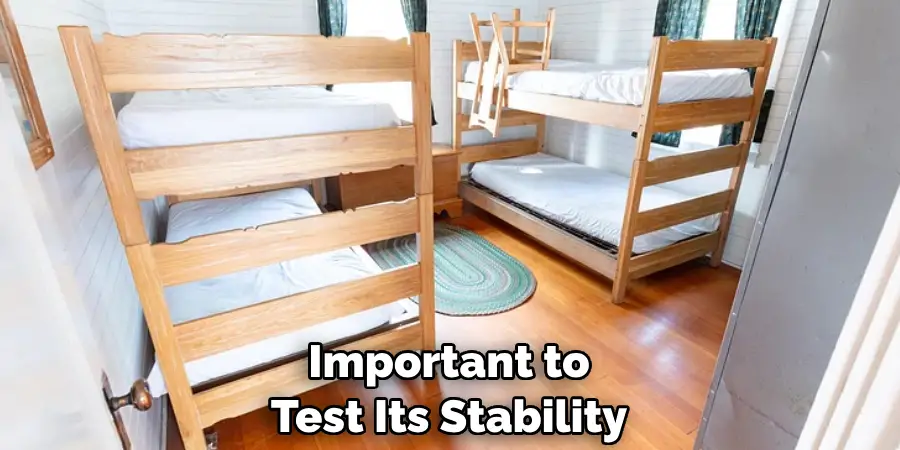
9. Test Stability
Once everything has been assembled, it’s important to test its stability by pushing down firmly on each corner and side rail several times just to make sure everything is secure. If anything feels loose, then tighten up any loose connections before proceeding further.
10. Add Final Touches
The last step in assembling your new bunk beds is adding any final touches, such as curtains, pillows, blankets, etc., so everyone can enjoy their new bedroom furniture! However, before you start decorating, it’s important to make sure that the bunk bed is fully assembled and securely in place. If your bunk bed comes with a ladder, double check that it’s properly attached and stable. Once everything is safe and secure, let your creativity run wild!
Things to Consider When Putting Together a Bunk Bed
When it comes to putting together a bunk bed, there are a few things that you should keep in mind. These considerations can help ensure the safety and stability of your bunk bed, as well as make the assembly process smoother.
Check All Parts and Instructions Before Starting
Before beginning to assemble your bunk bed, it’s important to check that you have all the necessary parts and tools. Make sure to read through the instructions carefully, as they will provide important information on how to properly assemble the bunk bed.
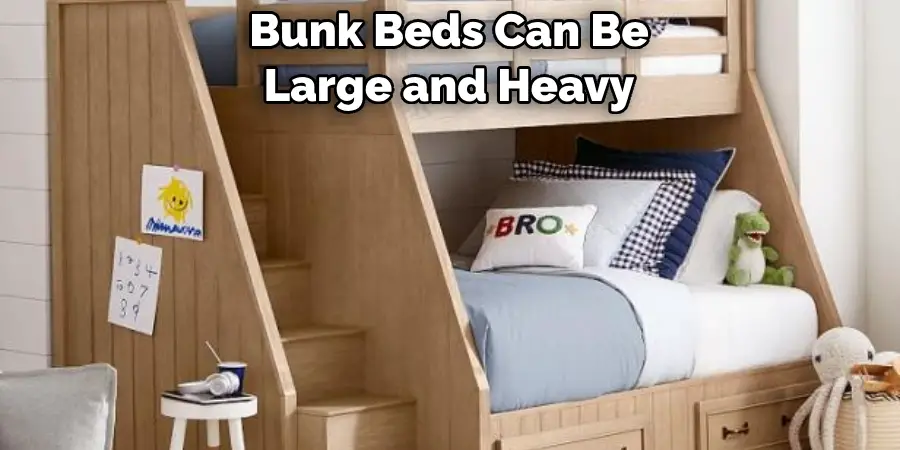
Have a Partner to Help
Bunk beds can be large and heavy, so it’s always a good idea to have someone there to assist with assembly. Having an extra pair of hands can make the process easier and safer.
Follow the Instructions Step by Step
It can be tempting to try and speed up the assembly process, but it’s important to follow the instructions step by step. Skipping steps or trying to assemble parts out of order can lead to an unstable and unsafe bunk bed.
Common Mistakes to Avoid when Assembling a Bunk Bed
While putting together a bunk bed may seem like a simple task, there are some common mistakes that can easily be made. These mistakes not only make the process more difficult and time consuming, but they can also compromise the safety of the bed. To ensure that your bunk bed is assembled correctly and safely, here are some common mistakes to avoid:
- Not reading the instructions carefully: Many people make the mistake of not thoroughly reading the assembly instructions that come with the bunk bed. This can result in missing important steps or using incorrect hardware, which can lead to an unstable and unsafe bed.
- Using incorrect tools: Another common mistake is using the wrong tools to assemble a bunk bed. This can cause damage to the bed or make it more difficult to put together. Make sure to have the necessary tools on hand, such as a screwdriver and allen wrench, before starting the assembly process.
- Not checking for damaged parts: Before assembling a bunk bed, always check all of the pieces and hardware for any damage or defects. If you notice any issues, contact the manufacturer immediately for replacements. Assembling a bed with damaged parts can compromise its stability and safety.
Conclusion
Congratulations, you have now successfully completed the task of putting your very own bunk bed together with ease. Not only did you save your hard-earned money by taking on this project, but you’ve also gained a valuable skill that can be used for various projects and tasks in the future. If you run into any issues during the assembly process or just need to brush up on your knowledge, refer back to this blog post and our helpful tips. Thanks to this article, there should no longer be any mystery behind how to put a bunk bed together. So go ahead and enjoy your new bed!