
To adjust a welded door hinge, use a hammer and screwdriver. With these tools, tap the hinge gently to fix the door’s alignment.
Welded door hinges may need adjustment to improve door alignment. This is common in older doors or those that undergo frequent use. Even with regular maintenance, the hinge may shift over time, leaving the door slightly crooked. This affects the door’s functionality and makes it difficult to close or lock properly.
Adjusting a welded door hinge is a simple diy task that requires a hammer and screwdriver. Gently tap the hinge to fix its alignment and improve the door’s function. This guide will show you how to adjust a welded door hinge in easy steps.

Understanding Welded Door Hinges
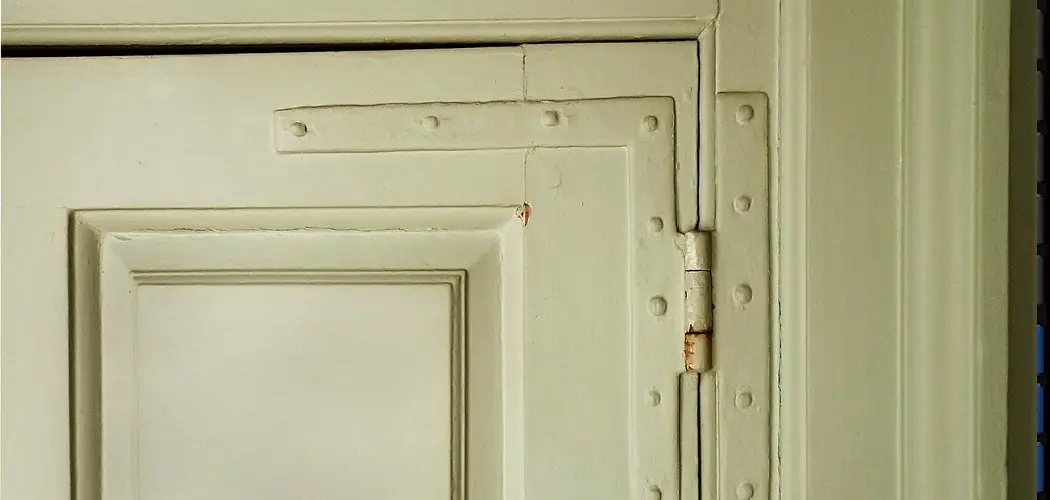
Welded door hinges are often used for heavy and industrial doors. They are connected to the door frame and the door leaf using welding methods such as spot welding, resistance welding, gas tungsten arc welding, and gas metal arc welding.
Unlike traditional hinges, welded hinges are not adjustable once they are fixed in place.
What Are Welded Door Hinges?
Welded door hinges are specifically designed to provide long-lasting support and security to heavy-duty doors. Unlike traditional hinges, they are connected to the door and the door frame using a welding process, which makes them a permanent fixture. Here are some key features of welded door hinges:
- They provide excellent security and stability to industrial doors
- They cannot be easily tampered with
- They are long-lasting with little to no maintenance
- They can withstand heavy loads and usage
Types Of Welded Door Hinges
Welded door hinges come in different types and sizes. The type of hinge installed on your door largely depends on the door’s weight and width. Here are the most common types of welded door hinges:
- Heavy-duty butt hinges: These hinges are suitable for industrial doors that weigh up to 1000 pounds. They are designed to withstand extreme pressure and wear and tear.
- Continuous (piano) hinges: Continuous hinges are often used for continuous architectural applications such as hospitals, schools, and banks. They are designed to run the length of the door and provide support and stability.
- Weld-on hinges: Weld-on hinges are an excellent option for doors that require maximum strength and security. They are ideal for doors that are difficult to secure, such as vaults or prison cells.
Common Problems With Welded Door Hinges
While welded door hinges are designed to provide long-lasting support and security, they can encounter some issues over time. Below are some common problems you may encounter:
- Weld failure: Over time, welding can wear off, and the hinges can become loose. This can cause the door to sag or break.
- Rust and corrosion: Welded door hinges are susceptible to rust and corrosion, leading to a shorter lifespan.
- Misalignment: Improper installation can cause misalignment of the hinge, leading to problems with the door’s opening and closing mechanisms.
Welded door hinges are excellent for industrial doors as they provide maximum support and security. Knowing the type of hinge suitable for your door and identifying any potential problems beforehand will help maintain the hinge’s longevity.
Tools And Materials Required
Welded door hinges are a popular fixture for both residential and commercial properties due to their durability. However, over time, they may require adjusting to ensure seamless performance. In this guide, we’ll explore everything you need to know about adjusting welded door hinges, starting with the tools and materials you’ll require.
Essential Tools And Materials
Adjusting your welded door hinges requires a handful of essential tools and materials. Some of the items you’ll need include:
- Safety goggles and gloves to protect yourself when handling tools
- A flat head screwdriver to turn the hinge adjustment screw
- An adjustable wrench to loosen or tighten the hex nuts on the hinge if present
- Lubricant to ensure smooth operation of the hinge after adjustment
Optional Tools That Can Be Useful
Apart from the essential tools, some optional tools can make the process a lot easier. These tools include:
- A pencil to mark the position of the hinge
- A level to ensure proper alignment of the hinge
- A power drill to drill new screw holes in case the existing ones are stripped or too large
By having these optional tools at hand, you’ll be able to adjust your welded door hinges with ease and precision.
Having the right tools and materials is crucial to the adjustment of your welded door hinges. Some of the essential tools you’ll require include a flat head screwdriver, adjustable wrench and lubricant, while optional tools such as a pencil, level, and power drill can come in handy.
With these tools, you can adjust your welded door hinges comfortably and efficiently.
Step-By-Step Guide On Welded Door Hinge Adjustment
Step 1: Check The Door And Hinge Alignment
Before adjusting the welded door hinge, it’s essential to check the door and hinge alignment. This step can help identify any potential issues that may be causing problems with the hinge. Here are the key points to follow in this step:
- Check whether the gap between the door and the frame is consistent along the top and sides of the door.
- Ensure the hinges are at the same level as each other.
- Verify that the hinge pins are fully seated in the hinge knuckles and not binding.
Step 2: Loosen The Hinge Screw
To adjust the hinge position, you first need to loosen the hinge screws. Here are the critical points to follow in this step:
- Use a screwdriver to loosen the screws that hold the hinge to the frame.
- Make sure to loosen the screws enough to allow the hinge to move, but not so much that the hinge detaches from the frame.
- Remove only one screw at a time to avoid damaging the door frame or hinge.
Step 3: Adjust The Hinge Position
Now that you’ve loosened the screws, it’s time to adjust the position of the hinge. Here are some key points to follow in this step:
- Move the hinge up or down, depending on whether the door needs to be raised or lowered.
- Check the gap between the door and frame frequently as you adjust the hinge’s position.
- Use shims if necessary to ensure the gap between the door and frame is correct.
Step 4: Tighten The Hinge Screws Carefully
After adjusting the hinge’s position, it’s time to tighten the screws. Here are the key points to follow in this step:
- Start by replacing the screw you removed in step 2, making sure to align the hinge correctly.
- Use your screwdriver to tighten the screw until it’s snug, making sure not to overtighten.
- Repeat the process for all the other screws.
Step 5: Give The Door A Final Check
Once you’ve tightened all the screws, it’s time to check the door’s alignment one last time. Here are the key points to follow in this step:
- Check the gap between the door and frame to ensure it’s consistent along the top and sides of the door.
- Open and close the door several times to ensure it swings smoothly.
- If necessary, adjust the hinge position again until the door swings smoothly and shuts correctly.
These steps should help you adjust a welded door hinge easily. Remember to be patient, take your time, and not force anything. With a little effort, you can fix a door that doesn’t close properly and save yourself the cost of hiring a professional.
Tips And Tricks For Welded Door Hinge Adjustment
Expert Tips For Perfectly Adjusting Your Welded Door Hinge
Adjusting a welded door hinge can be a daunting task, but it is essential to ensure that your door swings smoothly. Here are some expert tips to help you adjust your welded door hinge like a pro.
- Use the right tools: Make sure you have the right tools, such as a hammer, screwdriver, and pliers.
- Tighten the screws: Tighten or loosen the screws on the hinge to adjust the door’s height, width, or depth.
- Check the gaps: Ensure that the gaps between the door and the frame are equal on all sides.
- Test the door: Test the door’s movement by opening and closing it to ensure it swings smoothly.
- Use lubrication: Use a lubricant such as wd-40 to ensure the door’s smooth movement.
Common Mistakes To Avoid While Adjusting
When adjusting a welded door hinge, it is essential to avoid common mistakes that could damage the hinge or the door. Here are some mistakes to avoid.
- Over-tightening the screws: Over-tightening the screws could strip them and cause the door to become misaligned.
- Failing to check the gaps: Failing to check the gaps could cause the door to bind or rub against the frame, causing damage.
- Not testing the door’s movement: Not testing the door’s movement could result in a door that does not swing smoothly.
- Using the wrong tools: Using the wrong tools could damage the hinge or the door.
Troubleshooting And Quick Fixes
Even if you follow all the expert tips and avoid common mistakes, you may still encounter problems when adjusting your welded door hinge. Here are some troubleshooting tips to help you.
- Check for loose screws: If the door is still not swinging correctly after adjustment, check for loose screws and tighten them as needed.
- Check the hinge pins: If the hinge pins are loose or damaged, replace them.
- Check the hinge itself: If the hinge is damaged or bent, replace it.
- Adjust the stopper: If the door is not staying open or closed, adjust the stopper to ensure proper alignment.
Adjusting a welded door hinge may seem intimidating, but with the right tools, tips, and troubleshooting techniques, it can be a breeze. Keep these tips in mind to perfectly adjust your welded door hinge every time.
Frequently Asked Questions On How To Adjust Welded Door Hinge
How Do I Know If My Welded Door Hinge Needs To Be Adjusted?
You will notice the door is not closing smoothly, or there are gaps between the door and the frame. Another indicator is difficulty in turning the handle or latch, or the door sagging or rubbing on the frame.
What Tools Do I Need To Adjust My Welded Door Hinge?
You will need a power drill, a drill bit, a screwdriver, a hammer, a chisel, a ruler, a pencil, and a level.
Can I Adjust My Welded Door Hinge If It Has Been Painted Over?
Yes. You will need to score the painted area where the screws are, then gently tap the chisel along the painted line. This will expose the screw head, allowing you to adjust the hinge.
Can I Adjust All Hinges On My Door At Once?
No, it is recommended to adjust one hinge at a time. This will prevent misalignment of the door which can cause additional problems.
How Do I Adjust My Welded Door Hinge If It Is Loose?
If the hinge is loose, you should tighten the screws. If they are stripped, you will need to remove them, fill the holes with wood or a filler, and re-drill new pilot holes before screwing them back in.
Is It Necessary To Call A Professional To Adjust My Welded Door Hinge?
No, as long as you have the necessary tools and follow the instructions carefully, you can adjust your welded door hinge yourself. However, if you are uncomfortable doing so, it is recommended to call a professional for assistance.
Conclusion
Fixing a welded door hinge may seem like an intimidating task, but with the right tools and approach, it can be done without any professional help. We have discussed the steps and tools required to adjust the welded door hinge yourself, which are easy to follow and effective.
You need to focus on checking the hinge pins, detaching the door hinge, adjusting or replacing the hinge pins, and reattaching the hinge to the frame of the door. Make sure to tighten loose screws and lubricate the hinges to prevent any future problems.
By following the steps outlined in this article, you can save yourself the cost of hiring a professional to do the job. With a little patience and practice, adjusting welded door hinges will become something you can handle with confidence.