
curtains together seems like such a simple task, yet it often leads to frustration for many homeowners. When first confronting double curtains on a single rod, it’s easy to feel overwhelmed by all the options and potential pitfalls.
But having two sets of curtains hanging gracefully need not be so difficult. In this post, I’ll break down the process step-by-step and share my best tricks for making dual curtains work beautifully.
Whether you’re hoping to create symmetry in a large window or want extra insulation from two layers of fabric, the right approach can have two curtains dancing in tandem on one rod. Let’s get started to learn more about how to paint large flowers on a wall.
Can You Paint Large Flowers on Your Wall?
Are you wondering if you can paint large flowers on your wall? The answer is a resounding ‘yes.’ Painting large flowers on your wall is a creative and achievable project that allows you to bring a touch of nature and artistry into your living space. Whether you’re an experienced artist or a beginner, with the right supplies and techniques, you can transform a dull wall into a vibrant masterpiece that will leave a lasting impression on anyone who enters your room. So, unleash your artistic potential and explore the world of floral murals to make your space truly unique and beautiful.
Planning and Preparation
Choosing Your Flowers
Selecting the right flower design is key to creating a mural that resonates with your style and complements your room. First, consider the complexity of the design. As a beginner, simpler flower designs with few petals and uncomplicated shapes like sunflowers or daisies may be easier to tackle. If you’re more experienced, intricate designs like roses or orchids could provide an interesting challenge. Your choice of color palette should harmonize with your room’s existing color scheme. Think about whether a vibrant, multicolored display or a monochromatic approach best suits your space. Websites like Pinterest and Instagram, or even a simple Google Image search can provide a wealth of floral inspiration. For flower templates, check out mural stencil providers or design software like Adobe Illustrator.
Wall Selection and Prep
The ideal wall for painting is smooth, primed drywall. Before you begin painting, ensure the wall is clean and free from dust or grime, which could affect paint adhesion. Patch any holes or cracks with wall filler, then sand smooth once dry. For best results, apply a base coat of white or neutral paint. This prepares the wall surface, making your colors stand out and providing a consistent background.
Scaling and Sketching
Transferring your flower design to the wall is a crucial step in the process. If precision is paramount, consider using a projector to display your design directly on the wall. Alternatively, employ the grid method: Draw a grid on your reference image, then replicate it on your wall, ensuring each square on the wall is proportionate to the reference grid. Sketch the design into the corresponding squares. For a more organic, less structured look, try freehand sketching. Remember, the scale of your flower design should complement the size of your wall and the room’s overall proportions.
Transforming Your Space: A Step-by-Step Guide to Painting Large Flowers on Your Wall
1. Gathering Your Essentials
Before embarking on your artistic journey, it’s vital to assemble the necessary supplies. Here’s a checklist of what you’ll require:
- Canvas: Your wall serves as your canvas, so opt for a clean, smooth surface.
- Paint: Acrylic paints are ideal for wall murals due to their durability and vibrant color palette.
- Brushes: Invest in an array of brush sizes for intricate detailing.
- Palette: A palette facilitates effective color mixing and blending.
- Water and Cloth: Keep these at hand for brush and surface cleaning.
- Sketch or Stencil: Decide whether to freehand your design or employ a stencil for precision.
- Easel: If you prefer not to paint directly on the wall, an easel is a valuable alternative.
2. Selecting Your Floral Design
Now comes the enjoyable part – selecting the floral design that will grace your mural. Consider your personal preferences and the ambiance of the room. Some popular options include:
- Sunflowers: Radiate positivity and warmth.
- Roses: Symbolize love and elegance.
- Tulips: Bring a touch of spring into your space.
- Lilies: Exude purity and sophistication.
3. Preparing the Wall Canvas
Before you commence painting, ensure your wall is meticulously prepared:
- Clean the Surface: Rid it of dust and dirt with a damp cloth.
- Prime the Wall: Apply a primer to enhance paint adhesion and create a smooth surface.
- Mark the Center: Use a pencil to mark the mural’s central point.
4. Mastering the Art of Color Blending
Crafting the perfect shades for your flowers is pivotal. Experiment with blending diverse colors to achieve your desired effect. Remember, nature is a tapestry of diversity, and your mural can echo that splendid variety.
5. Outlining Your Floral Elegance
If you possess confidence in your drawing skills, sketch the flower outlines directly onto the wall using a pencil. However, if precision is paramount, opt for a stencil.
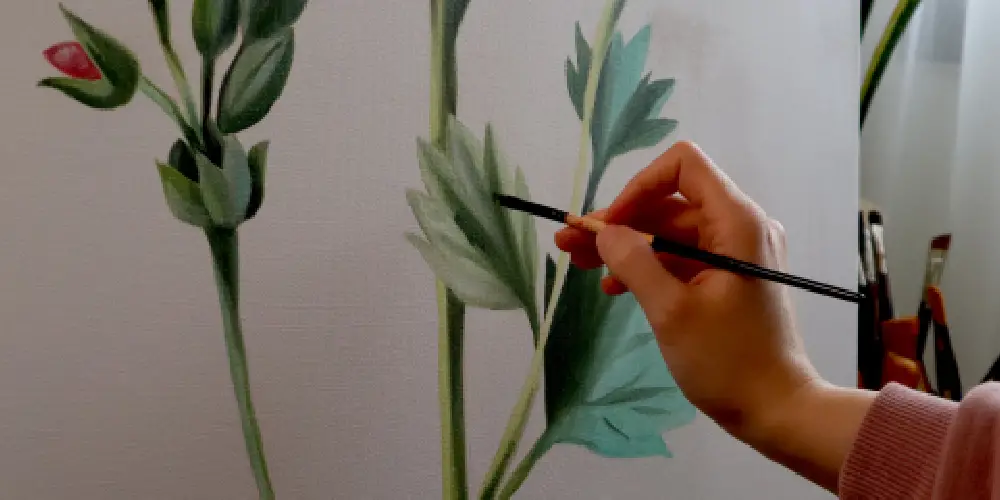
6. The Art of Flower Painting
Commence by filling in the petals with the base color. Then, infuse depth and realism by adding shadows and highlights. This phase requires patience and attention to detail.
7. Infusing Life with Delicate Details
To make your mural truly enchanting, incorporate details like leaves, stems, and even tiny insects, should you desire. These intricacies will breathe life into your mural, granting it a lifelike quality.
8. Creating Depth and Texture
Leverage blending techniques to craft seamless transitions between colors. For a three-dimensional effect, consider adding texture to your flowers using a dry brush or sponge.
9. Perfecting Your Masterpiece
Step back and appraise your mural. Make necessary adjustments, touch up any imperfections, and ensure the overall composition is harmonious.
Finishing Touches and Beyond
Bringing it to Life: Adding Foliage, Stems, and More
To fully capture the beauty of nature, don’t stop at flowers. Incorporating foliage, stems, and other elements can drastically enhance your mural. Select complementary shades of green for leaves and stems to establish a realistic touch. Also, consider the placement of these details; they should balance the composition and fill negative space appropriately but not overwhelm the flowers. Careful spacing and balance are key to a captivating mural.
Sealing and Protecting Your Work
Once your mural is complete, protect it against wear and tear by applying a suitable varnish. This will ensure its longevity, preserving the vibrant colors and intricate details. An acrylic varnish is a good option as it’s available in different finishes (gloss, satin, or matte), allowing you to choose based on your aesthetic preferences. To apply, ensure your mural is completely dry, then use a large, soft brush to apply the varnish evenly, moving in one direction to avoid brush marks.
Troubleshooting and Repairs
Mistakes are part of the process. Smudges, uneven lines, and color bleeding can happen, but these can be rectified. For smudges, wait for the paint to dry, then gently remove the smudge with a damp cloth. Uneven lines can be corrected using a small brush and the wall’s base color to subtly “erase” the errors. To prevent color bleeding, allow each layer of paint to dry thoroughly before applying the next.
Styling and Presentation: Harmonizing Your Décor
Once you’ve added the final touches to your mural, consider how it integrates with your overall room décor. Choose furniture and artwork that complement the colors and style of your mural. For instance, a couch in a color pulled from the mural can create a cohesive look. Lighting, too, is crucial – a well-placed spotlight can illuminate your work and create an inviting atmosphere. Remember, your mural is the room’s centerpiece, so the surrounding elements should enhance, not overshadow it.
Incorporating Multiple Types of Flowers
Beyond a Single Species
While a mural showcasing one type of flower can be stunning, incorporating multiple species can create an even more striking and diverse display. Consider pairing complementary colors or contrasting shades to add depth and interest. You can use the same techniques as before – blending colors, adding texture, and careful placement of foliage and stems – to create a cohesive yet varied look.
Symbolism and Meaning
Certain flowers hold specific meanings and symbolism, so incorporating these into your mural can add layers of depth and significance to your artwork. For example, a rose often represents love and passion, while a sunflower is associated with happiness and vitality. Do some research on the meaning behind different flowers to guide your choices or use them strategically to convey a particular message or emotion through your mural.
The Possibilities are Endless
Experiment and Explore
Now that you’ve learned the basics of creating a floral mural, don’t be afraid to experiment and push the boundaries. You can try different techniques like using a palette knife for texture or incorporating other mediums like watercolors or pastels for a unique look. You can also expand beyond flowers and incorporate other elements like birds, butterflies, or landscapes to create a truly one-of-a-kind masterpiece. Let your creativity run wild and see where it takes you!
Sharing Your Art
Lastly, don’t forget to share your beautiful creation with others. Whether it’s through social media, hosting an art show, or simply inviting friends over to admire your work, showcasing your mural can bring joy and inspiration to others. Who knows, your floral masterpiece may even inspire someone else to create their own! Remember, art is meant to be shared and appreciated. Keep creating and sharing your unique talents with the world. The possibilities are endless.
Maintenance and Longevity Tips for Your Mural
Keeping Your Mural Looking Fresh
To ensure your mural remains a stunning centerpiece for years to come, it’s essential to take proper care of it. Avoid exposing it to direct sunlight, as UV rays can cause fading over time. Regularly dusting and gently wiping down your mural with a soft cloth can also help maintain its vibrancy. If you notice any damage or wear and tear, address it promptly to prevent further deterioration.
Making Repairs
Over time, your mural may require touch-ups or repairs due to normal wear and tear. If you need to fix any smudges or uneven lines, simply follow the same techniques mentioned earlier – gently removing smudges with a damp cloth or using a small brush and base color to correct errors. If areas of the mural have faded, you can use acrylic paints to touch up the colors and revitalize your work.
Frequently Asked Questions (FAQs)
Can I Create Large Flower Murals on Any Type of Wall Surface?
While it’s technically possible to paint large flower murals on various wall surfaces, it’s highly recommended to choose a clean, smooth wall for the most optimal results. Smooth surfaces provide a better canvas for intricate details and smoother paint application, ensuring that your mural turns out as stunning as you envision.
Do I Need to Be an Experienced Artist to Paint a Mural?
No, prior experience as an artist is not a prerequisite for mural painting. With patience and practice, anyone can embark on this creative journey. Additionally, for those seeking precision and ease, stencils are a valuable tool to assist in creating intricate and professional-looking designs, making mural painting accessible to individuals of all skill levels.
What’s the Typical Timeframe for Completing a Floral Wall Mural?
The time required to complete a floral wall mural varies depending on the size and complexity of your chosen design. For smaller and less intricate designs, it may take only a few hours or a single day. However, more elaborate and larger murals can take several days to complete. The key is to allow ample time for each phase of the process, from preparation and outlining to painting and detailing, to ensure a satisfactory outcome.
Is It Possible to Repaint the Wall if I’m Unsatisfied with The Mural?
Absolutely, one of the advantages of mural painting is its flexibility. If you ever become dissatisfied with your mural, you can easily repaint the wall with a fresh coat of paint. This provides you with the opportunity to redesign or update your wall art to better suit your evolving tastes and preferences.
How Can I Safeguard My Mural from Fading or Damage?
To ensure the long-lasting beauty of your mural, it’s important to take precautions against fading and damage. Protect the mural from direct sunlight, as prolonged exposure can cause colors to fade over time. Additionally, moisture can be detrimental, so avoid placing the mural in areas prone to high humidity or condensation. To provide an extra layer of protection, consider applying a clear sealant to the mural, which can help safeguard it against environmental factors and preserve its vibrancy for years to come.
Where Can I Find Inspiration for My Floral Mural Design?
Finding inspiration for your floral mural design can be a delightful part of the creative process. Explore art books, both classic and contemporary, to discover various artistic styles and techniques. Online galleries and social media platforms often feature a wealth of mural artwork that can spark your imagination. Additionally, nature itself, with its endless array of flora and fauna, can serve as an abundant source of inspiration. Take a leisurely stroll in your garden or a local park to observe the intricate beauty of flowers and plants, and you may find the perfect muse for your mural.
Conclusion
Painting large flowers on a wall is a gratifying and creative endeavor that can instantly metamorphose any room. Armed with the right supplies, techniques, and a touch of artistic flair, you can birth a captivating floral mural that will reign as the centerpiece of your living space. So, seize your brushes, let your creativity unfurl, and transform your wall into a masterpiece of artistry.