
Are you tired of posters falling off your walls every time someone slams the door? Do you love wall decals but find that they just won’t stick no matter what you try? Look no further! In this blog post, we will provide expert advice on how to make wall decals stick for good.
Our tips and tricks are tried-and-true methods used by experienced decorators and DIYers alike. With our approach, those pesky wall decals will be secure and calming in their place so that you can enjoy an aesthetically pleasing space without any worry of them coming loose or peeling away. Get ready to up your decoration game with long-lasting results – let’s get started!
Understanding Wall Decals and Their Adhesives
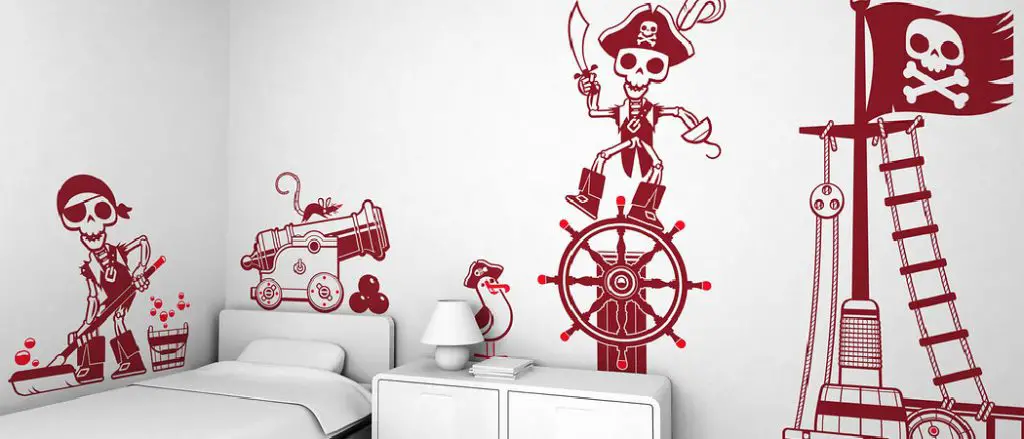
There is a wide variety of wall decals to choose from, each with its unique properties and adhesive techniques. Among the most popular types are vinyl, fabric, and paper decals.
Vinyl decals are known for their durability, glossy finish, and resistance to elements. They come with a range of adhesive options, including permanent and repositionable. Fabric decals, on the other hand, are more flexible and less likely to rip, making them ideal for the ones who value reusability. Lastly, paper decals, although less durable, provide an affordable option with easy application.
The adhesives used in wall decals vary as well. Permanent adhesives are meant for long-term applications, offering a strong bond unlikely to come off unless removed intentionally. Temporary adhesives provide a light bond and are easy to remove without leaving residue. Repositionable adhesives strike a balance between the two, allowing decals to be moved and adjusted without losing their stickiness.
Several factors influence the adhesion of wall decals. The type of wall surface plays a crucial role – smoother surfaces like glass or metal allow better adhesion than porous surfaces like brick or wood. Humidity levels can also affect adhesion; high humidity may weaken the adhesive. Meanwhile, temperature extremes can cause the adhesive to harden (in cold conditions) or soften (in hot conditions), both of which can reduce its effectiveness. Understanding these factors can help you make the most out of your wall decals.
Preparing the Wall Surface for Wall Decals
Cleaning
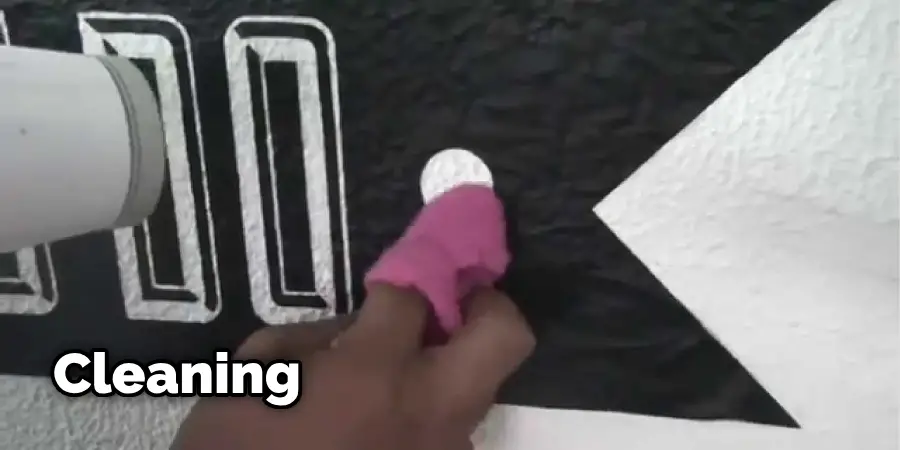
Before applying any wall decal, it is crucial to prep the surface by cleaning it thoroughly. Any dirt, dust, or residue on the wall can prevent the adhesive from sticking properly and cause your decals to fall off. Use a mild soap and water solution or rubbing alcohol to wipe down the wall and remove any impurities.
Drying
Once you have cleaned the wall, allow it to dry completely before applying your decals. You can use a clean cloth or paper towel to speed up the process and ensure that no moisture is left on the surface.
Smoothing
For smoother surfaces like glass or metal, simply wiping down with a dry cloth may be enough. However, for slightly rougher surfaces like painted walls, using a squeegee or a credit card to smooth out any bubbles or wrinkles can make all the difference in ensuring proper adhesion.
Applying Wall Decals Like a Pro: How to Make Wall Decals Stick
After preparing your wall and understanding the type of decal and adhesive you are working with, it’s time for the main event – applying your decals!
Step 1: Plan Your Design
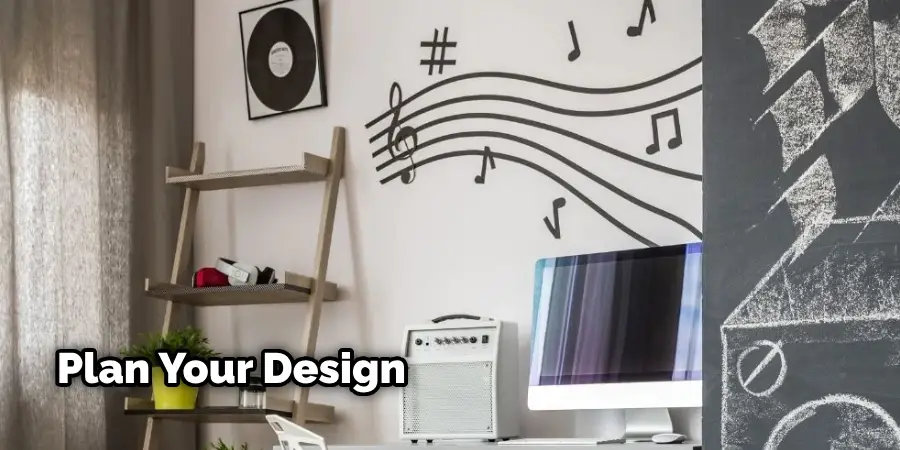
Before peeling off any backing, it’s essential to plan out your design and placement of the decals on the wall. This will help ensure that you achieve the desired result and avoid any mistakes.
Step 2: Remove Backing
Carefully peel off the backing from your decal, making sure not to touch the adhesive with your fingers. Avoid removing the whole backing at once – instead, peel a small section at a time to prevent it from sticking to itself.
Step 3: Apply Decal
Carefully place the decal on the wall, starting from one edge and smoothing out any air bubbles as you go. If you need to reposition or adjust the decal, do so gently to avoid damaging the adhesive.
Step 4: Press and Smooth
Using a squeegee or credit card, firmly press the decal onto the wall, starting from the center and working your way outwards. This will help remove any air bubbles and ensure proper adhesion.
Step 5: Allow to Settle
For best results, allow newly applied decals to settle for at least 24 hours before touching or moving them. This will give the adhesive enough time to bond with the wall surface and ensure long-lasting stickiness.
6 Additional Tips for Long-Lasting Wall Decals
1. Avoid Applying Decals Over Painted Surfaces
Paint may not bond well with the adhesive on decals, causing them to come off easily. If you must apply a decal over paint, make sure it is completely dry and cured before doing so.
2. Do Not Apply Decals Near Heat Sources
Placing wall decals near heat sources like radiators or fireplaces can cause the adhesive to melt and lose its stickiness. This may result in your decals peeling off or falling off completely.
3. Clean with Care
When cleaning your wall decals, avoid using harsh chemicals or abrasive materials. These can damage the decal and reduce its adhesion.
4. Avoid Direct Sunlight
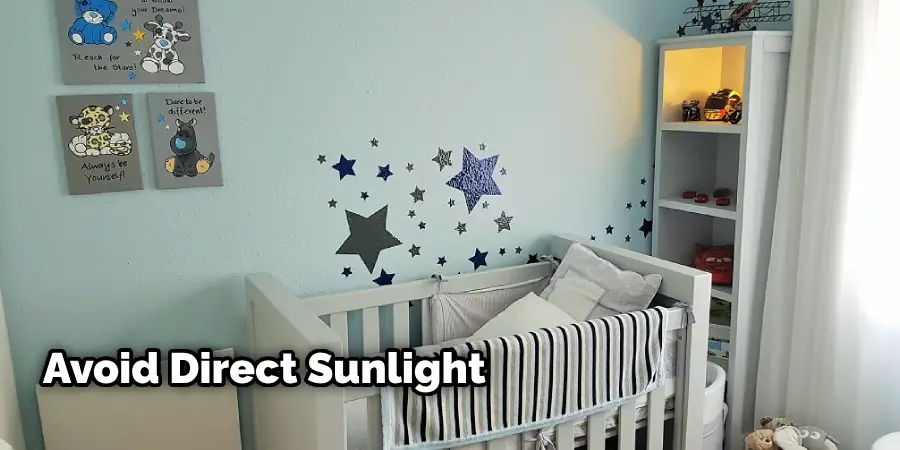
Direct sunlight can fade the colors of some wall decals, causing them to look dull and lose their aesthetic appeal. To prevent this, avoid placing decals in areas that receive direct sunlight for extended periods.
5. Remove Decals with Heat
If you need to remove a decal from the wall, using a hairdryer to warm up the adhesive can make it easier to peel off. However, be careful not to overheat the decal as it may damage the surface underneath.
6. Store Decals Properly
If you need to store decals for future use, make sure to keep them in a cool, dry place away from direct sunlight. This will prevent any changes in temperature or humidity from affecting the adhesive and prolong its lifespan.
If you enjoyed the tips above, you’ll love our in-depth article, “How to Keep Stickers from Peeling Off Wall.” This comprehensive guide provides a step-by-step process for keeping your wall decals looking their best and lasting for years to come.
How to Avoid Common Mistakes When Applying Wall Decals
Even with proper preparation and application, mistakes can still happen during the decal process. Here are some common mistakes to watch out for and how to avoid them:
1. Not Prepping the Surface Properly
As mentioned earlier, a clean and dry wall surface is crucial for proper adhesion. Skipping this step may result in your decals not sticking or falling off.
2. Applying Decals on Uneven Surfaces
Uneven surfaces like textured walls can make it challenging to apply decals smoothly and may cause them to peel off. Make sure the surface is smooth before applying any decals.
3. Not Using Proper Tools for Application
Using a squeegee or credit card helps smooth out bubbles and wrinkles, ensuring proper adhesion. Not using these tools may result in air pockets forming under the decal and causing it to come off.
4. Not Giving Decals Enough Time to Settle
Allowing decals to settle for at least 24 hours before touching or moving them is crucial. Not giving them enough time can result in them not adhering properly and falling off.
5. Applying Decals on Freshly Painted Walls
Paint needs time to dry and cure completely before applying decals on top. Applying them too soon may cause the adhesive to react with the paint and damage both the decal and the wall surface.
Frequently Asked Questions
Q1: Can I apply a decal to a freshly painted wall?
Answer: It’s not recommended. Paint needs time to dry and cure completely before applying decals. If you apply them too soon, the adhesive might react with the paint, damaging both the decal and the wall surface. Always wait at least three weeks after painting before applying decals.
Q2: Can I reuse my wall decal after removing it from the wall?
Answer: Most wall decals are designed for one-time use and may not stick as well when reapplied. However, some higher-quality decals are reusable. Check the product details or contact the manufacturer for specific information about your decal.
Q3: Can wall decals damage my wall?
Answer: When applied and removed properly, decals should not damage your wall. However, peeling them off quickly or without heating might pull off some paint or leave a residue.
Q4: How can I remove air bubbles after the decal application?
Answer: You can use a squeegee or credit card to smooth out air bubbles by pressing outward from the center of the decal. If that doesn’t work, try pricking small holes in the bubble with a pin and smoothing it out.
Tips on Maintaining and Removing Wall Decals
Maintaining Wall Decals
To maintain the longevity of your wall decals, avoid touching or picking at them. Regularly dusting the surface can also help keep them looking clean and fresh.
Removing Wall Decals
When it’s time to remove your decals, do so gently by peeling off slowly from one edge. If any residue is left behind, use a mild adhesive remover to clean the area. Avoid using harsh chemicals as they may damage the wall surface.
Advanced Tips and Tricks for Extra Stickiness
To ensure that your wall decals stick better and last longer, consider employing these advanced tips and tricks:
Reactivating Adhesive
Over time, the adhesive on your decals may lose its stickiness. However, you can reactivate the adhesive using a gentle heat gun or an adhesive reactivator product. Carefully apply heat or spray the reactivator onto the adhesive side, then press the decal back onto the wall. Remember to handle the decal with care to avoid damaging it.
Pre-Warming the Wall
Before applying your wall decals, consider pre-warming the wall slightly using a hairdryer. This can help the adhesive bond better with the wall surface, especially in cooler environments. However, ensure the wall is not too hot to avoid melting the adhesive.
Adding a Clear Coat (Optional)
For added durability and protection, you may consider adding a clear coat over your applied decals. This can help guard against physical wear and tear, sunlight exposure, and moisture. However, always ensure the clear coat is compatible with your decal to avoid any adverse reactions.
Long-Term Maintenance
For long-lasting, vibrant decals, regular cleaning and care are essential. Use a soft, damp cloth to gently wipe away any dust or dirt on the decal surface. Avoid using harsh cleaning agents that may damage the decal or its adhesive. Remember, well-maintained decals not only look better but also stick around for longer.
Safety Precautions and Considerations
When to Seek Professional Help
If you’re unsure about applying decals yourself or encounter any issues during the process, consider seeking professional help. They have the expertise and tools necessary to ensure proper application and save you from potential headaches.
Safety for Children and Pets
Wall decals may pose a choking hazard for small children and pets. Ensure they are applied out of reach or use child-safe decals. Also, avoid placing decals near cribs, beds, or other areas where children or pets may sleep.
Consider the Material of Your Wall
Different wall surfaces require different types of adhesives. Make sure to check the material of your walls and choose a decal with a suitable adhesive for better adhesion and longevity.
Now that you know how to apply and maintain your wall decals properly, it’s time to get creative and add some personality to your walls! Remember to always handle with care and follow the tips provided for long-lasting, beautiful decals.
Where to Find High-Quality Wall Decals
Online Retailers
There are many online retailers that offer a wide variety of wall decals in different sizes, designs, and materials. Some popular options include Etsy, Amazon, and Society6.
Local Home Decor Stores
You can also find wall decals at local home decor or craft stores. This allows you to see the decals in person before making a purchase and support small businesses in your community.
DIY Wall Decals: Can You Make Your Own?
Materials Needed
- Clear adhesive film or paper
- Printer and ink
- Scissors or cutting machine
- Design software (e.g., Adobe Illustrator)
Step-by-Step Guide
- Choose a design or create your own using design software.
- Print the design onto clear adhesive film or paper.
- Cut out the decal using scissors or a cutting machine.
- Peel off the backing and carefully apply the decal onto your wall surface.
- Smooth out any bubbles or wrinkles using a squeegee or credit card.
- Allow the decal to settle for at least 24 hours before handling.
Please note that homemade decals may not have the same durability and longevity as professionally-made ones. Use caution when making and applying your own decals. Whether you choose to purchase or make your own wall decals, they are an easy and affordable way to add a personal touch to any room.
Conclusion
By following these steps and tips, you can ensure proper adhesion and longevity of your wall decals. With a little bit of patience and careful planning, you can easily transform any room with beautiful and unique designs using wall decals.
So go ahead, get creative, and have fun decorating your walls! So why wait? Get started on your wall decal project today and see the amazing results for yourself! Thanks for reading this article about how to make wall decals stick. Happy decorating!