
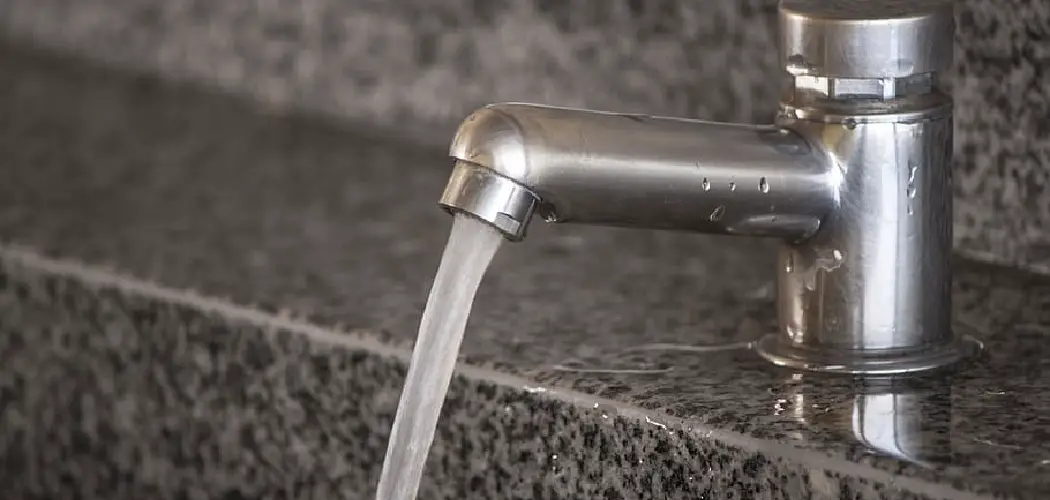
Having clean, filtered water at your kitchen sink is convenient and can provide health benefits over unfiltered tap water. However, many pull-out faucets were not designed with integrated filter systems in mind, making after-market installation more complicated.
In this post, I’ll break down the step-by-step process for installing a water filtration system on your pull-out kitchen faucet in a way that is simple, quick, and hassle-free. By following the guidance here, you’ll soon be enjoying crisp, clean filtered water with every pull of the faucet, all while protecting your family from contaminants in your water supply.
Installing a filter may seem intimidating, but with the right parts, simple tools, and this detailed guide, anyone can complete the job successfully. Let’s get started to learn more about how to install water filter on pull-out faucet.

Understanding Pull-Out Faucets and Different Filter Systems
Pull-out faucets come in different types, and understanding these types is key to choosing the right water filter system. The two common types are the spray head and swivel spout faucets.
The spray head faucet has a spray head that can be pulled out for better reach and flexibility, making it suitable for larger sinks.
The swivel spout faucet, on the other hand, has a spout that can swivel from side to side, offering more control over water direction.
When it comes to water filter systems for pull-out faucets, we primarily have two options: countertop systems and built-in systems.
Countertop systems sit on your counter and do not require any complex installation. They are generally cheaper and easier to maintain as you can easily change the filter cartridges yourself. However, they take up counter space and may not align with the aesthetics of your kitchen.
Built-in systems, on the other hand, are installed directly onto your pull-out faucet. They are generally more expensive, require professional installation, and offer a higher filtration level. However, they do not take up any counter space and seamlessly blend with your kitchen decor.
In conclusion, your choice between a countertop or a built-in system will depend on your budget, space constraints, and desired level of filtration. If you have limited counter space or want a higher filtration level, a built-in system may be your best bet. However, if you’re on a budget and are comfortable with a moderate filtration level, a countertop system would be a good choice.
Safety Precautions and Workspace Preparation
Safety Precautions
Before starting the installation process, it is important to take some safety precautions. Firstly, make sure to shut off the water supply to your pull-out faucet before installing the filter. This will prevent any accidental leaks or damage.
Also, ensure that you have all necessary tools and materials on hand to avoid leaving your workspace during the installation. This not only saves time but also prevents any potential accidents or mishaps.
Workspace Preparation
To make the installation process smoother and more efficient, it is important to prepare your workspace beforehand. Clear off any items from the counter around your pull-out faucet to create more space. Lay down a towel or mat to protect your countertop from any scratches or spills.
Also, make sure that the lighting in your workspace is adequate for working with small parts and tools. If needed, use a flashlight or work lamp to improve visibility.
Needed Materials
Given below are the materials that you will need to install a water filter on your pull-out faucet:
- Mounting Brackets
- Water Filter
- Filter Cartridges
- Wrench
- Pliers
- Screwdriver and Screws
12 Step-by-step Instructions on How to Install Water Filter on Pull-Out Faucet
Step 1: Gather the Necessary Materials
Before you begin installing the water filter, make sure that all of your materials are within reach. This will save you time and ensure that you don’t have to break your concentration while in the middle of the project. But don’t start the process without checking that you have all of the necessary components.
Step 2: Place Mounting Brackets
Before you can begin installing your water filter, you must first set up the brackets that will hold it in place. Measure two spots on the top of your faucet and make sure they are level with one another. Then, use a drill to attach the mounting brackets through each hole. Make sure the screws are securely tightened. This will ensure that the filter won’t move or rattle once it’s installed.

Step 3: Connect Hoses
Connect one side of your hose to the bottom of the filter unit and then screw it tightly into place. Once this is done, connect the other end of the hose to your faucet’s cold-water outlet, once again making sure that everything is secure. Reminder: You may need a wrench and pliers for this step. But don’t overtighten the connection, as this could damage the hose.
Step 4: Install Filter Cartridges
Now, it’s time to install the filter cartridges. Place them inside the water filter unit, then make sure that they are firmly in place. Make sure that they fit snugly and securely against the inner wall of the filter unit. It’s important to check that these are installed correctly as this will help ensure that the filter performs optimally. It is also worth noting that each cartridge may need to be changed every few months.
Step 5: Screw Filter Unit
Once you’ve installed the filter cartridges, all you need to do is screw your water filter into place on top of your faucet. This should be easy as long as everything was aligned correctly when it came to installing the mounting brackets. This is also an excellent time to check that all the connections are secure. It’s important to make sure that everything is tight before turning the water on.
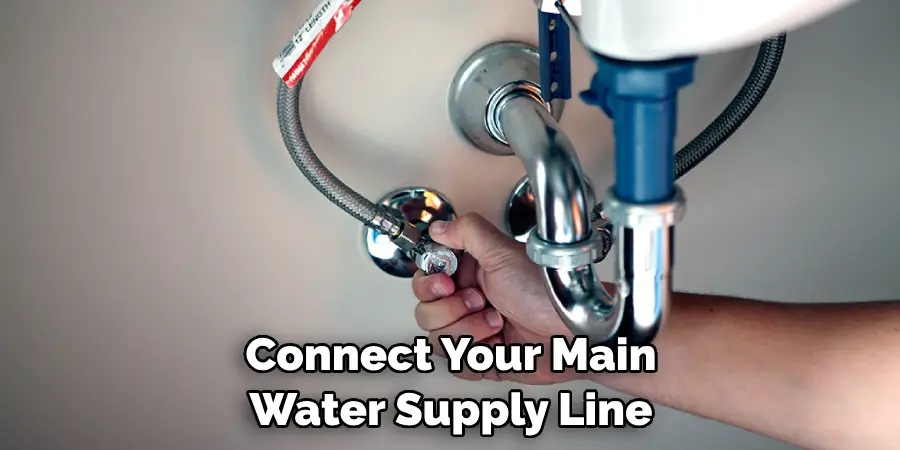
Step 6: Connect the Water Supply Line
The next step is to connect your main water supply line to your pull-out faucet so that filtered water can enter your home. Unscrew the end of the supply line and then connect it to the top side of your water filter. It’s important to make sure that all the connections are firm and secure before you start up the water flow. However, don’t overtighten the connections as this may cause damage to the pipes.
Step 7: Turn on the Water
Once you’ve connected your main water supply line, you can now turn on the water to check for any leaks or other potential problems. If everything is in order, proceed with the next step. It’s important to note that you should leave the filter running for at least five minutes before drinking any water that it produces. This will help ensure that your water is properly filtered and free of any contaminants.
Step 8: Check Filter Unit
It’s important to check that your filter unit is functioning correctly, so make sure that all of the connections are tight and secure and that there are no visible signs of leaking or damage. If everything looks good, move on to Step 9. This is also a good time to check that the filter cartridges are properly installed and functioning correctly.
Step 9: Connect Faucet Head
Now, it’s time to attach your faucet head to the filter unit. Make sure that it clicks into place securely, as this will ensure that no water leaks out and that the faucet head is easy to operate. It’s also important to check that the handle of the faucet is in the off position, as this will ensure that no water can escape from your filter.
Step 10: Test the Unit
Once you’ve finished connecting your faucet head, turn on the cold-water tap and make sure that filtered water is flowing correctly. If so, then it’s time to move on to Step 11. It’s important to note that if there are any problems with your water filter, you should contact a professional for assistance before using it. But if everything is working correctly, you can feel confident that your water filter is providing you with clean and safe drinking water.
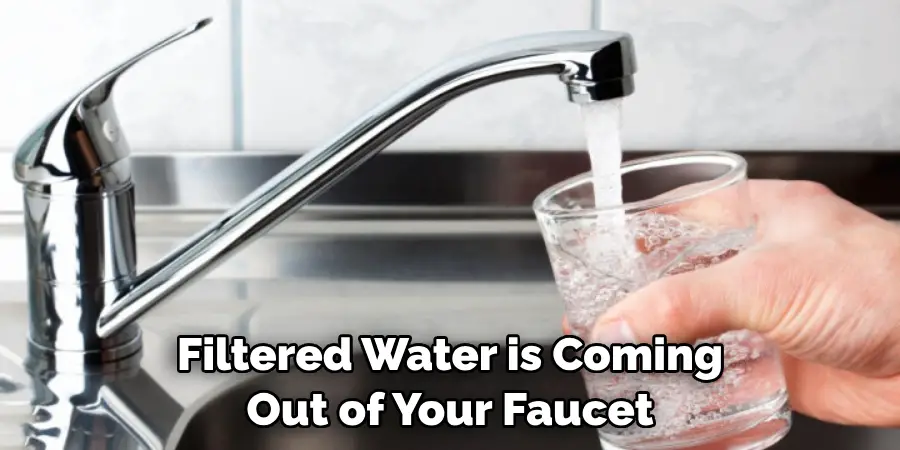
Step 11: Install Aerator
To get maximum efficiency from your new water filter, install an aerator. This device helps regulate water flow and ensures that only clean, filtered water is coming out of your faucet at all times. If you don’t have an aerator already, purchase one at your local hardware store and attach it to the end of your filter unit. If your filter unit already has an aerator, then you don’t need to do anything.
Step 12: Enjoy Clean Water
Finally, it’s time to enjoy your freshly filtered and clean water straight from the tap! Whether you’re drinking a glass of water or using some for cooking, you can now do so with peace of mind, knowing that your pull-out faucet is filtering out any contaminants. ! Always be sure to read the instructions that come with your filter unit and change the filters regularly for maximum efficiency. Enjoy your safe, clean water!
Following these steps on how to install a water filter on a pull-out faucet can help you install a water filter on your pull-out faucet in no time. Not only will it provide clear and clean drinking water, but it is also an inexpensive and simple project that anyone can do. You now have the tools to properly install a water filter on any pull-out faucet so that you can start enjoying crystal-clear H2O!
We hope this blog post has been helpful for those who want to make sure their tap water is clean and safe to drink. For more information about installing a water filter on your pull-out faucet or other plumbing.
7 Troubleshooting Common Issues with Pull-Out Faucets & Water Filters
Troubleshooting Common Issue 1: Leaks
If you’ve noticed that your pull-out faucet is leaking, the first thing to do is check all of the connections and make sure they are secure and tightened properly. If everything looks good there, then it could be a sign that the rubber washer or O-ring needs to be replaced. Also, make sure to inspect the hose for any signs of damage.
Troubleshooting Common Issue 2: Low Water Pressure
If you’ve noticed that the water pressure coming out of your pull-out faucet has decreased significantly, it could be due to a few different issues. First, make sure that the water filter isn’t clogged or blocked up with debris. If it is, then you’ll need to replace the filter. It is also possible that there is a blockage in the pipes. If this is the case, you may need to call a plumber as they will be able to inspect and fix any potential issues with your plumbing.
Troubleshooting Common Issue 3: Water Tastes Poor
If you’ve noticed that the water coming out of your pull-out faucet tastes bad, it could be caused by an issue with your filter. First, make sure to replace any clogged or worn-out filters and run a flush cycle through your system. If this doesn’t help, then you should inspect the connections between the filter and faucet for any signs of leakage or damage. If everything looks good, it may be time to purchase a new filter unit, as the current one may need to be replaced.
Troubleshooting Common Issue 4: Filter is Not Removing Contaminants
If you’ve noticed that your filter isn’t removing contaminants from your water supply, then it could be due to a few different issues. First, make sure the filter is the correct type and size for your specific water supply. Also, inspect the filter for any signs of clogging or damage, as these could prevent it from working properly. If everything looks good with your filter, then you should consider purchasing a higher-grade filter unit, as this may be more effective at removing contaminants from your water supply.
Troubleshooting Common Issue 5: Difficulty Installing Filter
If you’re having trouble installing your filter, the first thing to do is make sure all of the connections are tight and secure. Also, double-check that you have all of the necessary components for your specific filter unit. If everything looks good there, then it could be helpful to consult the manufacturer’s instructions or contact them directly for assistance with installation.
Troubleshooting Common Issue 6: Difficulty Operating Faucet Head
If you’re having trouble operating your faucet head, the first thing to check is that the handle of the faucet is in the “off” position. Also, inspect all of the connections and make sure they are secure. If everything looks good there, then it could be helpful to consult the manufacturer’s instructions or contact them directly for assistance with the operation.
Troubleshooting Common Issue 7: Difficulty Installing Aerator
If you’re having trouble installing an aerator on your filter unit, the first thing to check is that all of the connections are tight and secure. Also, make sure you have all of the necessary components for your specific aerator. If everything looks good there, then it could be helpful to consult the manufacturer’s instructions or contact them directly for assistance with installation. Additionally, if your filter unit does not come with an aerator, you can purchase one at most hardware stores. After you have the necessary components, you can easily install an aerator by following the instructions included with it.
By following these steps and troubleshooting common issues, you’ll be able to quickly and easily install a water filter on your pull-out faucet in no time! Not only will it provide clear and clean drinking water, but it is also an inexpensive and simple project that anyone can do. Now that you have the tools to properly install a water filter on any pull-out faucet, you can start enjoying crystal-clear H2O!
the
8 Helpful Tips for Maintaining Pull-Out Faucets & Water Filters
Tip 1: Inspect Connections Regularly
Make sure to regularly inspect the connections between your filter unit and faucet for any signs of damage or leakage. If you notice anything suspicious, be sure to replace the O-rings or seals as necessary.
Tip 2: Clean Filter Unit Regularly
Over time, your filter unit can become clogged with debris, which can cause the water pressure to decrease or even lead to contamination in your drinking water. To prevent this from happening, make sure to clean your filter unit on a regular basis.
Tip 3: Replace Filters Regularly
It is important to remember that most water filters need to be replaced every three months or so in order to maintain their effectiveness. Make sure to follow the manufacturer’s instructions for when and how often filters need to be changed.
Tip 4: Flush Tank Regularly
If you have a tank-style filter unit, it is important to regularly flush out the tank in order to avoid sediment buildup or contamination. The best way to do this is to fill the tank with clean water and let it sit for an hour or two before draining it.
Tip 5: Check for Leaks Regularly
Make sure to regularly inspect your filter unit and faucet for any signs of leakage or damage. If you notice anything suspicious, be sure to repair or replace the components as necessary in order to prevent further damage.
Tip 6: Inspect Turn Valves Regularly
It is important to regularly inspect the turn valves on your filter unit and faucet for any signs of wear or damage. If you notice anything suspicious, be sure to replace the turn valves as necessary in order to prevent further damage.
Tip 7: Clean O-Rings Regularly
If you notice that your filter unit or faucet isn’t working properly, it could be caused by a buildup of dirt and grime on the O-rings. To prevent this from happening, make sure to clean the O-rings with warm soapy water regularly.
Tip 8: Keep Spare Parts Handy
Make sure to keep an extra set of O-rings, turn valves, and other small parts on hand in case any of them need to be replaced. This will save you time and money if you ever need to make a repair.
Following these tips can help ensure that your pull-out faucet and water filter stay in good condition for years to come! Proper maintenance is key to keeping your water supply safe and clean. So don’t forget to inspect and replace worn-out parts, clean the filter unit regularly, and check for leaks from time to time! Good luck with maintaining your faucet & filter system!
Alternatives to Installing a Water Filter on Your Pull-Out Faucet
Alternative 1: Water Purification Systems
If you want more comprehensive filtration than what a pull-out faucet filter can provide, you may consider installing a reverse osmosis system or whole house water purification system. These systems are designed to remove more contaminants from your water and often offer additional benefits, such as softening your hard water.
Alternative 2: Bottled Water
Another option is to buy bottled water from the store. While it may be more expensive, purchasing bottled water can ensure that you are drinking clean and safe water all the time.
Alternative 3: Distilled Water
You may also want to consider distilling your own water at home with a distiller. This process removes most contaminants and impurities from the water, making it as safe to drink as possible. This method is often more cost-effective than purchasing bottled water for long-term use.
Alternative 4: Boiling Water
Boiling water before drinking it is another option that can be used to ensure that you are consuming clean and safe H2O. Boiling your tap water will effectively kill any bacteria or other microorganisms that may be present. While it doesn’t remove any chemical contaminants, it is still a good way to make sure your water is safe before consuming it.
Alternative 5: Carbon Filters
Carbon filters are also an option for those who don’t want to install a full-fledged water filtration system but still want some basic protection from contaminants. These filters are easy to install and can reduce the amount of lead, chlorine, and other chemicals in your water supply.
Alternative 6: Water Test Kits
Finally, if you’re concerned about the quality of your tap water, you can purchase a water test kit and have it analyzed. This will let you know what contaminants are in your water so that you can make an informed decision about how best to treat it before drinking or using it for cooking.
No matter which method of ensuring clean, safe drinking water you choose, it’s important to stay informed and make sure that your water is free of contaminants. With the variety of options available today, there are plenty of ways to enjoy clean tap water without having to install a full-scale filtration system.
Frequently Asked Questions
Q. Do I Need Any Special Tools to Install a Water Filter on My Pull Out Faucet?
A. Yes, you will need a wrench, pliers, screwdriver and screws for this project.
Q. How Long Does It Take to Install a Water Filter on a Pull Out Faucet?
A. The time it takes depends on your experience level with plumbing projects, but typically the process should take around an hour or less.
Q. How Often Do I Need to Replace the Filter Cartridges?
A. Generally it is recommended that you replace your filter cartridges every 6-12 months in order to ensure clean and safe drinking water at all times. Make sure to check the manufacturer’s instructions for your specific filter unit.

Q. Is It Necessary to Install an Aerator for My Water Filter?
A. Though it is not necessary, installing an aerator for your water filter can help regulate the flow of water and maximize the efficiency of your filter unit. It is highly recommended that you install an aerator to get the best results.
Additional Tips and Tricks
Tip 1: Use Cold Water to Extend Filter Life
Using cold water instead of hot water when running your faucet can help extend the life of your filter. Hot water can cause the filter to deteriorate more quickly, leading to a shorter lifespan.
Tip 2: Store Filters Properly
If you have extra filters on hand, make sure to store them properly to maintain their effectiveness. Keep them in a cool, dark place to prevent any exposure to sunlight or heat.
Tip 3: Consider Your Water Source
The quality of your tap water can vary depending on the source. If you have well water, it may be more contaminated and require additional filtration methods. It’s always a good idea to check with your local water authority to learn more about the quality of your tap water.
Tip 4: Regularly Clean Your Pull-Out Faucet
In addition to maintaining your filter, it’s important to regularly clean your pull-out faucet as well. This will prevent any buildup or residue that may affect the functionality of your faucet and ultimately, the quality of your filtered water.
Tip 5: Use a Water Dispenser
If you don’t want to install a water filter directly on your faucet, consider using a separate water dispenser. These devices allow you to pour tap water into the dispenser, which then filters it and dispenses clean drinking water. This can be a convenient option for those who are unable to install a water filter on their pull-out faucet or prefer not to.
Tip 6: Seek Professional Help
If you encounter any issues with your pull-out faucet or water filter system, don’t hesitate to seek professional help. A certified plumber can provide maintenance and repairs to ensure that your system is functioning properly and safely. It’s always better to address any problems early on rather than waiting for them to worsen over time.
Remember, regular maintenance and care are key to keeping your pull-out faucet and water filter in good condition. By following these tips and exploring alternative options, you can ensure that you have access to clean and safe drinking water for you and your family. Cheers to a healthier home! Keep hydrated, friends
Conclusion
In summary, when it comes to being able to open a magnetic door lock without a key, it is possible by using techniques such as a magnet, credit cards, and thin objects. However, it is essential to remember that these techniques are not always the most reliable methods, as they can cause damage to locks if used multiple times or over extended periods of time.
If you find yourself in need of an alternative way to unlock a magnetic door lock without a key, consider enlisting the help of a professional locksmith who is qualified and knowledgeable enough to advise you on the best solution based on your unique situation. After all, unlocking a magnetic door lock is much easier when performed with expert precision. Keep this advice in mind on how to install water filter on pull out faucet and you will quickly find yourself with peace of mind once again!