

Having a peaceful, pleasant outdoor space on your deck can be particularly enjoyable during the summer months. But what better way to bring this vision to life than by hanging some string lights?
Brightening up your trex deck with beautiful overhead lighting makes for memorable nights under the stars and will give any gathering an elegant touch. Not sure how to go about it?
No problem – we’ll show you step-by-step how easy it is! With our guide, you’ll get everything from tips on safety protocols to product recommendations as you embark on adding a special glow to your personal oasis. So, keep on reading this article to learn more about how to hang string lights on a Trex deck.

Assessing Your Trex Deck
Before planning your lighting layout, it’s crucial to understand the material and structure of your Trex deck.
1. Overview of Trex Decking Material and Its Characteristics
Trex is a composite decking material known for its durability and resemblance to real wood. Its resistance to harsh weather conditions and pests makes it an ideal choice for outdoor decking. Moreover, Trex’s texture provides a robust platform, which is less likely to cause accidental slips, making it a safe place to hang lights.
2. Importance of Understanding the Structure and Layout of the Deck
A proper understanding of your deck’s layout helps in formulating an efficient plan for hanging the string lights. Knowing where the joists, posts, and rails are can guide you on the most strategic places to attach your lights, ensuring a seamless and balanced appearance when they are lit.
3. Tips on Assessing the Available Power Sources
Assessing the available power sources is a critical step. Ensure you have accessible outdoor sockets or an extension cord that can reach from an indoor socket to the deck. Remember, safety is paramount, so avoid overloading sockets, and always use waterproof and outdoor-rated electrical equipment.
Planning Your String Light Layout
1. Factors to Consider When Planning The Layout
When planning your string light layout, it’s important to consider both the size and shape of your Trex deck. These dimensions will influence the pattern and spacing of your lights. Additionally, the desired ambiance is crucial. For a more intimate, cozy feel, opt for a dense layout with lights hung closer together. If you prefer a more spacious, airy vibe, hang lights further apart.
2. Choosing the Right Type of String Lights for a Trex Deck
Several types of string lights work well with Trex decking. However, it’s important to choose a style that complements your outdoor decor and meets your lighting needs. LED string lights are a popular choice due to their energy efficiency and longevity. Solar-powered lights are an environmentally friendly option, while classic Edison-style bulbs provide a warm and inviting glow.
3. Calculating the Number of Lights Needed for the Desired Coverage
The number of string lights required for your Trex deck depends on your deck’s size and the desired illumination level. A general rule of thumb is to have about 100 mini lights or 10-15 larger bulbs per foot for a vibrant display. Measure your deck and sketch a layout to calculate the total length of string lights required. Remember to account for a little extra length to cater to swags or drapes in your layout.
Needed Materials
Given below is a list of materials you need to hang string lights on your Trex deck:
- String lights
- Hammer
- Nails or screws
- Drill (if using screws)
Step-by-step Guidelines on How to Hang String Lights on a Trex Deck
Step 1: Measure the Area
Before you start, it’s important to accurately measure the area where your string lights will be. This includes measuring the length of the space and any corners or curves that need to be taken into account. This is important to ensure that you have enough string lights to cover the area. It is also helpful for knowing where to place the nails or screws. It is best to use a measuring tape for this step.
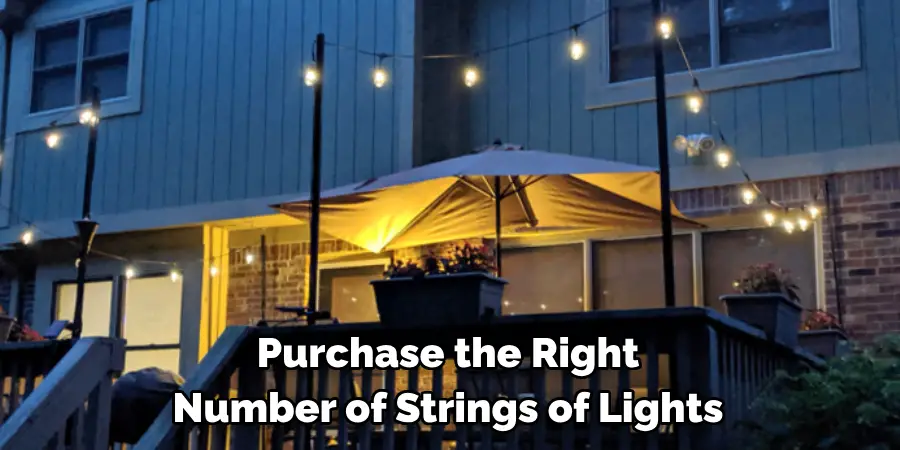
Step 2: Purchase Your String Lights
Once you know the size of the area, purchase the right number of strings of lights for your Trex deck. Be sure to check that your lights are suitable for outdoor use so they don’t get damaged by rain or wind. But even if your lights are rated for outdoor use, it’s still important to unplug them in bad weather or when not in use. It’s also a good idea to buy extra string lights just in case.
Step 3: Unbox and Prepare the String Lights
Once you have your lights, take them out of the box and make sure that all the bulbs are working. If there are any that don’t work, check the connections for any loose wires or damaged parts before continuing. This is also a good time to install any extra lights that you’ve purchased as spares. It’s also a good idea to leave some slack in the lights for flexibility.
Step 4: Determine Where You’ll Hang the Lights
Now you need to decide where you want to hang the string lights. You should look for a secure spot that won’t be in danger of being knocked off or damaged by wind or rain. Ideally, there should also be some sort of railing or post to attach the string lights onto. You may also need to get creative with how you hang the lights if there’s no railing or post that can be used. But whatever you do, make sure the lights are secure.
Step 5: Attach the Lights
Now it’s time to attach the string lights. If you’ve chosen a railing or post, use nails or screws to secure them in place. You can also use hooks to hang them from overhangs or eaves. It’s important to make sure that the lights are securely attached so they don’t come undone in windy weather. It’s also a good idea to attach the lights at equal intervals for an even spread of light.
Step 6: Test the Lights
Once the string lights are in place, switch them on to make sure that they’re working properly. This is also a good time to make sure that the lights are evenly spaced and that there aren’t any gaps. If you find any issues, now is the time to fix them. You may need to adjust the position of the lights or make sure that they’re securely attached.
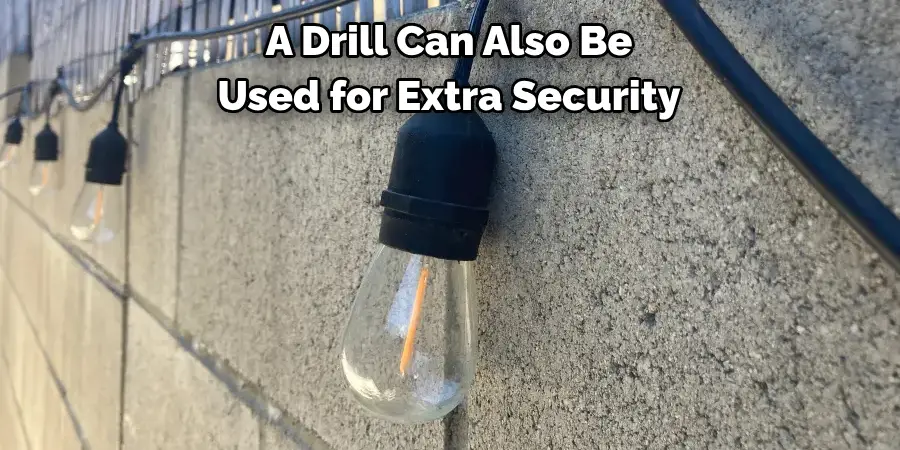
Step 7: Secure Your Lights
If you’ve used nails or screws, double-check that they are secure and won’t come loose when exposed to wind or rain. A drill can also be used for extra security if necessary. You may also need to use additional materials such as zip ties or cable clips if you’ve hung the lights in an unconventional way. It’s also a good idea to use extra insulation or waterproofing tape on connections for added protection.
Step 8: Connect the Lights
Finally, you need to connect all the string lights together so they’re powered by one source. Depending on the type of lights you have, this may require special connectors or plugs. Make sure to follow any instructions provided with your lights when connecting them together. However, if you’re unsure of what to do, it’s always best to consult an electrician or professional.
Step 9: Hang Up Any Dangling Lights
Once the lights are all connected and powered, double-check that there aren’t any dangling strands. If there are, you can use hooks to hang them up securely. Although it’s not essential, it can make your deck look more aesthetically pleasing and will also help protect the lights from potential damage. Although, keep in mind that if you’re using metal hooks, these can rust over time and should be replaced regularly.
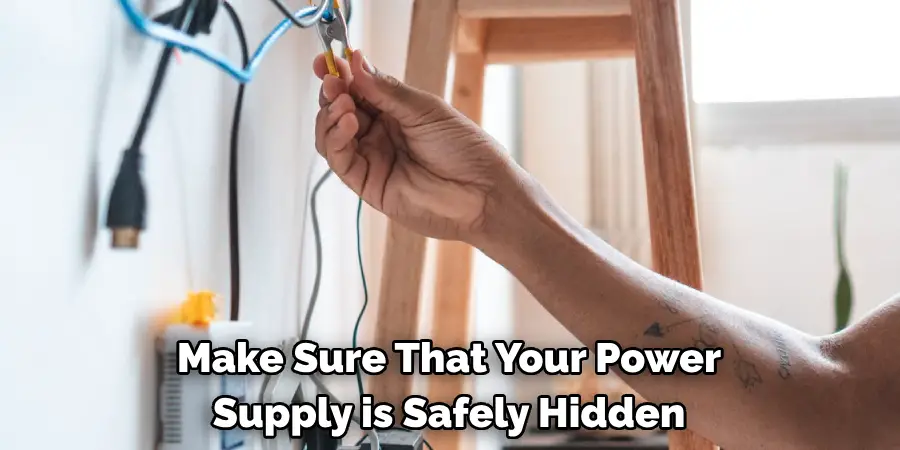
Step 10: Safely Hide the Power Supply
The last step is to make sure that your power supply is safely hidden and away from any sources of water or moisture. This will help protect your lights and make sure that they’re safe to use for many years. If necessary, you may need to purchase a weatherproof box or cover for your power supply.
Step 11: Enjoy Your Illuminated Trex Deck
And there you have it! You’ve successfully installed string lights on your Trex deck – all that’s left to do is kick back and enjoy your illuminated space beneath the stars. Always remember to turn off the lights when not in use and don’t leave them plugged in during bad weather. It’s also important to check the lights regularly for any damage or loose connections. With these tips in mind, you should have years of enjoyable use from your string lights.
With these simple steps, you can easily create a magical atmosphere for outdoor entertaining in your backyard. Now that you know how to hang string lights on a Trex deck, it’s time to get started!
If you need any further help or advice on installing string lights on your deck, don’t hesitate to contact an experienced Trex professional. They should be able to provide you with all the information and advice that you need to make sure that your lights are hung safely and securely.
Maintenance and Safety Tips for Your Trex Deck String Lights
1. Turn off the Lights when not in Use
To avoid potential fire hazards and save energy, it’s important to turn off your string lights when they’re not in use. This will also help prolong their lifespan.
2. Check for Damage Regularly
Regularly inspect your string lights for any signs of damage such as frayed wires or loose connections. If you notice any issues, it’s important to address them immediately and replace damaged lights.
3. Keep Them Away from Water
Make sure to keep your string lights away from any sources of water or moisture. If necessary, use weatherproof boxes or covers for power supplies to protect them from rain or snow.
4. Replace Old Lights
Over time, your string lights may become damaged or lose their brightness. It’s important to replace them when necessary to ensure your deck stays well-lit and safe.
5. Consult a Professional for Repairs
If you notice any issues with your string lights that you are not comfortable fixing yourself, it’s always best to consult a professional electrician or Trex professional for repairs.
6. Use Outdoor-rated Lights
Make sure to purchase and use lights that are specifically rated for outdoor use. These lights are designed to withstand the elements and are safer for use in outdoor spaces.
7. Follow Manufacturer’s Instructions
Always follow any instructions provided by the manufacturer when installing, connecting, or maintaining your string lights. This will ensure they are used safely and properly.
8. Don’t Overload Electrical Outlets
Be mindful of the load on your electrical outlets when connecting multiple string lights. Too many strings can overload the circuit and pose a safety risk.
Troubleshooting Common Issues with Your Trex Deck String Lights
Sometimes, despite our best efforts, things can go wrong with our outdoor string lights. However, there’s no need to panic. Here are some common issues you might face and their solutions:
1. Lights Not Turning On
If your string lights are not turning on at all, first check if they are properly connected to the power source. If the connections are fine, test the power outlet with another appliance to see if it’s working. If the outlet is functioning correctly, the problem could be with your string lights. It might be time to replace them.
2. Lights Flickering or Going Out
Flickering lights could be a sign of a loose connection or a bulb that’s on its way out. Try tightening the bulbs in their sockets. If that doesn’t work, you may need to replace the problematic bulbs. If the entire string is flickering, check the connections and the power source.
3. Lights are Dim
If the lights are dim, it could be because too many strings are connected together, putting a strain on the power source. Try reducing the number of connected strings. If the lights are still dim, it could be that the bulbs are nearing the end of their lifespan and need to be replaced.
4. One Bulb is Out, and the Whole String Goes Out
This is a common issue with some types of string lights. When one bulb goes out, the entire string goes off. This is usually an easy fix: simply find the burnt-out bulb and replace it.
5. Lights Have Been Damaged by Weather
Despite your best efforts to protect your lights from the elements, sometimes Mother Nature wins. If your lights have been damaged by severe weather, you’ll likely need to replace them.
Remember, if you’re ever unsure about a repair, it’s best to consult with a professional. Safety should always be your top priority.
Incorporating Smart Technology into Your Lighting Setup
In the modern age, lighting setups have seen a significant leap in technology with the advent of smart devices. With outdoor string lights, integrating smart technology can prove beneficial in several ways. For starters, it offers the convenience of remote control, meaning you can operate your lights from anywhere using your smartphone. This eliminates the need for manual operations and the need to be physically present to switch the lights on or off.
Another key benefit is the ability to set timers. You no longer have to remember to switch off your lights to conserve energy or switch them on when it gets dark. With smart technology, you can schedule timings for your lights, efficiently managing their operation and significantly saving on energy costs.
Smart lights also provide the feature of dimming or changing colors, allowing you to adjust the ambiance based on your preference or the occasion. Moreover, integrating your lights with home assistants like Alexa or Google Home can facilitate voice control, adding to the convenience.
In conclusion, incorporating smart technology into outdoor lighting setups enhances not only convenience and energy efficiency but also adds a layer of personalization to your outdoor decor.
Do You Need to Use Professionals?
Although it’s possible to hang string lights on your own, we always suggest using a professional. This is because there are certain safety regulations that need to be followed when installing electrical equipment outdoors. A Trex professional should be able to guide you through the process and make sure that your lights are installed safely and securely.
So if you want a flawless job that’s done right, it’s always best to consult a professional.
At the end of the day, hanging string lights on your Trex deck is an easy and fun process – but with great power comes great responsibility. So make sure to follow the guidelines outlined in this blog post for a safe, beautiful outdoor lighting setup that will last for years to come!
Frequently Asked Questions
Q: Can I Hang String Lights on a Trex Deck?
A: Yes, you can easily hang string lights on a Trex deck using nails or screws. Just make sure to take the necessary safety precautions and connect the lights properly.
Q: How Do I Secure the String Lights on My Trex Deck?
A: The best way to secure string lights on a Trex deck is to use nails or screws. Alternatively, you can use hooks to hang them from overhangs or eaves.
Q: Do I Need Any Special Connectors to Hang String Lights on a Trex Deck?
A: Depending on the type of lights you have, you may need special connectors or plugs to connect all the strings together. Make sure to follow any instructions provided with your string lights when connecting them together.
Q: What Materials Do I Need to Hang String Lights on a Trex Deck?
A: You will need string lights, a hammer, nails or screws and a drill (if using screws). You may also need special connectors or plugs depending on the type of string lights you have.
Conclusion
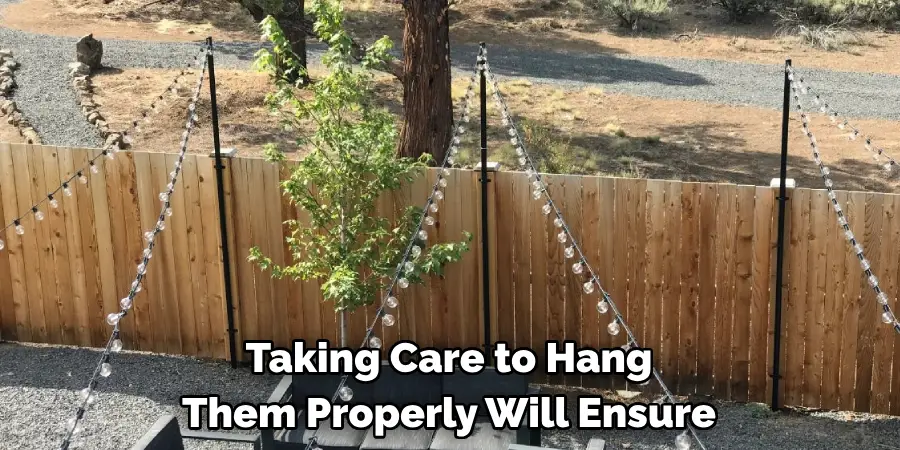
Hanging string lights on your Trex deck can be a great way to brighten up the area for parties, BBQs, or lounge nights. Taking care to hang them properly will ensure that they won’t blow away or be a safety hazard. Whether you opt for the simple hook and eyelet method or the superior cable ties technique, you’ll be sure your deck is illuminated with style for many seasons to come!
Plus, on how to hang string lights on a trex deck, should it ever come time to take down the lights after the party is over, disassembling them is much simpler than installing them in the first place. So grab those fairy lights and get ready for some good old-fashioned fun – your guests will be sure to thank you!