
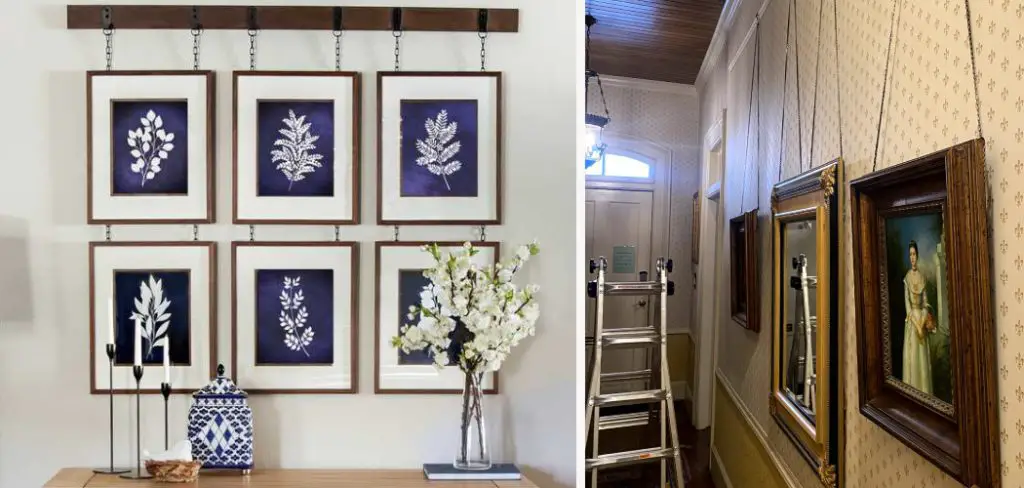
Hanging pictures in your home can be a great way to make any room look unique and stylish. But why limit yourself to traditional wall hangings? Picture rails are an easy and creative alternative that brings a whole new dimension of decorating possibilities to your home.
With picture rails, you can create collage walls, interesting shelves, or hanging works of art without needing to put holes in your walls. Ready to learn how? Read on for all the details about how to hang from picture rail!
Needed Materials
Given below are the materials that you’ll need in order to hang from a picture rail:
- Picture Rail
- Picture Hanging Hooks
- Hammer & Nails (if needed)
- Level (if needed)
- Pencil for Marking
11 Step-by-step Guides on How to Hang From Picture Rail
Step 1: Determine Where the Picture Rail Will Go
The first step in figuring out how to hang from a picture rail is to determine where it should go. Figure out the desired height of your picture rail and mark it on your wall with a pencil. Make sure that you look at the other decorations in your home and measure accordingly so that everything is aesthetically pleasing when complete. If you need a level to ensure that the picture rail is straight on the wall and even with other decorations, make sure that you have one nearby. This is an important step, so make sure that you take your time and double-check your measurements.
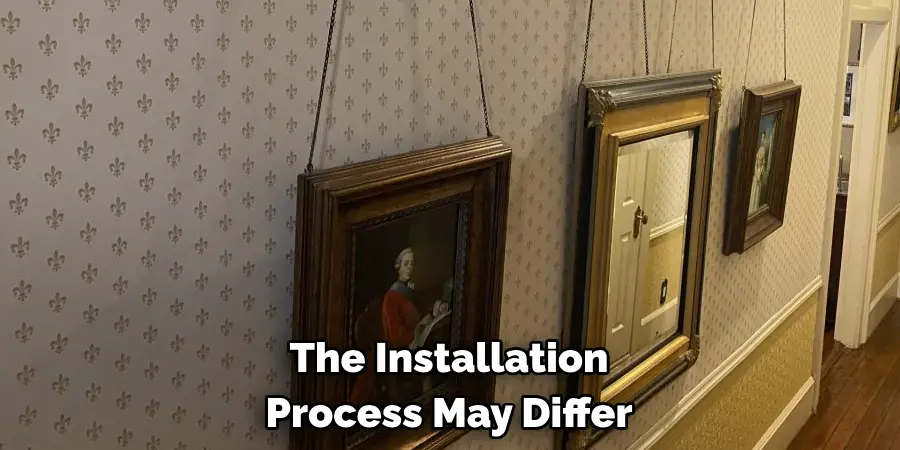
Step 2: Install the Picture Rail
Once you have determined where you want your picture rail to be, it’s time to install it! Depending on the type of wall that you have, the installation process may differ. For drywall walls, use a hammer and nails to secure the rail in place. For plaster walls or brick/concrete walls, use heavy-duty screws to attach the rail. But if you’re unsure of what type of wall you have, it’s best to consult a professional for assistance. You should also double-check to make sure that the rail is level before you secure it.
Step 3: Measure and Mark Where Your Artwork Will Hang
Now that you have your picture rail installed, it’s time to figure out where each piece of artwork will hang on the rail. To do this, measure the length of the artwork from top to bottom and mark it on the rail with a pencil. But be sure to measure from the top of the artwork so that you ensure that everything will hang evenly. It’s also important to double-check your measurements before moving on. This is to make sure that all the artwork fits nicely on the rail and looks aesthetically pleasing.
Step 4: Attach Hanging Hooks
Once you have determined where each piece of artwork will hang, attach the necessary hanging hooks to the picture rail. Make sure that each hook is secure and won’t come off easily when hung up. If necessary, use a hammer and nails to further secure the hooks. But be sure to double-check that the hooks are level with each other so that everything hangs properly. You can also use a level to make sure that the hooks are even.
Step 5: Hang Up the Artwork
Once your picture rail is installed and the hanging hooks have been attached, it’s time to hang up your artwork. Securely attach each piece of artwork to its corresponding hook and adjust accordingly until everything is straight and level. This is an important step, so make sure that you take your time to ensure that everything looks perfect. You can also use a level to double-check the artwork and make any necessary adjustments.
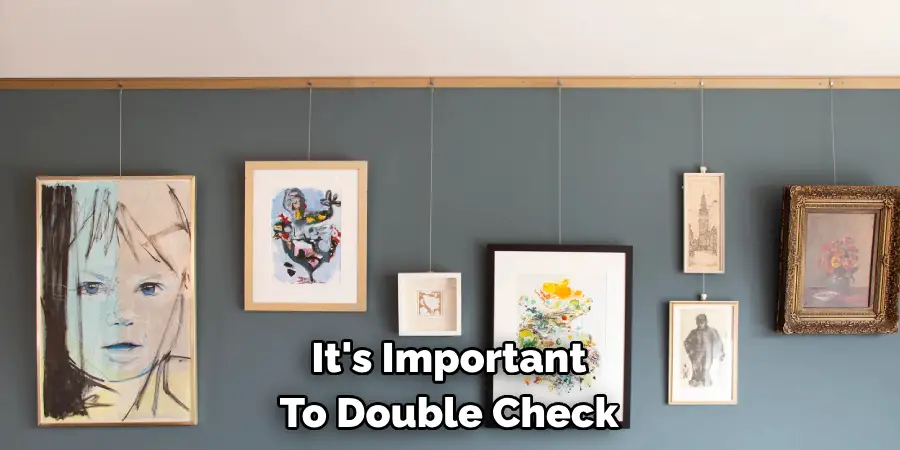
Step 6: Double Check that Everything Is Level
Just to be sure, it’s important to double-check that everything is level. Use a level to make sure that each piece of artwork hangs straight and won’t move out of place over time. It’s also important to double-check the distance between each artwork and that everything hangs properly on your picture rail. Make any necessary adjustments until everything looks perfect.
Step 7: Secure the Artwork to the Wall
To make sure that your artwork stays securely in place, add a few nails or screws to each piece of artwork. This will help ensure that it won’t come off the wall and fall on anyone’s head. This is especially important if you have children or pets in the house. Make sure that all screws and nails are secure before moving on to the next steps. If necessary, you can also use a level to double-check that everything is straight and secure.
Step 8: Hang Any Additional Pieces of Artwork
If you have additional pieces of artwork that you’d like to hang from your picture rail, follow the same steps as listed above. Measure, mark, and attach hanging hooks before finally hanging up each piece of artwork. You should also double-check that everything is level and secure before moving on. It’s also a good idea to hang any additional artwork close together so that it looks aesthetically pleasing.
Step 9: Arrange Your Artwork
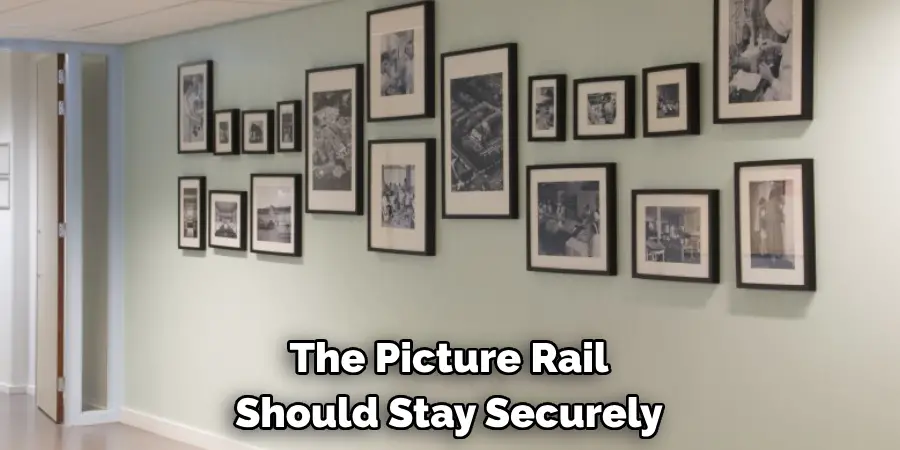
Once all of your artwork is on the wall, it’s time to arrange it so that it looks aesthetically pleasing. Rearrange pieces until you are satisfied with the look of the overall display. This involves playing around with different arrangements, grouping artworks together, and making sure that everything looks symmetrical. Don’t be afraid to move pieces around until you are happy with the results!
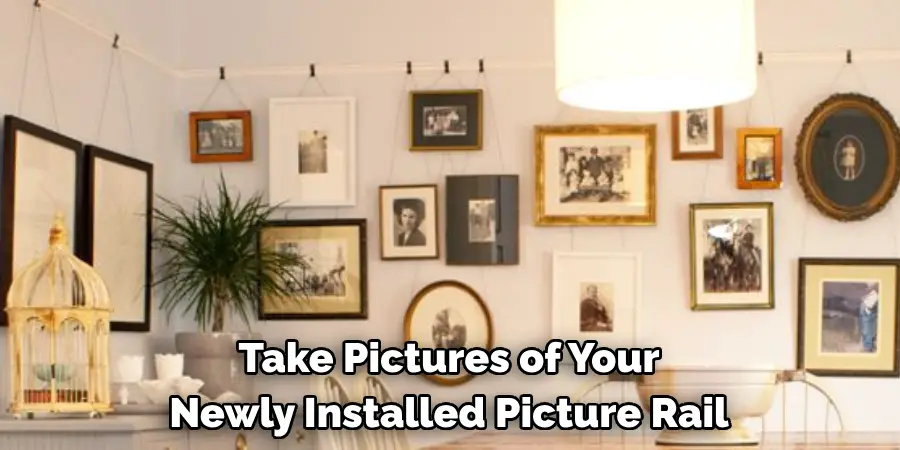
Step 10: Take Pictures
Take pictures of your newly installed picture rail and share it with family and friends! This is a great way to show off your hard work and make sure that everyone can admire your masterpiece. It’s also a great way to document the progress of your project and keep it for posterity. But most importantly, it’s an excellent way to remember all the memories associated with each piece of artwork you’ve hung.
Step 11: Enjoy Your Handiwork!
Finally, take some time to admire your handiwork and enjoy the fruits of your labor. The picture rail is sure to become the highlight of any room in your house and will add character wherever you decide to place it. Friends and family will be sure to admire your work – just make sure that you tell them who did it! So sit back, relax, and enjoy your masterpiece! Always remember how satisfying it is to complete a project. Enjoy!
Hanging from a picture rail is a great way to spruce up any space and add texture and dimension to any wall. By following these 11 easy steps on how to hang from picture rail, you can successfully hang artwork from picture rails in no time!
So don’t be intimidated by the task – try your hand at it today and enjoy the unique look of a picture rail in your home. Remember, there are many different types of picture rails available in various sizes and designs, so make sure to do some research before you purchase. With this guide, you’ll have no problem mastering how to hang from a picture rail!
Tips for Choosing the Right Picture Rail
Tip 1: Consider the Size
Before purchasing a picture rail, make sure to measure the size of your wall and consider how many pieces of artwork you plan on hanging. This will help you determine what size and length of picture rail you need.
Tip 2: Match the Style
Picture rails come in a variety of styles – from traditional to modern. Make sure to choose one that matches the overall aesthetic of your home and existing decor.
Tip 3: Think About Weight Capacity
Picture rails are designed to hold a certain weight, so make sure to choose one that can support the weight of your artwork. This information should be listed on the package or in product descriptions.
Tip 4: Consider Using Multiple Rails
If you have a large collection of artwork, consider using multiple picture rails to create a gallery wall. This can add visual interest and allow for more flexibility in arranging your artwork.
Tip 5: Use the Right Hanging Hooks
When choosing hanging hooks for your picture rail, make sure they are strong enough to support the weight of your artwork. Additionally, adjustable hooks can be useful for ensuring that everything hangs straight and level. Overall, make sure to choose hooks that are sturdy and reliable.
Tip 6: Don’t Forget About the Picture Rail Accessories
Picture rails often come with accessories such as end caps, corner pieces, and connectors. These can add a finished look to your picture rail installation and help create a cohesive display.
Tip 7: Experiment with Different Arrangements
Don’t be afraid to play around with different arrangements of your artwork on the picture rail. This can add visual interest and create a unique display. Have fun with it, and don’t be afraid to switch things up every once in a while!
Tip 8: Consider Lighting
Picture rails offer the opportunity to incorporate lighting into your display. You can use track lighting or attach small lights directly to the rail. This can add a dramatic effect and draw attention to your artwork.
Tip 9: Keep Safety in Mind
When hanging artwork from a picture rail, safety should always be a top priority. Make sure all screws and nails are secure, and avoid hanging heavy or fragile pieces above areas where people will be walking or sitting.
Tip 10: Don’t Restrict Yourself to Just Artwork
Picture rails can also be used to display other items, such as plants, mirrors, or even books. Be creative and use your picture rail to showcase a variety of items in addition to artwork.
By following these tips and using the steps outlined above, you’ll be able to successfully incorporate a picture rail into your home and create a stunning display of artwork. Enjoy the process and have fun with it! So go ahead and get started on creating your very own picture rail today! Happy hanging!
How to Avoid Common Mistakes When Hanging from a Picture Rail
Common Mistake 1: Not Using Enough Hooks
One of the most common mistakes when hanging artwork from a picture rail is not using enough hooks to support the weight of the artwork. This can result in pieces falling and getting damaged, or worse, causing harm to people below.
To avoid this mistake, always make sure to use enough hooks and evenly distribute the weight of your artwork along the picture rail. This will ensure that everything hangs securely and safely.
Common Mistake 2: Not Using Proper Hanging Hardware
Another common mistake is using inadequate or incorrect hanging hardware for your picture rail. This can lead to pieces falling or becoming damaged over time.
Make sure to use sturdy, adjustable hooks specifically designed for picture rails to ensure a secure and stable display. Don’t be tempted to use cheaper alternatives that may not hold up over time.
Common Mistake 3: Hanging Too Many Pieces
While multiple picture rails can create an interesting gallery wall, it’s important not to overcrowd the space with too many pieces of artwork. This can make the display look cluttered and overwhelming.
To avoid this mistake, carefully consider the size and number of pieces you want to hang and choose a picture rail that can support their weight. Less is often more when it comes to creating a visually appealing display.
Common Mistake 4: Not Testing the Weight Capacity
It’s important to always test the weight capacity of your picture rail before hanging any artwork. This will ensure that it can safely support the weight and prevent any accidents from occurring.
To test the weight capacity, simply hang a heavier object onto the rail and see if it holds without bending or sagging. If it does, then it should be able to hold your artwork without issue.
Common Mistake 5: Not Considering Lighting
While picture rails offer the opportunity to incorporate lighting, it’s important to carefully consider the type and placement of the lights. Improperly placed or too bright lights can cause glare or cast shadows on your artwork, taking away from its beauty.
To avoid this mistake, experiment with different lighting options and make sure to use ones that enhance the display without distracting it.
By being aware of these common mistakes and following the tips and guidelines outlined above, you’ll be able to successfully incorporate a picture rail into your home and create a stunning display of artwork. Happy hanging! So go ahead and get started on creating your very own picture rail today!
The Versatility of Picture Rails
Beyond their traditional role of displaying artwork, picture rails serve a variety of practical purposes. This versatile furnishing can be creatively repurposed to hang curtains, adding a touch of elegance to your windows while providing privacy. With the right accessories and a bit of creativity, picture rails can transform into a functional room divider.
Simply hang a curtain, fabric panel, or even a series of plants from the rail to delineate spaces within your home. This not only adds an aesthetic touch but also helps in creating designated areas for different activities, enhancing the functionality and flow of your living space. Remember, the possibilities with picture rails are limited only by your imagination!
Incorporating Other Elements into Your Display
Picture rails offer a unique platform to exhibit a medley of creative expressions. Apart from paintings and photographs, consider presenting sculptures, textiles, or even your favorite memorabilia for an added visual dimension. This amalgamation of various art forms can create a dynamic narrative, reflecting your personal style and interests.
For instance, a woven tapestry can add a touch of texture and color, contrasting beautifully with the sleek frames of paintings. Displaying a cherished sculpture not only provides a three-dimensional element to your display but also imbues a personal touch. Remember, the key is to create a balanced arrangement that represents your aesthetic sensibilities, without overwhelming the viewer. Embrace the freedom that picture rails offer and let your creativity unfold!
Using Accessories to Enhance Your Display
Hooks and Hangers
When it comes to hanging artwork from a picture rail, the right hooks and hangers are crucial. These accessories not only provide support but also contribute to the overall aesthetic of your display. Choose hooks that are adjustable and sturdy enough to hold the weight of your artwork. For a cohesive look, opt for hangers that complement or match the finish of your picture rail.
Chains and Cords
Chains and cords are essential for hanging pieces with wire or D-rings on the back. They allow for easy adjustability of height and can also add a decorative touch to your display. Consider using different types of chains, such as brass or silver, to create visual interest.
Lighting Accessories
As mentioned earlier, lighting is an important aspect to consider when incorporating a picture rail into your home. Along with the lights themselves, you can also find a variety of accessories such as mounting brackets and clips to attach them to your picture rail securely. These accessories not only help in proper placement but also ensure that your lights stay in place without damaging the rail or artwork.
Incorporating Picture Rails in Other Areas of Your Home
While picture rails are traditionally associated with living rooms and galleries, their utility extends far beyond these spaces. They can be seamlessly incorporated into other areas of your home, like bedrooms, kitchens, or even bathrooms, serving as a unique and functional display solution. In a bedroom, they can elegantly showcase your favorite photographs or prints, adding a personal touch to your private retreat.
In a kitchen, a picture rail could be an innovative way to display your collection of vintage cookware or culinary-themed art. Even bathrooms can benefit from the addition of a picture rail, which could hold framed prints or small potted plants for a touch of tranquility. Remember, the scope of using picture rails shouldn’t be limited to just one room. Explore their potential throughout your home and see how they can enhance and personalize your space!
Frequently Asked Questions
Q: What Type of Wall Should I Use for a Picture Rail?
A: It depends on what type of wall you have. If you have drywall, you can easily install it with a hammer and nails. For plaster walls or brick/concrete walls, use heavy-duty screws to attach the rail in place.
Q: Do I need to Use a Level to Hang From the Picture Rail?
A: Yes! It’s important to use a level so that each piece of artwork hangs straight and won’t move out of place over time. This step is especially helpful if you’re hanging multiple pieces of artwork in order to create an aesthetically pleasing display.
Q: How Many Pieces of Artwork Can I Hang From the Picture Rail?
A: It depends on the size of the picture rail and artwork. However, it is recommended that you limit each picture rail to no more than 5 or 6 pieces of artwork in order to ensure that everything stays safe and secure. This will also make rearranging the artwork easier if you decide to do so in the future.
Q: Will the Picture Rail be Securely Attached to My Wall?
A: Yes! If installed properly, the picture rail should stay securely attached to your wall. Be sure to use a hammer and nails or heavy-duty screws depending on what type of wall you have in order to make sure that it stays in place. Additionally, you can add a few screws or nails to the artwork itself in order to make sure that it doesn’t come off the wall. With these precautions, you can be sure that your picture rail is firmly secured.
Conclusion
After taking the time to hang your picture rail with precision and care, you can now feel confident in your handy work. Whether you needed to add spice to an old wall or create interesting designs that are high up on the ceiling, it’s safe to say you know how to make it happen.
As you become more and more accustomed to hanging from picture rails, be sure to not push your limit too much by tackling a large project all at once. In the end, properly hung artwork will bring that extra ‘wow’ factor to any room! Be sure to have fun as you do this adventure in DIY home improvement. Thanks for reading this article on how to hang from picture rail.