
Are you looking for a unique way to dress up the corners of your bedroom or living room? Are you someone who loves DIY projects and wants a straightforward, stylish solution to brighten those hard-to-reach areas? Hanging curtains in a corner is the perfect answer! Not only will it add dimension and style to any space, but this simple home improvement project requires minimal supplies and effort.

In this post on how to hang curtains in a corner, we’ll walk through everything you need to know about installing curtains in the corner of your home – from choosing the suitable fabrics and hardware to helpful tips on making sure it’s done correctly. So read on if you’re ready to get started!
Understanding Corner Windows
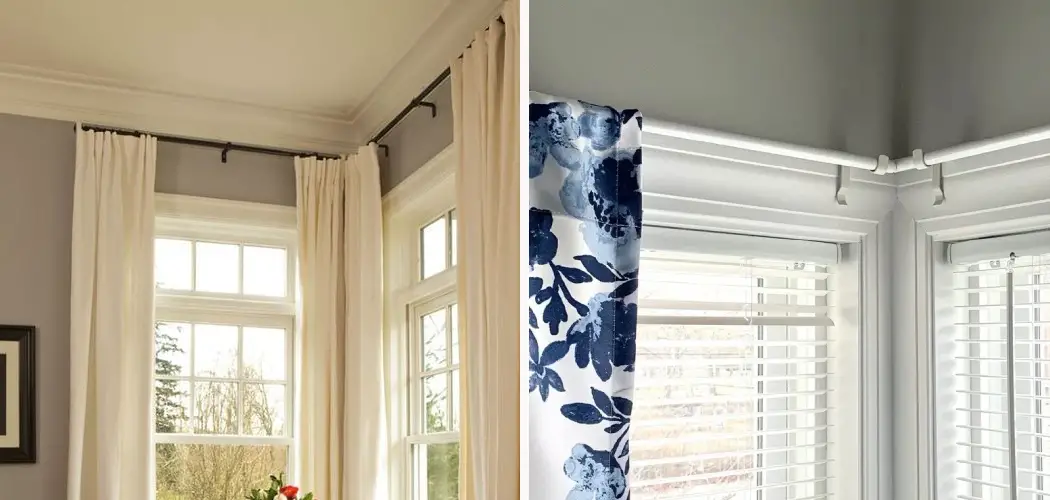
Corner windows are an architectural feature that can significantly enhance the aesthetic appeal of your home. They provide a panoramic view of the outside world and allow an enormous amount of natural light to flood in, creating a bright and welcoming living space. However, their unique layout can pose a challenge when it comes to installing curtains. Understanding the specifics of your corner windows is the first step in ensuring that your curtains provide the effect you desire.
Types of Corner Windows
There are several styles of corner windows to consider:
- Bay Windows: These windows protrude outward from the main wall, creating a bay in a room. They often consist of a picture window with two smaller windows, or flanks, on either side.
- L-Shaped Windows: As the name suggests, these are two windows meeting in a right angle at the corner of your room.
- Octagonal Windows: These are eight-sided windows that offer a unique, geometric appeal.
Measuring for Curtains
When measuring for curtains, be sure to take into account not just the window’s height and width but also the corner angle. You’ll want to ensure there is sufficient rod space on each wall for the curtains to draw back completely.
Light Control Considerations
The type of fabric, color, and lining of your curtain can significantly impact the amount of light that enters your room and the level of privacy you enjoy. Lighter fabrics will allow more light to filter through, while darker, lined curtains provide greater privacy and light control.
Tips on Choosing the Right Curtain Rod
There are several factors to consider when selecting a curtain rod for your corner windows:
- Material: Popular materials for curtain rods include wood, metal, and plastic. Choose a material that complements the overall aesthetic of your room.
- Shape and Size: Look for adjustable or curved curtain rods that can be customized to fit your corner windows’ unique shape and size.
- Support: Consider the weight of your curtains and choose a rod that can support their load without bending or bowing.
Needed Materials
- Curtain Rods
- Screws and Anchors (if Not Provided With Curtain Rod)
- Measuring Tape
- Level
- Drill or Screwdriver
- Curtains of Your Choice
- Curtain Rings or Clips (optional)
- Ladder or Step Stool (if Necessary)
11 Step-by-step Guidelines on How to Hang Curtains in a Corner
Step 1: Choose Your Curtains
The first step in hanging curtains in a corner is selecting the perfect curtains for the space. Not all curtains are suitable for this type of installation, so keep in mind that lightweight fabrics work best. If you prefer heavier curtains, consider using two separate curtain rods for each window instead. It’s also important to measure the height and width of your windows to ensure that you purchase curtains that will fit properly. But if you’re unsure of what size to get, opt for curtains that are longer and wider than your windows – this will give a fuller, more dramatic look.

Step 2: Measure the Corner
Using a measuring tape, measure the distance from one window to the corner and then from the corner to the other window. These measurements will help determine the length of your curtain rod. You may also want to take note of any obstructions in the corner, such as electrical outlets or light switches. But don’t worry, we’ll address this later on. It’s also a good idea to double-check the measurements – accuracy is key when it comes to hanging curtains in a corner.
Step 3: Purchase Curtain Rods
After determining the length of your curtain rod, it’s time to purchase them. You can either buy two separate rods or opt for one long continuous rod that can be cut down to size. It’s important to make sure the rods have proper brackets for corner installation. If they don’t come with anchors and screws, be sure to purchase those as well.
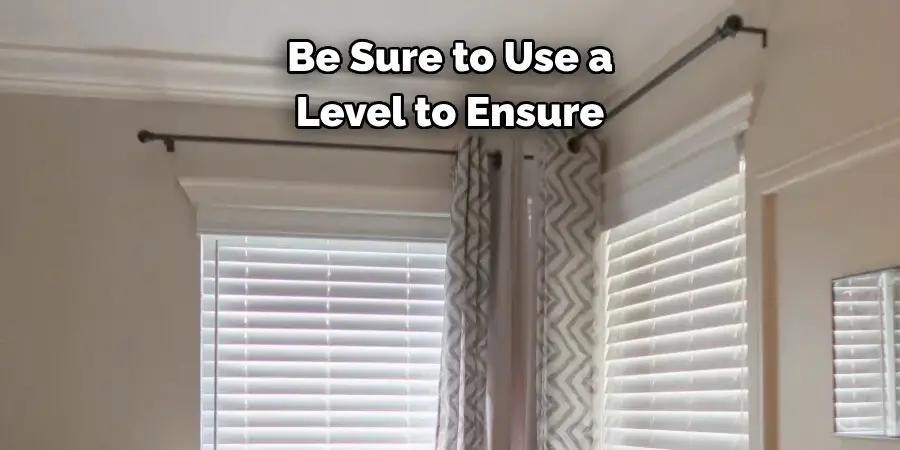
Step 4: Install Brackets
Using the measurements from Step 2, install the brackets for your curtain rods into the corners of your walls. Be sure to use a level to ensure that they are straight. If there are any obstructions, you may need to adjust the placement of the brackets accordingly. It’s also important to note that the brackets should be placed a few inches above the top of your windows for proper curtain placement. But again, if you prefer to have your curtains hang closer to the ceiling, make sure to adjust the bracket placement accordingly as well.
Step 5: Attach Curtain Rods
Once the brackets are installed, attach the curtain rods to them. For continuous rods, cut it down to size and connect the pieces together with a connector. For separate rods, make sure they are parallel and evenly spaced. However, if you’re using lightweight curtains, it’s recommended to use one continuous rod for a more seamless look. If your curtain rods do not have any brackets for corner installation, you can purchase corner connectors to properly connect the two rods at the corner.
Step 6: Hang Curtains
Hang your curtains onto the rod using either curtain rings or clips. This will give you more flexibility in terms of adjusting the length of the curtains and how they fall. It’s also a good idea to hang the curtains before installing them onto the rod so you can see how they will look and make any necessary adjustments. You can also add any desired curtain tie-backs at this point.
Step 7: Adjust the Length
If you’re using clips, you may need to adjust the length of your curtains. Simply clip them higher or lower on the rod until you achieve the desired length and look. But if you prefer a more permanent solution, you can also hem the curtains to fit perfectly. It’s best to have another person hold the curtain while you adjust and pin it for easier measurement. If you’re using rings, you can also adjust the length by simply moving the rings up or down on the rod.
Step 7: Test for Length
Before securing the curtain rods, test the length of your curtains by pulling them to the desired height and position. Once you’re satisfied with how they look, mark where you need to secure the brackets. It’s always better to have the curtains slightly longer than necessary, as you can always make adjustments later. You can also mark the bracket placement before hanging the curtains if that’s easier for you.
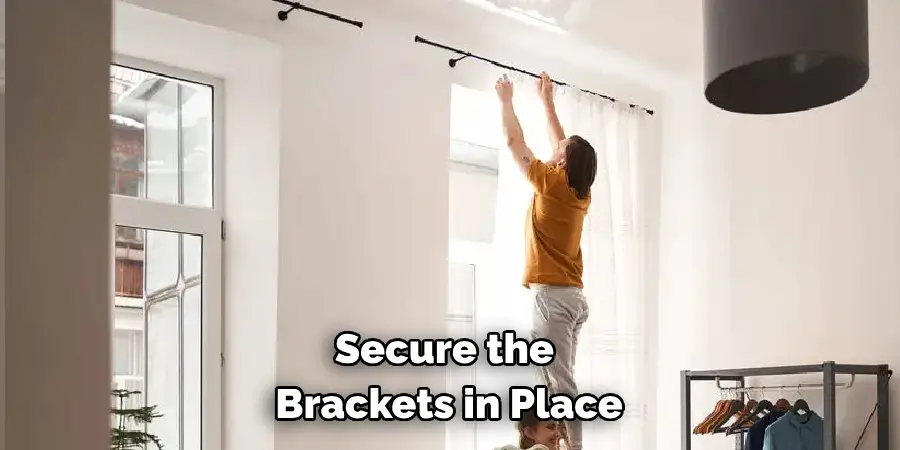
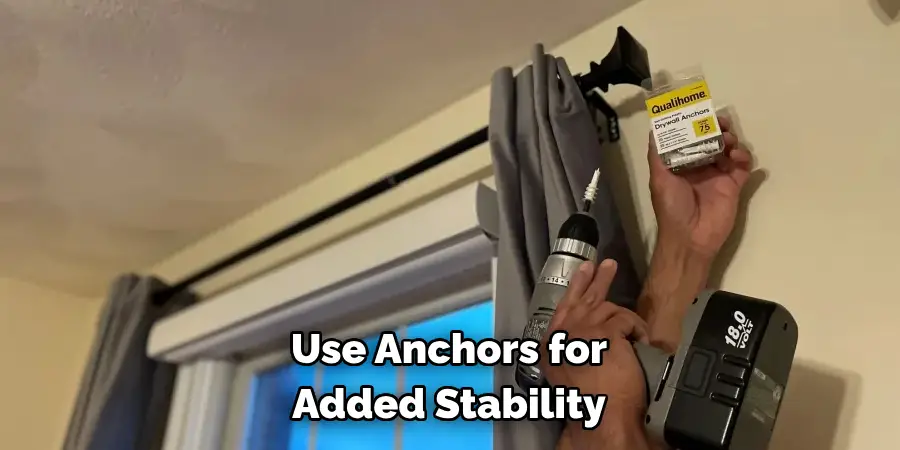
Step 8: Secure Brackets
Using a drill or screwdriver, secure the brackets in place. Please make sure they are tight and properly aligned. Anchors are also recommended for added stability. If there are any obstructions in the corner, you may need to adjust the bracket placement again. But with proper measurements and adjustments, your curtains should hang perfectly.
Step 9: Adjust Curtains
After the brackets are secured, adjust your curtains to ensure they are hanging evenly and at the desired length. If necessary, you can also use a level to make sure they are straight. This step may take some trial and error, but it’s important to get it right for a polished look. It’s also a good idea to step back and take a look at the overall appearance of the curtains.
Step 10: Final Touches
At this point, you may want to add any additional accessories, such as tiebacks or valances, for a more decorative look. You can also trim any excess curtain length if needed. You can also play around with different styles of hanging the curtains, such as pinched pleats or ripple folds, for a more modern look.
Step 11: Enjoy Your Newly Hung Curtains
Congratulations, you have successfully hung curtains in a corner! Now, step back and admire your work. You may even want to invite some friends over to show off your new DIY project. Don’t forget to take lots of pictures to share on social media! Always remember to measure twice, cut once, and have fun with the process.
Following these 11 easy steps on how to hang curtains in a corner, you can easily transform any room into a stylish and cozy space. So go ahead and give it a try – we promise it’s easier than it looks! And the best part? You can customize this project to fit your own personal style and taste. With just a few simple materials and some spare time
Tips and Tricks
- If You Have an Obstruction in the Corner, Such as an Electrical Outlet or Light Switch, You Can Either Move the Brackets to Avoid It or Cut a Small Hole in the Curtain for It to Pass Through.
- For a More Polished Look, Iron Your Curtains Before Hanging Them. This Will Remove Any Wrinkles and Creases.
- To Achieve a Fuller Look, Purchase Curtains That Are 2-3 Times the Width of Your Windows.
- When in Doubt, Always Measure Twice and Cut Once. This Will Save You From Any Costly Mistakes.
Troubleshooting Common Issues with Hanging Curtains in a Corner
Issue: The Brackets Are Not Aligning Properly
If you’re having trouble aligning the brackets for your curtain rods, make sure that they are level and evenly spaced. You may also need to adjust the placement of the brackets if there are any obstructions in the corner.
Issue: The Curtains Are Too Short
If your curtains are too short, you can either adjust the length by using clips or rings or hem them for a more permanent solution. Make sure to measure carefully and have another person hold the curtain while you make adjustments.
Issue: The Curtains Are Too Long
If your curtains are too long, you can trim off any excess fabric or use curtain tie-backs to hold them in place. Alternatively, you can also hem the curtains for a cleaner look.
Issue: The Curtains Are Not Hanging Evenly
This issue can be solved by adjusting the placement of the brackets and ensuring they are level. You may also need to change the length of your curtains using clips or rings.
Issue: The Brackets Are Not Secure
If your brackets are not secure, you may need to use anchors for added stability. You can also try using longer screws to ensure the brackets are properly attached to the wall.
By following these tips and troubleshooting common issues, you can easily overcome any challenges when hanging curtains in a corner.
Creative Curtain Ideas for Corners
1. Layered Look
Create a layered look by hanging sheer curtains behind your main curtains. This adds depth and texture to the room while still allowing natural light to come through.
2. Corner Valances
For a unique and decorative touch, install valances in the corner of your windows. These can be made from various fabrics such as lace or burlap and can be tied back with ribbon or twine.
3. DIY Tassel Trim
Add a fun embellishment to your curtains by attaching tassels along the inner edge. This simple DIY project can add a pop of color and personality to your space.
4. Floor-to-ceiling curtains
For a dramatic look, hang floor-to-ceiling curtains in the corner. This will elongate the room and create a cozy, intimate feel.
5. Macrame Accents
For a bohemian touch, add macrame accents to your corner curtains. These can be hung along the inner edge or even used as tie-backs.
6. Floral Swag
Create a romantic and whimsical look by draping a floral swag over the corner of your curtain rods. This adds a touch of nature to your space and can be easily changed with the seasons.
7. Printed Panels
Add some personality to your curtains with printed panels in the corner. Choose from bold patterns or soft florals to suit your style.
8. Beaded Curtains
For a fun and eclectic look, hang beaded curtains in the corner of your windows. These can add a touch of glam to any room.
With these creative curtain ideas for corners, you can truly make this DIY project your own and reflect your personal style in your home decor.
Maintenance and Cleaning Tips for Corner Curtains
1. Regular Dusting
To keep your corner curtains clean, regularly dust them with a soft cloth or duster. This will prevent any build-up of dust and debris.
2. Spot Cleaning
For small stains or spills, spot-clean your curtains using a gentle detergent and warm water. Make sure to test on a small, inconspicuous area first.
3. Machine Washing
If your curtains are machine washable, follow the care instructions on the label and use a gentle cycle with cold water. Hang them to dry to prevent any shrinkage.
4. Professional Cleaning
For more delicate or heavily soiled curtains, it may be best to seek professional cleaning services. They have the equipment and expertise to clean your curtains properly without damaging them.
By following these maintenance and cleaning tips, you can ensure that your corner curtains stay looking fresh and beautiful for years to come.
Alternative Corner Curtain Solutions
Although hanging curtains in a corner is a popular and stylish solution, there are also alternative options for dressing up your windows.
1. Corner Rods
Instead of using traditional curtain rods, you can opt for corner rods specifically designed to fit in corners. These are available in various styles and finishes to match your decor.
2. Window Film
For a more modern and minimalist approach, consider using window film on the corner of your windows. This adds privacy and can also add a decorative element with various patterns and designs.
3. Blinds or Shades
If you prefer a simpler look, you can install blinds or shades in the corner of your windows for both functionality and style.
No matter which solution you choose, make sure to measure carefully and consider the overall design of your space to find the best fit for your corner windows.
Seasonal Curtain Decor Ideas for Corners
1. Festive String Lights
For the holiday season, add some sparkle to your corner curtains with festive string lights. These can be hung along the inner edge or draped over the top of the curtain rod.
2. Seasonal Swag
Change up your floral swag with seasonal elements such as pinecones and berries for winter, or colorful flowers for spring.
3. Tie-Backs
Switch out your tie-backs with different materials and colors to match the seasons. For example, use burlap in the fall and pastel ribbons in the summer.
4. Seasonal Prints
For a quick and easy update, switch out your printed curtain panels with seasonal prints such as snowflakes for winter or florals for spring.
5. Seasonal Wreaths
Hang a seasonal wreath in the corner of your windows to add a festive touch. These can be easily switched out with different styles and themes throughout the year.
By incorporating these seasonal curtain decor ideas, you can keep your corner curtains looking fresh and festive all year round.
Budget-Friendly Curtain Hacks for Corners
1. Use Clip Rings
Instead of buying specific corner curtain rods, use clip rings to hang your curtains in the corner. This is a more budget-friendly option and allows for flexibility in adjusting the length.
2. Repurpose Sheets or Tablecloths
Save money by repurposing old sheets or tablecloths as curtains for your corner windows. This is also a great way to add unique patterns and colors to your space.
3. DIY Tension Rods
Create your own tension rods using PVC pipes or wooden dowels. These can be cut to fit the width of your corner window and are a cost-effective alternative to buying rods.
With these budget-friendly hacks, you can save money while still achieving a stylish and functional look for your corner curtains.
Frequently Asked Questions
Q1: Can I Hang Curtains in a Corner Without Using Curtain Rods?
A1: Yes, you can use tension rods or even a clothesline to hang your curtains. Just make sure they are secure and not sagging. It’s also a good idea to use lightweight curtains for this type of installation.
Q2: What Fabric Works Best for Hanging Curtains in a Corner?
A2: Lightweight fabrics such as sheer, linen, or cotton work best for this type of installation. Heavier fabrics can be used, but it’s recommended to use two separate curtain rods instead of one long continuous rod.
Q3: How Do I Secure the Brackets if I Have Tile Walls?
A3: If you have tile walls, it’s best to use a drill with a masonry bit to secure the brackets. Make sure to use anchors for added stability. Alternatively, you can purchase adhesive hooks designed for hanging curtains on tile walls.
Conclusion
In conclusion on how to hang curtains in a corner, there are several options out there to make hanging curtains in the corner of a room quick and easy. With just a few supplies and some patience, you can have the perfect drapes to fit your style. If you’re feeling extra creative, why not take it up a notch and craft your very own tiebacks? Investing in extra-long curtain rods can also open up new possibilities for creating exactly what you’re looking for.
Whatever type of curtain arrangements you go with, make sure to keep measurements accurate and use the best quality installation equipment available. Hang in there, and don’t forget – measure twice, hang once! Now that was fairly simple and straightforward, so why not give it a shot today or see if you can come up with something even better that works perfectly for your space?
You can check it out Decorate Bathroom Vanity