

To take out an Ikea drawer, simply pull the drawer out from its track by applying even pressure. Looking to remove a drawer from your Ikea furniture?
Don’t worry, we’ve got you covered! In this guide, we’ll show you the easiest way to take out an Ikea drawer. Whether you’re looking to clean the drawer or replace it entirely, our step-by-step instructions will walk you through the process.
With just a little bit of effort and the right technique, you’ll have that drawer out in no time. So, let’s get started and learn how to remove an Ikea drawer with ease!
Tools And Materials
To take out an Ikea drawer, you’ll need a few tools and materials such as a screwdriver, a soft cloth, and possibly a hammer. By following these steps, you can easily remove the drawer and make any necessary repairs or adjustments.
List Of Tools Required
Removing an Ikea drawer may seem like a daunting task without the right tools. But fear not! We have compiled a list of essential tools that will make this process a breeze. Take a look at the following tools you’ll need:
| Tools | Description |
| Screwdriver | A screwdriver is needed to remove any screws that may be securing the drawer to the track. |
| Hammer | A hammer can come in handy if you need to gently tap or nudge the drawer to loosen it from the cabinet. |
| Pliers | Pliers can be useful for gripping and twisting any connectors or screws that may be holding the drawer in place. |
Having these tools ready before you start will save you time and effort, ensuring a smooth and hassle-free removal process.
Materials Needed
Now that you have the necessary tools, let’s move on to the materials that will further assist you in taking out an Ikea drawer:
- Empty Container: Having an empty container nearby will allow you to conveniently store any screws, connectors, or small parts that you remove during the process. This way, everything is organized and easy to find when it’s time to reassemble the drawer.
- Soft Cloth: A soft cloth will help protect the surface of the drawer and the surrounding area as you work. It prevents scratches and ensures your Ikea furniture stays in pristine condition.
By gathering these materials and having them readily available, you’ll be well-equipped to tackle the task at hand.

Step-by-step Guide
Are you struggling to remove a drawer from your Ikea furniture? Don’t worry; we’ve got you covered! In this step-by-step guide, we’ll walk you through the process of safely and easily taking out an Ikea drawer. Just follow these simple instructions, and you’ll have that drawer out in no time.
Step 1: Empty The Drawer
First things first, start by emptying the contents of the drawer. Remove any items, ensuring the drawer is completely empty. This will make it easier to handle and prevent any accidental damage or mishaps.
Step 2: Locate The Release Mechanism
Next, you need to locate the release mechanism. Ikea drawers usually have a release lever or button that unlocks the drawer from its track. Look for any visible buttons, levers, or tabs inside the drawer or on either side of the tracks.
Step 3: Release The Drawer
Once you’ve located the release mechanism, it’s time to release the drawer. Depending on the type of Ikea drawer you have, you may need to press the release lever or button, push the tabs, or gently lift the drawer up and tilt it forward. Pay close attention to any instructions specific to your model.
Step 4: Remove The Drawer From The Track
With the drawer released, carefully slide it out from the track. Slowly pull the drawer towards you, making sure it comes out smoothly and without any resistance. Hold the drawer firmly as you remove it, keeping it level to avoid any tipping or falling.
And that’s it – your Ikea drawer is successfully taken out! Remember to handle the drawer with care and follow these steps to avoid any potential damage. Now, you can clean, repair, or rearrange your furniture with ease.
Summary:
- Step 1: Empty the drawer
- Step 2: Locate the release mechanism
- Step 3: Release the drawer
- Step 4: Remove the drawer from the track
Removing an Ikea drawer may seem daunting, but by following this step-by-step guide, you can do it quickly and efficiently. Now you can take out and reorganize your drawers with confidence. For more helpful guides and tips, bookmark our blog and stay tuned for future updates!
Frequently Asked Questions For How To Take Out An Ikea Drawer
How Do You Remove An Ikea Drawer Without Handles?
To remove an Ikea drawer without handles, locate the white lever on each side of the drawer. Push the levers upwards simultaneously while pulling the drawer towards you. This will disengage the drawer from the runner, allowing you to remove it easily.
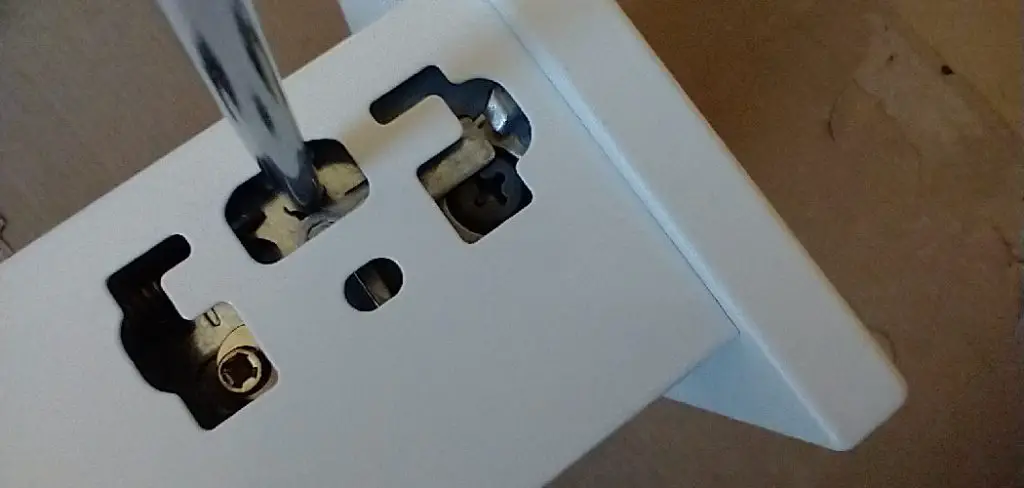
Can You Remove An Ikea Drawer With A Screwdriver?
Yes, you can remove an Ikea drawer with a screwdriver. Look for the screws on each side of the drawer runner. Using a screwdriver, unscrew the screws to release the drawer from the runner. Once the screws are removed, you can easily lift the drawer out.
How Do You Remove A Stuck Ikea Drawer?
To remove a stuck Ikea drawer, check if anything is obstructing its movement. If there is no visible obstruction, try tapping the sides of the drawer gently to loosen it. If it still doesn’t release, use a silicone spray or lubricant on the runner to reduce friction.
Apply a small amount and try pulling the drawer again.
Conclusion
Taking out an IKEA drawer may seem like a daunting task, but with the right steps, it can be a breeze. By following the simple techniques outlined in this blog post, you can easily remove an IKEA drawer and make adjustments or repairs as needed.
Remember to handle the drawer with care and use the proper tools for a smooth and efficient process. Happy drawer dismantling!