
Are you worried that moisture may be pooling underneath your tile floor? Don’t freak out! Detecting and repairing water damage can seem like an overwhelming task, but it doesn’t have to be. With just a few steps, you will get the answers you need about whether there is moisture beneath your floors so that you can take the proper next steps.
In this blog post, we’ll walk through how to determine signs of water damage, preventive measures for avoiding future issues, and tips on what immediate actions should be taken after discovering a possible leak under your tile floor. Ready to start troubleshooting and tackling this home renovation project head-on? Keep reading to learn more about how to detect moisture under tile.
Why Do You Need to Detect Moisture Under Tile
Detecting moisture under tile is crucial for a few reasons. First, it can cause damage to your flooring and subfloor if left untreated. Over time, the water can weaken the structural integrity of the floor and lead to costly repairs. Additionally, moisture buildup can create a breeding ground for mold and mildew, which can be hazardous to your health.
Moreover, detecting moisture under tile can also prevent any potential issues from escalating. If you notice signs of water damage early on, you can take immediate action to fix the problem before it becomes a larger, more expensive issue. This not only saves you time and money but also ensures the safety and functionality of your home.
Common Signs of Moisture Under Tile
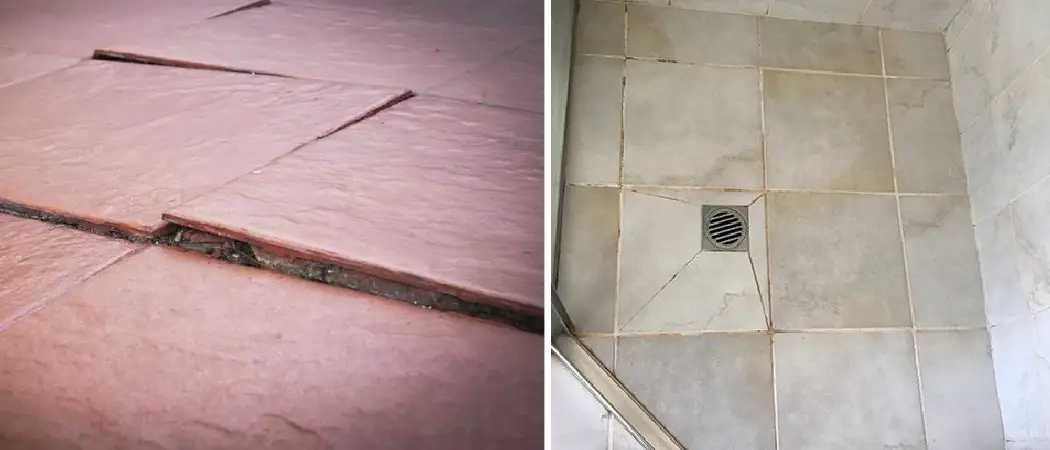
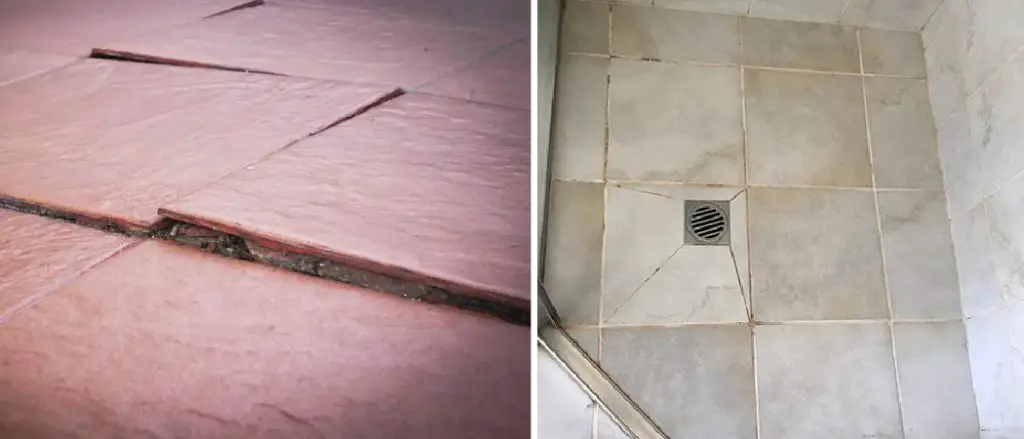
One of the first steps in detecting moisture under your tile is to observe any visible or olfactory signs.
Visible signs of moisture
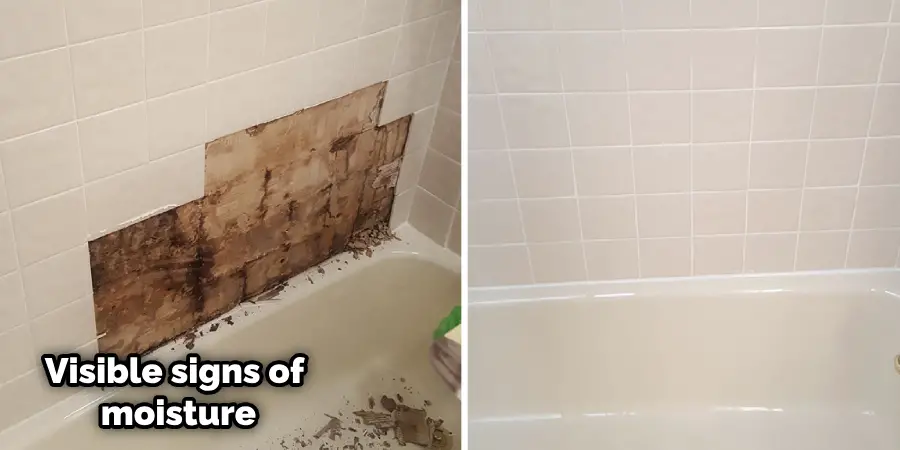
- Discolored or stained tiles: This could be a clear indication of water seepage underneath the tiles.
- Grout that is crumbling or cracked: Moisture can cause the grout to weaken, leading to crumbling or cracking.
- Bulging or warping tiles: These are signs of water damage, as the moisture can cause tiles to bulge or warp.
- Loose or hollow-sounding tiles: If you tap on your tiles and they sound hollow or feel loose, it could be due to water collection under the tiles.
Olfactory Signs of Moisture
- Musty or moldy odors: A persistent musty smell could indicate the presence of mold, which thrives in damp conditions.
- Damp or mildewy smell: This is another sign of moisture and possible fungal growth beneath your tiles.
Recognizing these signs early on can help you address the problem before it escalates, saving both your floor and your wallet.
8 Methods on How to Detect Moisture Under Tile
Method 1: Moisture Meter
A moisture meter is a handy tool that can accurately detect the level of moisture in your floors. Place the pins of the meter on top of your tile, and it will give you a reading. Keep in mind that this method works best on nonporous tiles, as porous tiles may absorb water and give an inaccurate reading.
Method 2: Infrared Camera
Using an infrared camera is another effective way to detect moisture under tiles. These cameras use thermal imaging to identify areas of increased moisture, making it easy to pinpoint the exact location of any leaks or water buildup.
Method 3: Surface Temperature Test
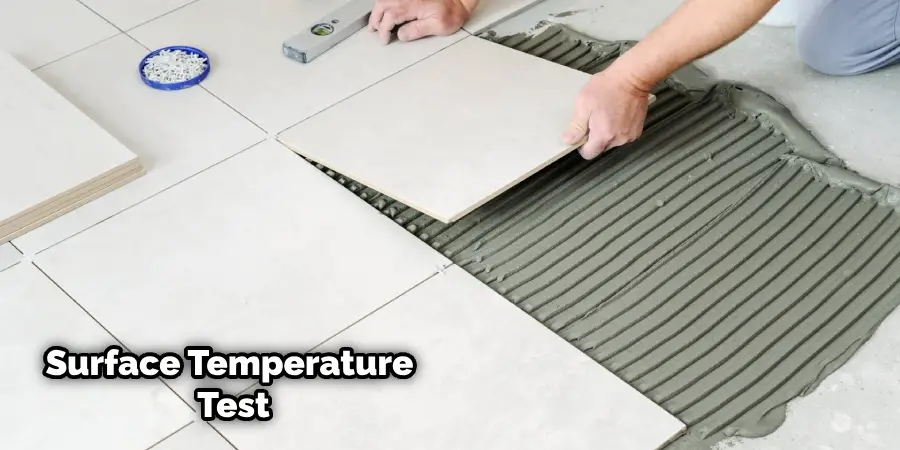
If you don’t have access to a moisture meter or infrared camera, you can conduct a surface temperature test using a digital thermometer. Place the thermometer on your tile and check for any significant differences in temperature, as this could indicate the presence of moisture.
Method 4: Visual Inspection
As mentioned before, visible signs such as discoloration and warping can also help you detect moisture under tile. Take a close look at your floors to see if any areas seem off or different from the rest of the floor.
Method 5: Dampness Test
To do a dampness test, tape a plastic sheet over an area of your tile floor and leave it for 24 hours. If you notice condensation on the underside of the plastic sheet when you remove it, this could be a sign of moisture buildup under your tiles.
Method 6: Water Meter Test
This method involves shutting off all water sources in your home and then checking the water meter. If the meter is still moving, it could indicate a leak somewhere in your plumbing system that may be affecting your tile floors.
Method 7: Home Inspection
If you’re unsure about how to detect moisture under tile or want a professional opinion, consider hiring a home inspector. They have specialized equipment and training to identify any potential issues with your floors accurately.
Method 8: Professional Moisture Testing
Lastly, you can also opt for professional moisture testing services, where trained technicians use advanced techniques to detect and measure any moisture under your tile floor.
How to Avoid Common Mistakes When Detecting Moisture Under Tile
While there are several methods to detect moisture under tile, it’s also essential to avoid common mistakes that could lead to inaccurate readings or overlooked issues. Here are a few tips to keep in mind:
1. Use multiple methods
It’s always best to use a combination of methods for more accurate results. Relying on just one method may not give you the full picture, so it’s essential to cross-check with other techniques.
2. Check for false positives
Certain factors, such as humidity or recent mopping, can affect the accuracy of moisture readings. Always double-check your results before taking any action.
3. Monitor regularly
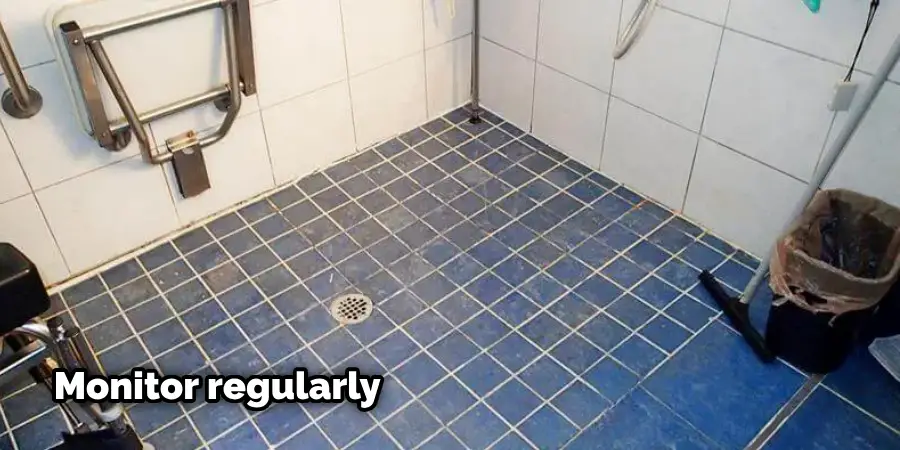
Make it a habit to monitor your floors regularly, especially in areas prone to moisture buildup. This can help you catch any issues early on and prevent them from escalating into bigger problems.
4. Don’t ignore signs of moisture
If you notice any visible or olfactory signs of moisture, don’t ignore them. Actively addressing the problem can save you time, money, and potential health hazards down the line.
Preventive Measures for Avoiding Future Issues
Once you have detected and addressed any moisture buildup under your tile, it’s important to take preventive measures to avoid future issues. Here are a few tips to keep in mind:
Fix Leaks Promptly:
If you discover any leaks or water damage, make sure to fix them as soon as possible to prevent further damage.
Proper Ventilation:
Ensure that your bathroom and kitchen have proper ventilation systems in place to reduce moisture buildup.
Seal Grout Lines:
Sealing grout lines can help prevent water from seeping into the subfloor and damaging your tiles.
Regular Maintenance:
Perform regular maintenance checks on your plumbing system, roof, and foundation to catch any potential issues early on.
Waterproofing:
Consider waterproofing your tile floor to add an extra layer of protection against moisture.
By following these preventive measures, you can help keep your tile floors in top shape and avoid any future headaches. Remember, detecting moisture under tile is essential for maintaining a safe and healthy home.
How to Properly Dry Out Affected Areas Before Repairing or Replacing Tiles
After detecting and addressing the source of moisture, it’s critical to thoroughly dry out the affected areas before any repair or replacement of tiles. This prevents the recurrence of moisture issues and ensures the longevity of your flooring. Follow these steps to dry out your tile floor effectively:
Step 1: Remove Excess Water
Begin by removing any standing water with a mop or towels. For larger amounts of water, consider using a wet vacuum. The goal is to eliminate as much water as possible from the surface.
Step 2: Increase Air Circulation
Enhance the drying process by improving air circulation in the room—open windows and doors to allow fresh air to circulate. You can also use fans, air movers, or a dehumidifier to expedite drying.
Step 3: Use a Dehumidifier
A dehumidifier is a very effective tool to pull moisture from the air and surrounding materials. Please place it in the affected area and run it continuously until the area is arid.
Step 4: Heat the Room
Raising the room’s temperature can accelerate evaporation. However, balance this with good ventilation to ensure the evaporated moisture can escape the room.
Step 5: Check Underneath the Tiles
If tiles were loosened or removed due to moisture damage, make sure to dry the underlying area. This may require professional assistance to ensure the subfloor and any underlayment are completely dry before reinstallation.
Step 6: Confirm Dryness Before Replacing or Repairing Tiles
Before you repair or replace your tiles, confirm that the affected area is thoroughly dry. Depending on the degree of moisture, this could take several days or even a week. A moisture meter can be helpful in determining when the floor is ready.
Rushing to replace or repair tiles before the area is arid can trap moisture, leading to future problems. Patience and thoroughness in drying will result in a more successful tile repair or replacement.
Conclusion
In conclusion, moisture trapped beneath tile flooring is a common problem that can lead to severe structural and health issues if not addressed promptly. Detection methods range from simple DIY techniques to professional moisture testing services.
Avoiding common mistakes and adopting preventive measures can save you from future problems related to moisture buildup. After addressing the moisture source, it’s crucial to thoroughly dry out the affected area before repairing or replacing tiles to prevent recurrence of moisture issues.
Through consistent vigilance and preventive care, you can ensure the longevity of your tile flooring and the safety of your home environment. Thanks for reading this article about how to detect moisture under tile.