

To laminate at home with plastic wrap, cut 2 pieces of wrap larger than the document, place the document in the center of one piece, place the other piece on top, and press down firmly. Laminating materials at home can save time and money, especially if you only need to do a few items.
While there are various types of laminators available on the market, you can also laminate documents at home with simple and inexpensive materials like plastic wrap. Plastic wrap laminating is an ideal option for those who only need to laminate an item or two and do not want to invest in an expensive laminating machine.
With the use of only plastic wrap and a few additional materials, you’ll be able to preserve your documents and protect them from damage.
What You Will Need
Laminating is a great way to protect and preserve important documents. While commercial laminators are widely available, they can be quite expensive. Luckily, laminating at home is relatively easy, as long as you have the right supplies. In this blog post, we’ll guide you through the process of laminating with plastic wrap at home, starting with the materials you’ll need.
List Of Materials Required For Diy Lamination With Plastic Wrap
To complete a lamination project, you will need:
- Plastic wrap
- Tape
- Scissors
- Your document or item to be laminated
Explanation Of Why Each Material Is Needed
- Plastic wrap: This is the key component of the lamination process. Plastic wrap protects your document from damage or wear. Choose a high-quality wrap, as cheaper brands may not adhere properly or may yellow with age.
- Tape: You will need tape to secure the plastic wrap to your document. Use a clear tape so that it doesn’t obstruct the view of your document.
- Scissors: You will need scissors to cut the plastic wrap and tape to the right size for your document.
- Your document or item to be laminated: You can laminate anything from important documents to favorite photos, or even your kid’s artwork. The sky’s the limit!
Tips For Selecting The Right Type Of Plastic Wrap
- Choose a plastic wrap that is thicker than standard food wrap. This will provide better protection for your document.
- Opt for a wrap that is adhesive on one side, as this will help it stay in place while you are laminating.
- Avoid using plastic wrap that is textured, patterned, or colored, as it may detract from the look of your document or item.
- When in doubt, test the plastic wrap on a small area of your document first, to make sure that it adheres properly and doesn’t damage your item.
By selecting the right materials and following a few simple steps, you can easily laminate at home with plastic wrap. Happy laminating!
Preparing Your Surfaces
Laminating is a great way to protect your documents, posters, and other important items. However, not everyone has access to a laminating machine. Fortunately, you can achieve the same results by using plastic wrap. But before you start laminating, it’s essential to prepare your surfaces correctly.
Here are some tips on how to prepare your surfaces for laminating.
Detailed Steps For Preparing Surfaces To Be Laminated
Preparing your surfaces involves more than just wiping them with a cloth. You want to ensure that your surfaces are clean, dry, and free of any damage or imperfections. Here are some detailed steps for preparing your surfaces:
- Start by cleaning your surfaces with a mild cleaning solution and a soft cloth. Avoid using any harsh chemicals that may damage the surface or leave a residue.
- Rinse the surfaces with clean water and dry them with a clean, soft cloth.
- If the surfaces are still damp, use a fan or hairdryer to dry them completely.
- Check for any cracks, creases, or wrinkles on the surface. Smooth them out as much as possible before laminating.
Best Practices For Cleaning And Drying Surfaces
To ensure that your surfaces are adequately prepared for laminating, you need to follow some best practices for cleaning and drying them. Here are some tips:
- Use a soft cloth or sponge when cleaning your surfaces to avoid scratches or damage.
- Avoid using harsh chemicals when cleaning your surfaces. Instead, use a mild cleaning solution mixed with water.
- Rinse your surfaces thoroughly with clean water to ensure that all traces of cleaning solution are removed.
- Use a clean, soft cloth to dry your surfaces. Avoid using a rough cloth or paper towel as it may damage the surface or leave a residue.
How To Address Any Existing Damage Or Imperfections
Before laminating, it’s essential to address any existing damage or imperfections on your surfaces. Here’s how you can do it:
- If there are any cracks or tears on the surface, use a clear tape to cover them. This will prevent the plastic wrap from sticking to the damaged area.
- If there are any wrinkles or creases on the surface, smooth them out as much as possible using your hands.
- If the surface has any adhesive residue from previous use, you can use a mild adhesive remover to clean it off.
By following these preparation tips for laminating with plastic wrap, you can achieve a smooth, professional-looking finish for your important documents and materials. Just remember to clean and dry your surfaces thoroughly, and address any existing damage or imperfections before laminating.
Happy laminating!
Laminating Your Surfaces
Laminating surfaces at home might seem daunting, but with the right technique, it’s achievable. One way to do it is by using plastic wrap. Here’s how you can ace it with ease:
Step-By-Step Instructions For Laminating Surfaces With Plastic Wrap
- Clean your surface. Ensure that the surface you want to laminate is clean of any debris, dust, or dirt.
- Cut the plastic wrap to size. Cut a piece of plastic wrap that is larger than your surface. This will help you wrap it around the edges to ensure complete coverage.
- Lay the plastic wrap over the surface. Be sure to place it as evenly and flatly as possible. Consider taping it down to avoid it slipping.
- Smooth it out. Use your hands to carefully smooth out the plastic wrap over the surface, removing any air pockets and wrinkles.
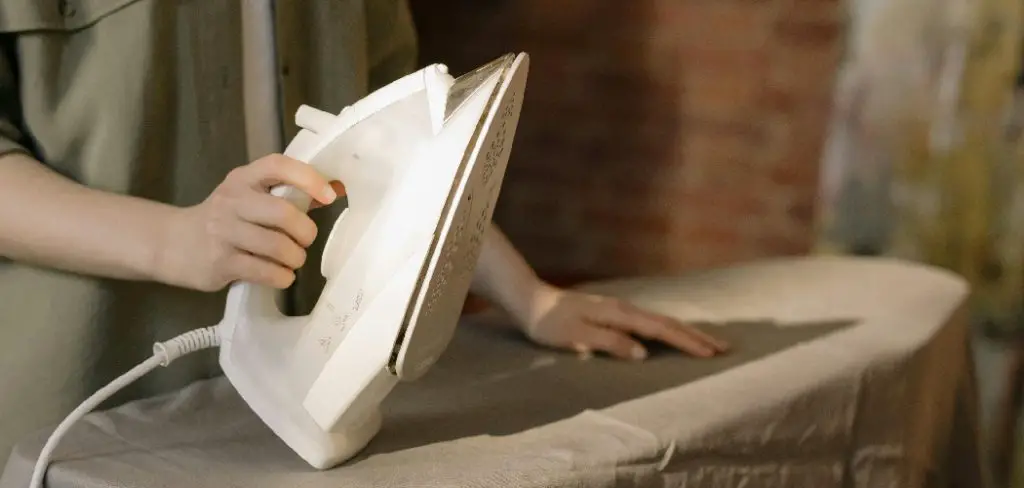
- Apply heat. Use a hairdryer, set on low heat, to help the plastic wrap better adhere to the surface. Move the hairdryer steadily back and forth, four to six inches away from the surface.
- Trim off excess. Once the plastic wrap is firmly attached to the surface, trim off any excess with a pair of scissors or a sharp blade.
Important Tips And Tricks For Achieving A Smooth And Tight Finish
- Use the right type of plastic wrap. Opt for thicker or heavy-duty plastic wrap as it will offer a more reliable seal compared to thin variants.
- Work on a flat surface. Laminating on a flat surface helps reduce the chances of wrinkles forming. Take the time to ensure that your surface is as even as possible.
- Don’t stretch the plastic wrap. Stretching the plastic wrap will cause it to thin, leading to breaks or holes and a lousy finish. Instead, use multiple layers of unwrinkled, evenly laid plastic wrap to achieve better coverage.
- Avoid excessive heat. Too much heat will cause the plastic wrap to melt, leading to a sticky, uneven finish. Use the hairdryer on low heat, and keep it a few inches away from the surface.
Suggestions For Dealing With Tricky Or Intricate Surfaces
- Use multiple pieces. If the surface is too tricky to cover with a single piece of plastic wrap, consider using multiple pieces to cover it entirely.
- Cut the plastic wrap into strips. For intricate surfaces with many curves and corners, cutting the plastic wrap into small strips might help. Work with a few strips of plastic wrap at a time, ensuring that you thoroughly cover each section.
- Apply heat to each section. When laminating tricky or intricate surfaces, apply heat to each section, one at a time. Use a smaller hairdryer, set on low heat, to ensure that each section gets adequately covered.
By following these simple steps and tips, you can easily laminate surfaces at home with plastic wrap. Take your time, and always ensure that the plastic wrap is cut correctly, laid, and smoothed out well. With these techniques, you can achieve a beautiful, smooth, and cost-effective lamination.
Caring For Your Laminated Surfaces
Laminating your surfaces can add a layer of protection against dust, water and other general wear-and-tear. And did you know? You can do it yourself at home with plastic wrap. But once you’ve successfully completed the laminating process, it’s important to know how to clean and maintain your surfaces on a regular basis.
Here are some best practices for cleaning and maintaining laminated surfaces:
Best Practices For Cleaning And Maintaining Laminated Surfaces:
- To clean your laminated surfaces, use a damp microfiber cloth and non-abrasive cleaning solution.
- Avoid using abrasive cleaning tools and solutions, which can damage the lamination over time.
- Never use ammonia-based cleaners, as they can damage the lamination’s protective coating.
- Always wipe dry the surfaces after cleaning to prevent watermarks and stains.
- If you’re cleaning a food-related laminated surface, such as a kitchen counter or tablecloth, make sure to clean the surface frequently and thoroughly to prevent food stains, odors and bacteria build-up.
Here are some solutions to common issues, such as scratches or bubbles:
Solutions For Common Issues, Such As Scratches Or Bubbles:
- For small scratches or tears, you can use clear silicone caulk or clear nail polish to fill in the gaps.
- A hairdryer on a low setting is the best way of removing bubbles which are formed during laminating.
- If large bubbles occur, gently puncture them with a pin and spread the air out with your fingers.
- For cuts or deep scratches, you can attempt to fill in the gap with a clear adhesive contact paper.
When thinking about diy plastic wrap lamination, you want to make sure it’s worth your time and effort. While the duration of how long your lamination lasts ultimately depends on the item’s usage, there is still some general guidance you can follow:
Guidance On The Lifespan Of Diy Plastic Wrap Lamination:
- With careful maintenance and usage, home-diy lamination can last up to a few weeks or even a couple of months.
- Lamination generally doesn’t last years, especially if used frequently or with heavy wear-and-tear.
- If you’re looking for a longer-lasting solution, it might be better to seek a professional lamination service.
By understanding how to best care for and maintain your laminated surfaces, you can extend their lifespan and ensure that they look great for years to come.
Frequently Asked Questions On How To Laminate At Home With Plastic Wrap
Can I Use Plastic Wrap To Laminate Paper At Home?
Yes, plastic wrap can be used to laminate paper at home. Using plastic wrap is a cheap and easy way to create a protective layer over your important documents.
What Are The Advantages Of Using Plastic Wrap To Laminate?
The advantages of using plastic wrap to laminate include affordability, simplicity, and accessibility. Plus, it is a hands-on method that requires little to no equipment.
Is It Safe To Use Plastic Wrap To Laminate Documents?
Using plastic wrap to laminate documents is safe as long as you follow safety guidelines, such as avoiding overheating the plastic and ensuring that the plastic does not melt onto the document.
What Types Of Documents Can I Laminate With Plastic Wrap?
You can laminate a wide range of documents with plastic wrap, including photographs, certificates, artwork, and school projects. It can also protect and waterproof your documents.
How Do I Laminate With Plastic Wrap?
To use plastic wrap to laminate, cut a piece of plastic wrap that is larger than your document, place the document in the center of the wrap, fold the wrap over the document, and smooth out any air bubbles.
Conclusion
Now that you have learned how to laminate at home with plastic wrap, you can create professional-looking documents and protect your important papers without even leaving your house. Diy lamination is a budget-friendly option for those who do not have access to a laminating machine or those who only need to laminate a few sheets.
By following the simple steps outlined in this guide, you can avoid the hassle and expense of outsourcing your lamination needs. With just plastic wrap, a ruler, and an iron, you can achieve great results and bring new life to your old or worn-out documents.
So, go ahead and give it a try – you might be surprised by how easy and satisfying it can be to do it yourself!